Customizing Your Monitor
You can make numerous adjustments to your monitor using the
Navigating the menu
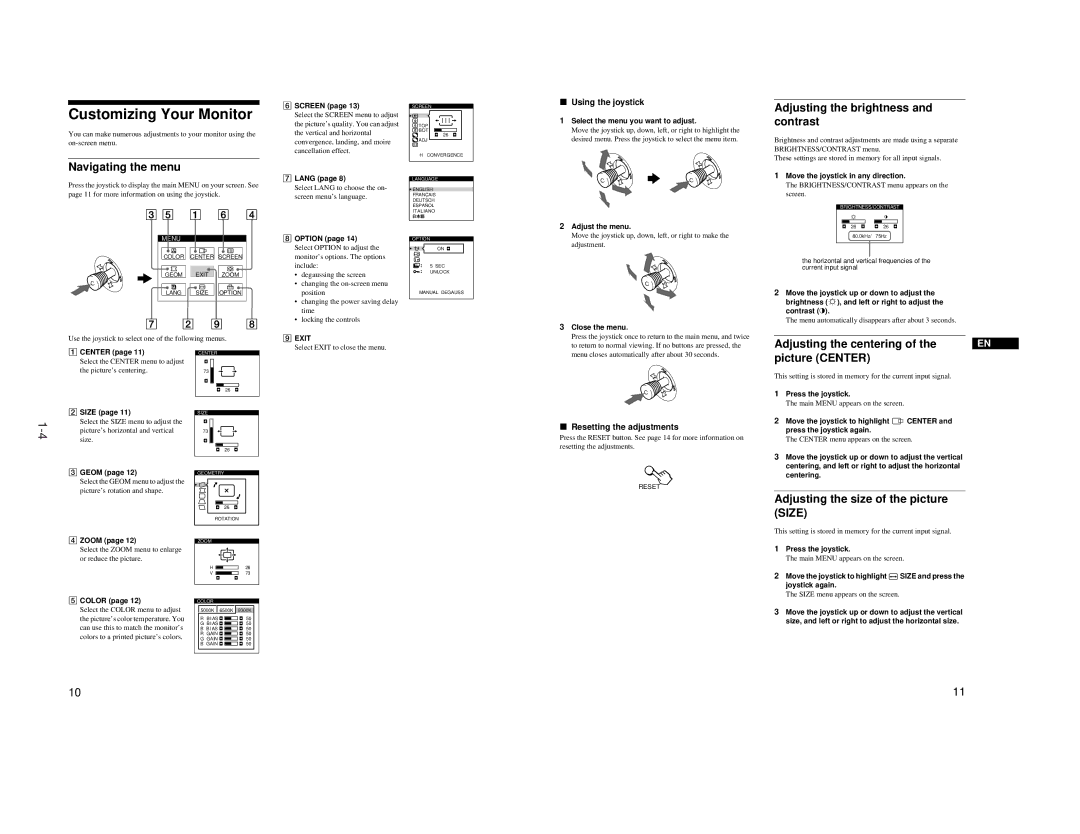
Press the joystick to display the main MENU on your screen. See page 11 for more information on using the joystick.
MENUMENU
COLOR CENTER SCREEN
GEOM EXIT ZOOM
LANG SIZE OPTION
Use the joystick to select one of the following menus.
6SCREEN (page 13)
Select the SCREEN menu to adjust the picture’s quality. You can adjust the vertical and horizontal convergence, landing, and moire cancellation effect.
7LANG (page 8)
Select LANG to choose the on- screen menu’s language.
8OPTION (page 14)
Select OPTION to adjust the monitor’s options. The options include:
•degaussing the screen
•changing the
•changing the power saving delay time
•locking the controls
9 EXIT |
Select EXIT to close the menu. |
SCREEN
![]() TOP
TOP
![]() BOT
BOT
26
![]() ADJ
ADJ
H CONVERGENCE
LANGUAGE
![]() ENGLISH
ENGLISH
FRANÇAIS
DEUTSCH
ESPAÑOL
I TA LIANO
OPTION
ON ![]()
ZZ...5 SEC
UNLOCK
MANUAL DEGAUSS
xUsing the joystick
1Select the menu you want to adjust.
Move the joystick up, down, left, or right to highlight the desired menu. Press the joystick to select the menu item.
![]()
![]()
![]()
![]() b
b
2Adjust the menu.
Move the joystick up, down, left, or right to make the adjustment.
3 Close the menu. |
Press the joystick once to return to the main menu, and twice |
to return to normal viewing. If no buttons are pressed, the |
Adjusting the brightness and contrast
Brightness and contrast adjustments are made using a separate BRIGHTNESS/CONTRAST menu.
These settings are stored in memory for all input signals.
1Move the joystick in any direction.
The BRIGHTNESS/CONTRAST menu appears on the screen.
BRIGHTNESS/CONTRAST
26 ![]()
![]() 26 80.0kHz/ 75Hz
26 80.0kHz/ 75Hz
the horizontal and vertical frequencies of the current input signal
2Move the joystick up or down to adjust the
brightness ( ![]() ), and left or right to adjust the contrast (6).
), and left or right to adjust the contrast (6).
The menu automatically disappears after about 3 seconds.
Adjusting the centering of the | EN |
1CENTER (page 11)
Select the CENTER menu to adjust the picture’s centering.
2SIZE (page 11)
Select the SIZE menu to adjust the picture’s horizontal and vertical size.
CENTER
73![]()
![]()
![]() 26
26 ![]()
SIZE
73![]()
![]()
![]() 26
26 ![]()
menu closes automatically after about 30 seconds. |
xResetting the adjustments
Press the RESET button. See page 14 for more information on resetting the adjustments.
picture (CENTER) |
This setting is stored in memory for the current input signal.
1 | Press the joystick. |
|
| The main MENU appears on the screen. |
|
2 | Move the joystick to highlight | CENTER and |
| press the joystick again. |
|
| The CENTER menu appears on the screen. | |
3 | Move the joystick up or down to adjust the vertical | |
| centering, and left or right to adjust the horizontal | |
3 GEOM (page 12) | GEOMETRY |
centering. |
Select the GEOM menu to adjust the picture’s rotation and shape.
4ZOOM (page 12)
Select the ZOOM menu to enlarge or reduce the picture.
5COLOR (page 12)
Select the COLOR menu to adjust the picture’s color temperature. You can use this to match the monitor’s colors to a printed picture’s colors.
26
ROTATION
ZOOM
H ![]() 26
26
V ![]() 73
73
COLOR
5000K | 6500K |
|
9300K |
R BIAS ![]()
![]()
![]() 50
50
G BIAS ![]()
![]()
![]() 50
50
B BIAS ![]()
![]()
![]() 50
50
R GAIN ![]()
![]()
![]() 50
50
G GAIN ![]()
![]()
![]() 50
50
B GAIN ![]()
![]()
![]() 50
50
RESET
Adjusting the size of the picture (SIZE)
This setting is stored in memory for the current input signal.
1Press the joystick.
The main MENU appears on the screen.
2Move the joystick to highlight ![]() SIZE and press the joystick again.
SIZE and press the joystick again.
The SIZE menu appears on the screen.
3Move the joystick up or down to adjust the vertical size, and left or right to adjust the horizontal size.
10 | 11 |
