HCD-PX333
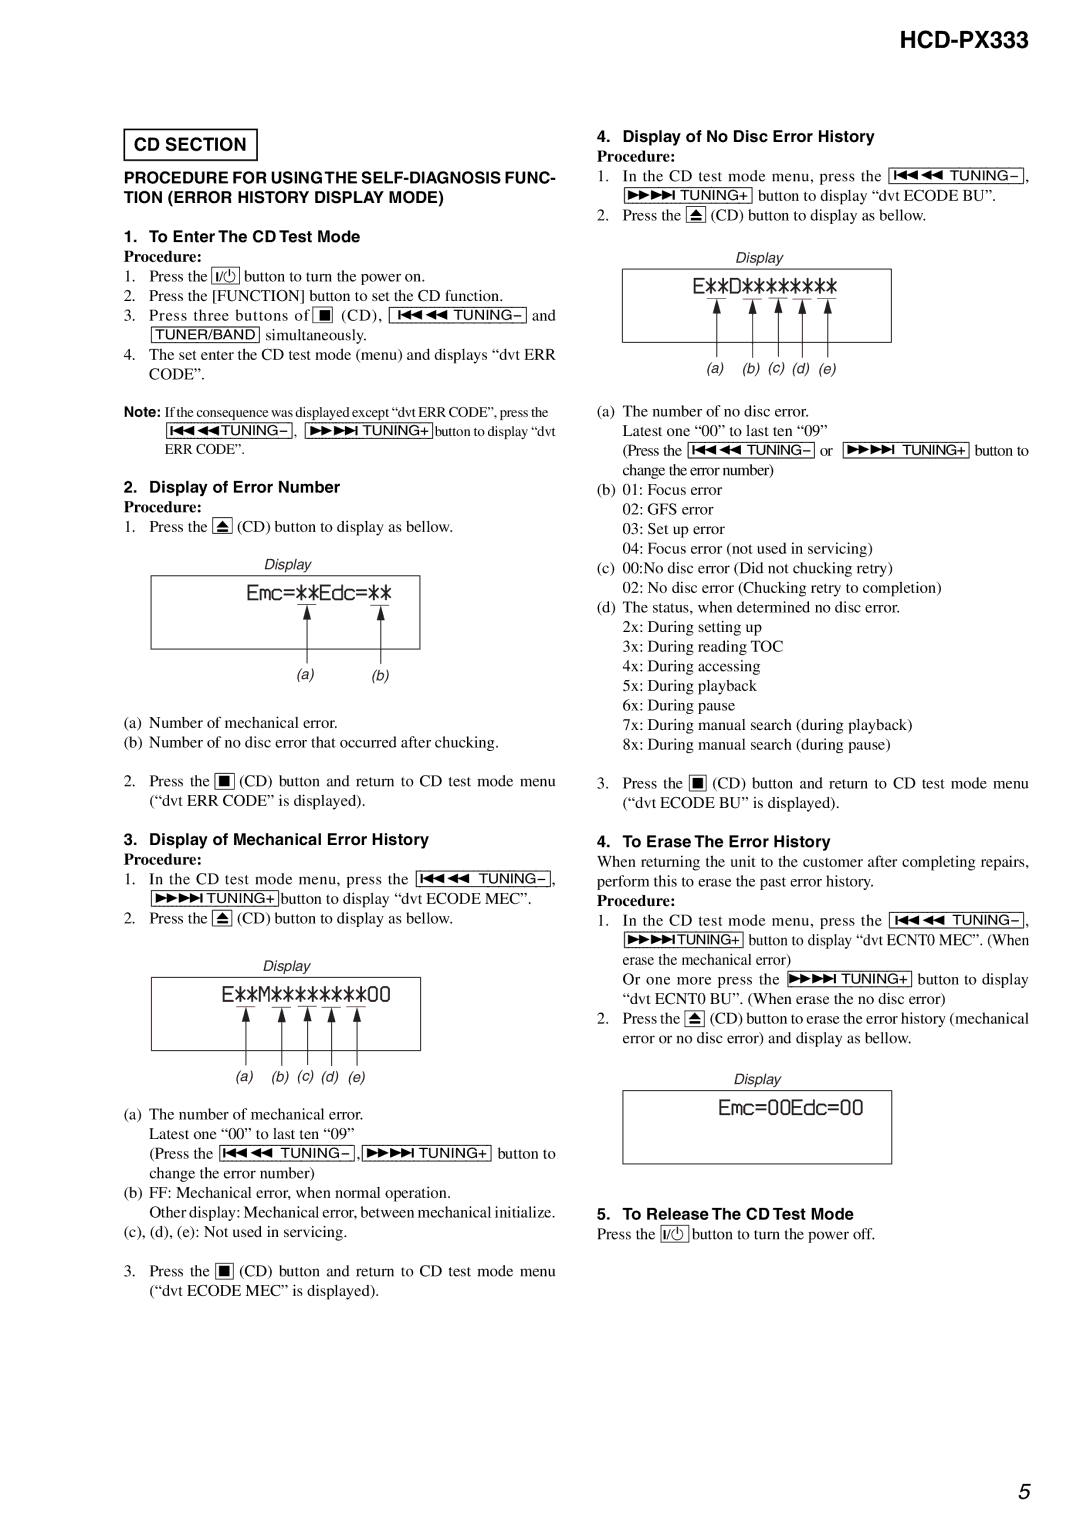
CD SECTION
PROCEDURE FOR USING THE
1.To Enter The CD Test Mode
Procedure:
1.Press the ?/1 button to turn the power on.
2.Press the [FUNCTION] button to set the CD function.
3.Press three buttons of x (CD), [ .m
4.The set enter the CD test mode (menu) and displays “dvt ERR CODE”.
Note: If the consequence was displayed except “dvt ERR CODE”, press the
ERR CODE”.
2.Display of Error Number
Procedure:
1. Press the Z (CD) button to display as bellow.
Display
Emc=**Edc=**
(a)(b)
(a)Number of mechanical error.
(b)Number of no disc error that occurred after chucking.
2.Press the x (CD) button and return to CD test mode menu (“dvt ERR CODE” is displayed).
3.Display of Mechanical Error History
Procedure:
1.In the CD test mode menu, press the [.m
2.Press the Z (CD) button to display as bellow.
Display
E**M********00
(a)(b) (c) (d) (e)
(a)The number of mechanical error. Latest one “00” to last ten “09”
(Press the [.m
(b)FF: Mechanical error, when normal operation.
Other display: Mechanical error, between mechanical initialize.
(c), (d), (e): Not used in servicing.
3.Press the x (CD) button and return to CD test mode menu (“dvt ECODE MEC” is displayed).
4.Display of No Disc Error History
Procedure:
1.In the CD test mode menu, press the [.m
2.Press the Z (CD) button to display as bellow.
Display
E**D********
(a)(b) (c) (d) (e)
(a)The number of no disc error. Latest one “00” to last ten “09”
(Press the [.m
(b)01: Focus error
02:GFS error
03: Set up error
04:Focus error (not used in servicing)
(c)00:No disc error (Did not chucking retry)
02:No disc error (Chucking retry to completion)
(d)The status, when determined no disc error. 2x: During setting up
3x: During reading TOC
4x: During accessing
5x: During playback
6x: During pause
7x: During manual search (during playback)
8x: During manual search (during pause)
3.Press the x (CD) button and return to CD test mode menu (“dvt ECODE BU” is displayed).
4.To Erase The Error History
When returning the unit to the customer after completing repairs, perform this to erase the past error history.
Procedure:
1.In the CD test mode menu, press the [.m
Or one more press the [M> TUNING+] button to display “dvt ECNT0 BU”. (When erase the no disc error)
2.Press the Z (CD) button to erase the error history (mechanical error or no disc error) and display as bellow.
Display
Emc=00Edc=00
5.To Release The CD Test Mode
Press the ?/1 button to turn the power off.
5
