Video Cassette Recorder
Safety
Precautions
Installing
Compatible colour systems
Table of contents
Check your model name
Unpacking
Using the remote commander
Setting up the remote commander
Inserting the batteries
You can use this remote
TV control buttons
Getting Started
If your TV does not have a Peritel connector
Connecting the VCR
Peritel cable not supplied Signal flow
If your TV has a Peritel connector
Mains lead LIGNE-1
To mains Aerial cable supplied
If the connected TV complies with
About the Smartlink features
Press ?/1 MARCHE/VEILLE to turn on the VCR
Tuning your TV to the VCR
Press Regl Canal on the VCR lightly
Press Regl Canal TV system appears in the display window
To obtain a clear picture from the VCR
To check to see if the TV tuning is correct
VCR below Reglage Auto Press Regl Canal
Reglage Auto Regl Canal
Press Reglage Auto
Setting up the VCR with the Auto Set Up function
To cancel the Auto Set Up function
Before you start…
Selecting a language
Turn on the VCR and the TV Set the TV to the video channel
Press M/m to highlight LANGUE, then Press OK
Tip
Press M/ m to highlight the desired language, then press OK
Press Menu to exit the menu
Presetting channels
CABLE, then press OK
Press M/m to highlight Reglage DES
CHAINES, then press OK
Programme position
Chaine Press Chaine +/- to select
Press M/m to highlight Reglage
CANAL, then press OK
If the picture is not clear
Channel system for the French Catv network
Tuning the French Catv channels
Changing programme positions
Changing/disabling programme positions
Press MENU, then press M/m to highlight Listes and press OK
Press M/m to highlight Liste DES CHAINES, then press OK
Getting
Press MENU, then press M/m to highlight LISTES, and press OK
Disabling unwanted programme positions
On the right
Press M/ m to highlight the row which you Want to disable
Selected row will be cleared as shown Press ANNUL/0
Changing the station names
Press
Press M/m to highlight HORLOGE, then press OK
Setting the clock
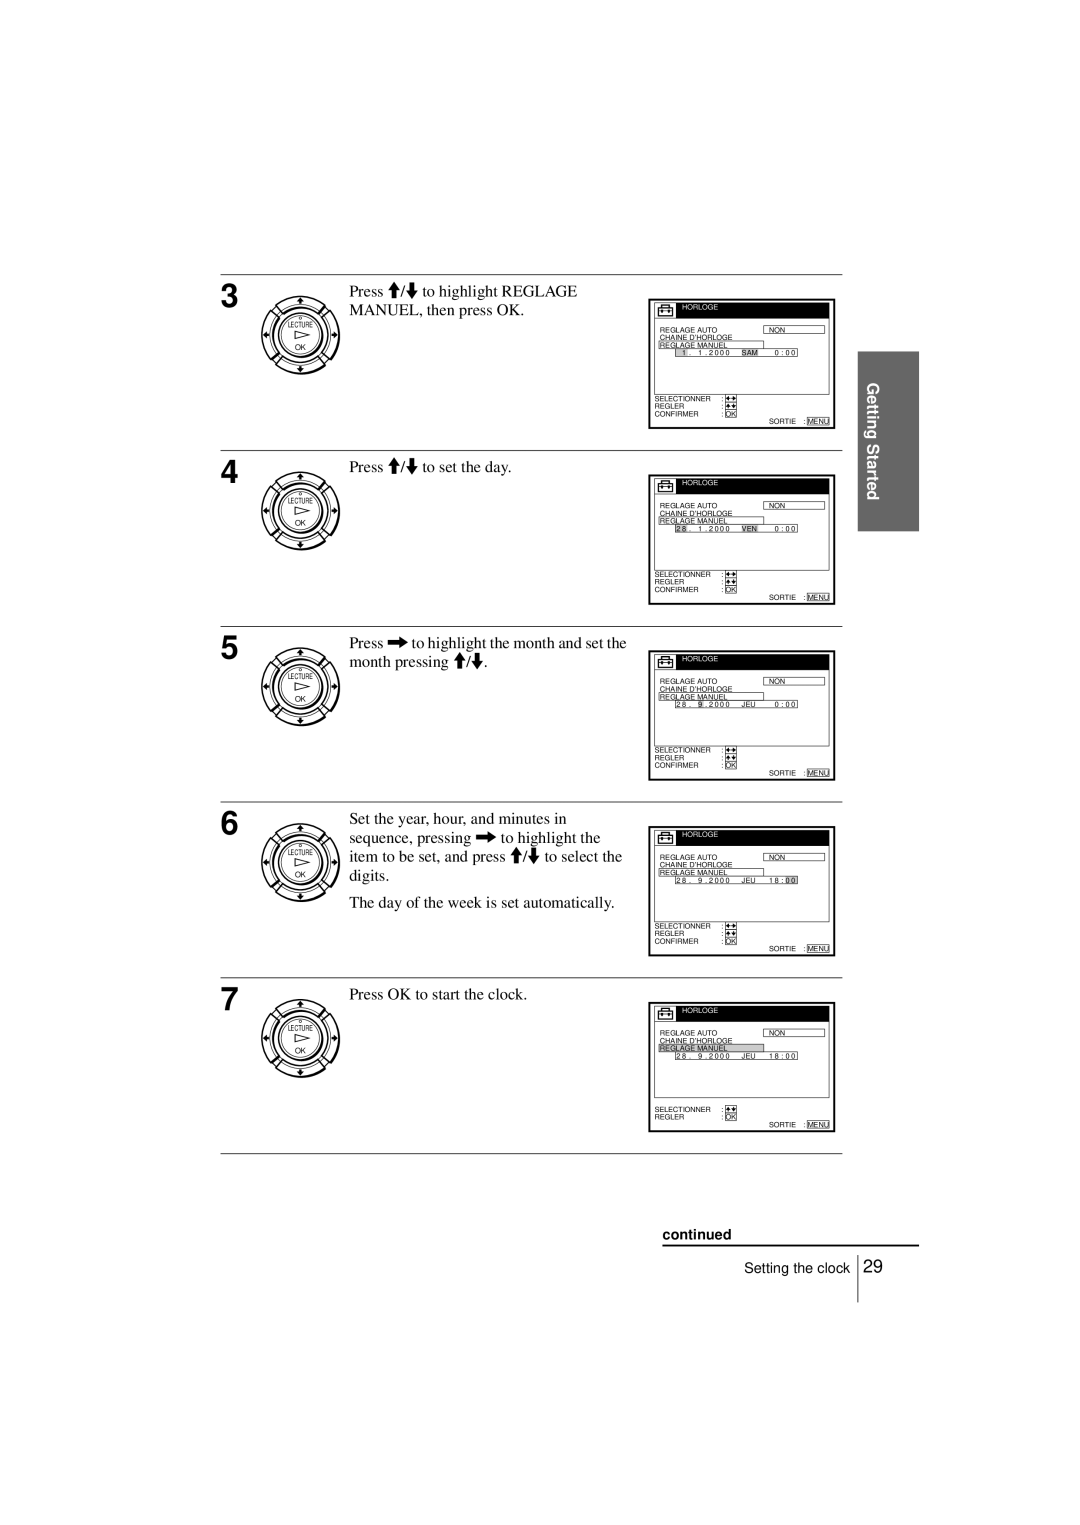
Setting the clock manually
Month pressing M/m
MANUEL, then press OK
Press , to highlight the month and set
Tips
Reglage Auto is highlighted
Changing the station for the Auto Clock Set function
Press m to highlight Chaine ’HORLOGE, then press OK
Press M/m to highlight OUI, then press OK
Connecting a decoder
Setting the Canal Plus decoder
Press M/m to highlight DECODEUR/ LIGNE2, then press OK
Setting the Canal Plus channel
Press M/m to highlight OPTIONS-2, then press OK
Menu disappears from the TV screen
Press M/m to highlight DECODEUR, then press OK
Press M/m to highlight Reglage DES CHAINES, then press OK
Press M/m to highlight NORME, then press OK
Reglage DES Chaines
Chaine Press Chaine +/- to select the desired
CANAL+, then press OK
Then press OK
Stop m RET
Playing a tape
To play an NTSC-recorded tape
Additional tasks
To set the colour system
To use the time counter
Lecture
ENR Stop
Recording TV programmes
Press x Stop
To stop recording
To check the remaining time
To watch another TV programme while recording
To save a recording
Safety tab Tips
Recording what you are watching on the TV TV Direct Rec
Before you start
Recording TV programmes using the Dial Timer
Turn Prog to set the recording date
To stop the VCR while recording, press x Stop
To return to the previous step
To set the clock
To use the VCR after setting the timer
To cancel the Demonstration Mode
About the Demonstration Mode
To activate the Demonstration Mode
Recording TV programmes using the ShowView system
Press Minuterie
VPS/PDC setting appear on the TV screen
Press OK Date, start and stop times, programme
Position or station name, tape speed*,
Timer recording with VPS/PDC signals
Press M/m to reset it
Press / , to highlight the item you
Want to change
To record satellite broadcasts
Setting the timer manually
Normale Showview Selectionner Regler Sortie Menu
To stop recording
RET Playback options Operation
Playing/searching at various speeds
Ralenti ×2
Playback options Operation
To resume normal playback
To cancel the duration
Setting the recording duration time
To extend the duration
Additional Operations
Before you start …
Checking/changing/cancelling timer settings
When the timer settings overlap
Acces Smart
Searching using the Acces Smart function
To recall the latest data screen after you remove the tape
Recording the programme D over the programme a and B
Originally recorded programmes
About the Optimum Picture Control OPC function
Adjusting the picture
Adjusting the tracking
Tip
Menu option Set this option to
Changing menu options
PressOK. MENU, then select Options and press
OPTIONS-2
VMC-2121HG Peritel cable not supplied Signal flow
How to connect to record on this VCR
Editing with another VCR
Example a Your VCR Recorder LIGNE-1 TV Other VCR Player
Entree LIGNE-2 Other VCR Player
Example B Your VCR Recorder
Before you start editing
Operation when recording on this VCR
To stop editing
Press the x Stop buttons on both VCRs
Clock
Troubleshooting
Symptom Remedy
No TV programme appears
Others
Plus
Canal
Contamination
Additional Information
Initial
Supplied accessories
Specifications
System
Inputs and outputs
Refer to the pages indicated in parentheses for details
Index to parts and controls
Front panel
PDC OPC
Display window
Mains lead 8
Antenne Entree connector 8
Rear panel
Remote commander
Additional Information
Index to parts and controls
Additional Information
Smartlink
Index