For Machines Mfg. Since 8/09 | S E R V I C E | Model SB1020 |
To adjust the headstock travel switch:
1.DISCONNECT BANDSAW FROM POWER!
2.Fully lower the headstock by opening the downfeed valve. Allow it to come to a stop on its own (see Downfeed Stop Bolt on this page for more details).
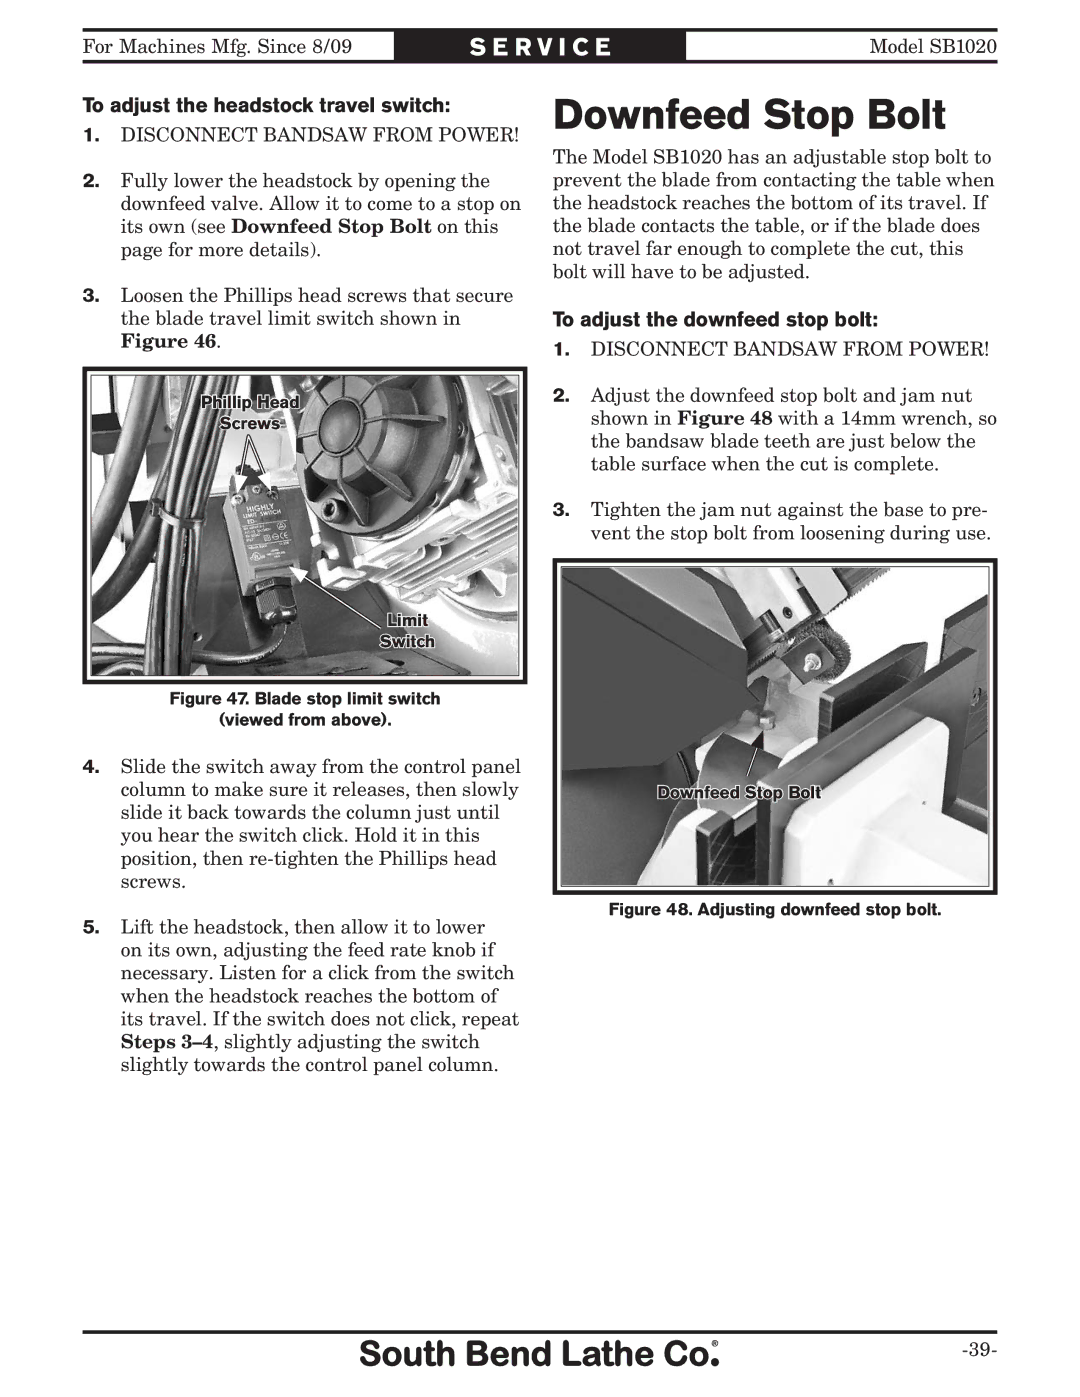
3.Loosen the Phillips head screws that secure the blade travel limit switch shown in Figure 46.
Phillip Head
Screws
![]() Limit
Limit
Switch
Figure 47. Blade stop limit switch
(viewed from above).
4.Slide the switch away from the control panel column to make sure it releases, then slowly slide it back towards the column just until you hear the switch click. Hold it in this position, then
5.Lift the headstock, then allow it to lower on its own, adjusting the feed rate knob if necessary. Listen for a click from the switch when the headstock reaches the bottom of its travel. If the switch does not click, repeat Steps
Downfeed Stop Bolt
The Model SB1020 has an adjustable stop bolt to prevent the blade from contacting the table when the headstock reaches the bottom of its travel. If the blade contacts the table, or if the blade does not travel far enough to complete the cut, this bolt will have to be adjusted.
To adjust the downfeed stop bolt:
1.DISCONNECT BANDSAW FROM POWER!
2.Adjust the downfeed stop bolt and jam nut shown in Figure 48 with a 14mm wrench, so the bandsaw blade teeth are just below the table surface when the cut is complete.
3.Tighten the jam nut against the base to pre- vent the stop bolt from loosening during use.
Downfeed Stop Bolt