Install the Motherboard
Step 1. Install the CPU
![]() Mark your CPU Frequency: Record the working frequency of your mPGA CPU that should be clearly marked on the CPU cover.
Mark your CPU Frequency: Record the working frequency of your mPGA CPU that should be clearly marked on the CPU cover.
FSB 400MHz
|
| 1.5GHz(100x15.0) |
|
| 1.6GHz(100x16.0) |
| 1.7GHz(100x17.0) |
| 1.8GHz(100x18.0) |
|
|
|
|
|
|
|
|
|
|
|
| 1.9GHz(100x19.0) |
|
| 2.0GHz(100x20.0) |
| 2.2GHz(100x22.0) |
|
|
|
|
|
|
|
|
|
|
|
|
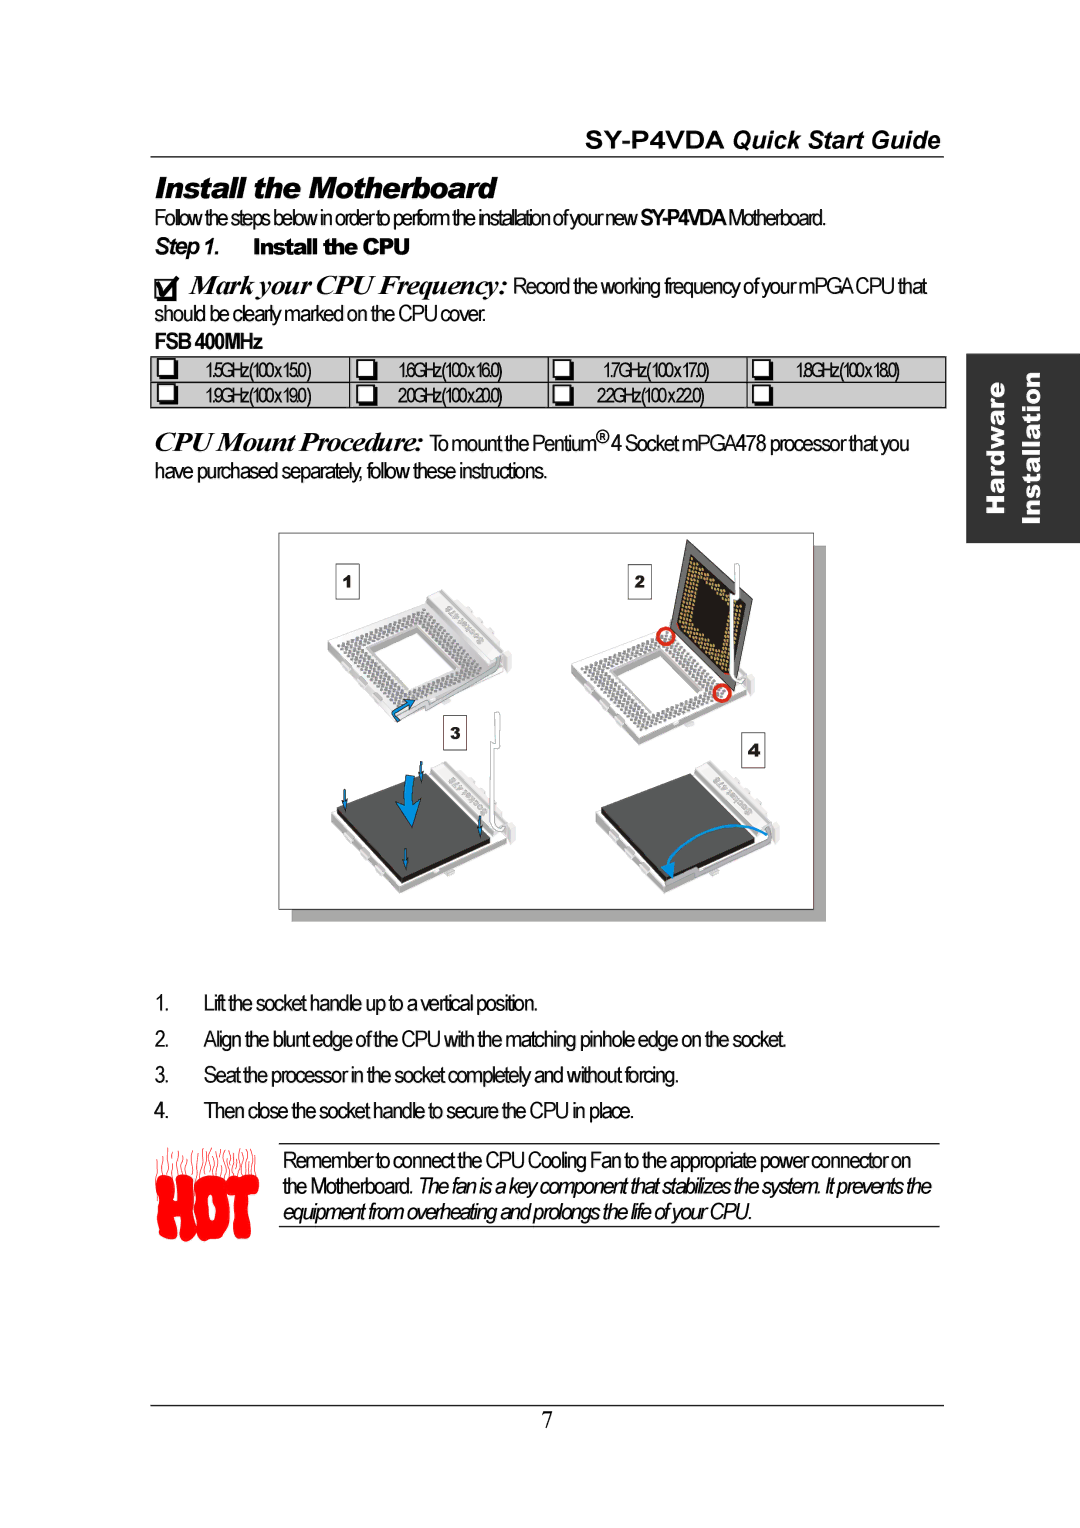
CPU Mount Procedure: To mount the Pentium®4 Socket mPGA478 processor that you have purchased separately, follow these instructions.
1 |
| 2 |
| 3 | 4 |
|
|
Hardware Installation
1.Lift the socket handle up to a vertical position.
2.Align the blunt edge of the CPU with the matching pinhole edge on the socket.
3.Seat the processor in the socket completely and without forcing.
4.Then close the socket handle to secure the CPU in place.
Remember to connect the CPU Cooling Fan to the appropriate power connector on the Motherboard. The fan is a key component that stabilizes the system. It prevents the equipment from overheating and prolongs the life of your CPU.
7