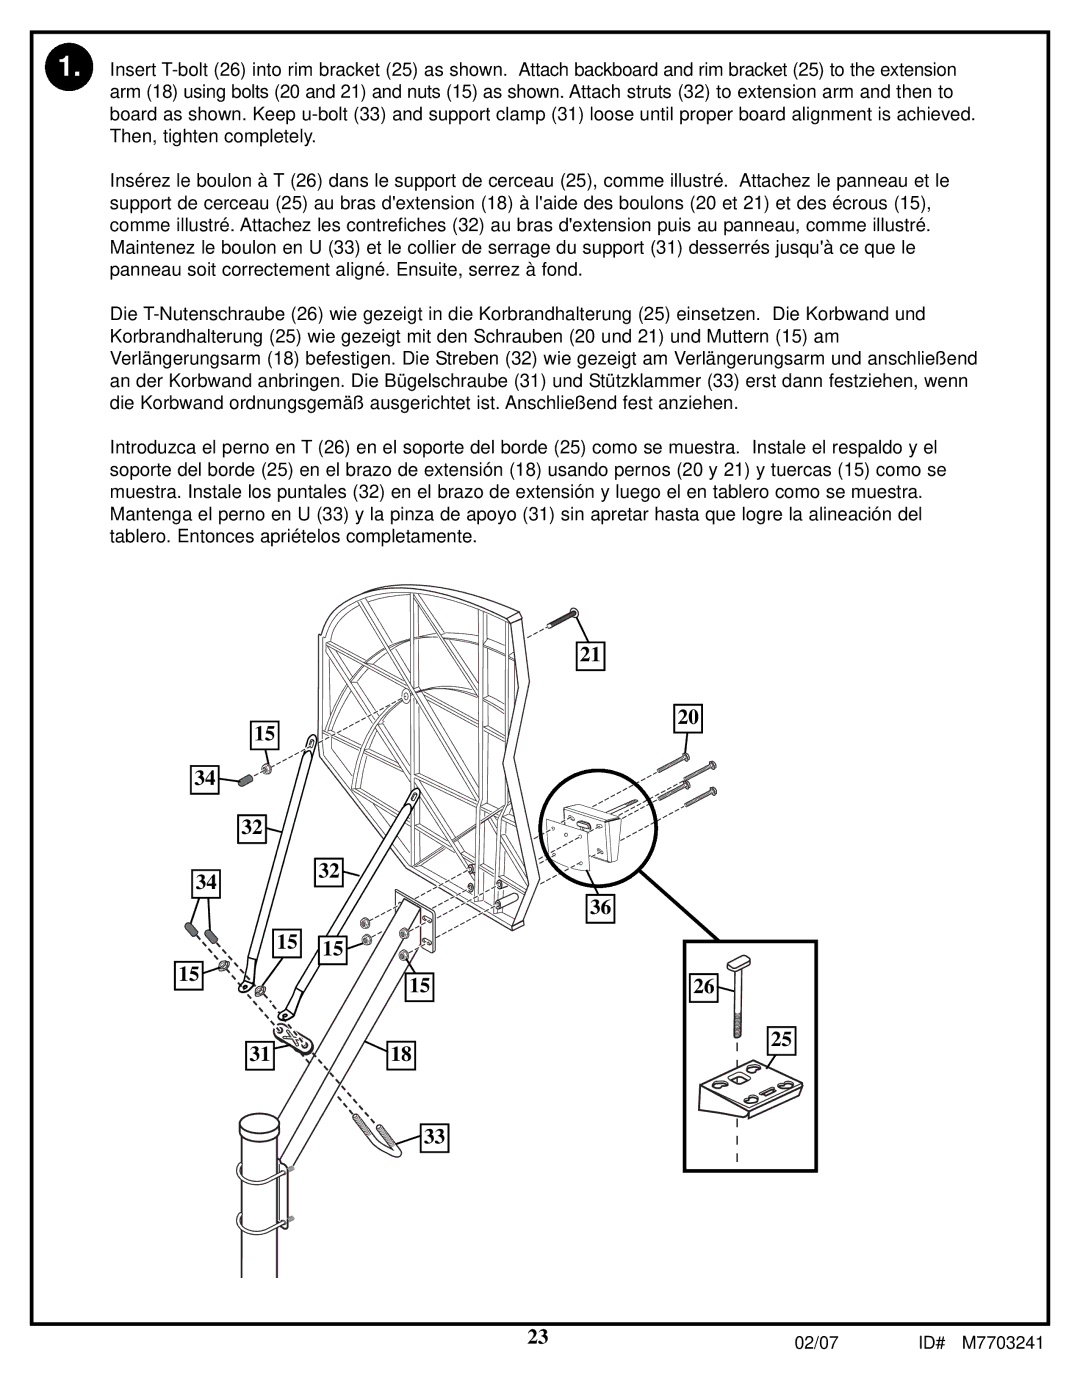
1. Insert
Insérez le boulon à T (26) dans le support de cerceau (25), comme illustré. Attachez le panneau et le support de cerceau (25) au bras d'extension (18) à l'aide des boulons (20 et 21) et des écrous (15), comme illustré. Attachez les contrefiches (32) au bras d'extension puis au panneau, comme illustré. Maintenez le boulon en U (33) et le collier de serrage du support (31) desserrés jusqu'à ce que le panneau soit correctement aligné. Ensuite, serrez à fond.
Die
Introduzca el perno en T (26) en el soporte del borde (25) como se muestra. Instale el respaldo y el soporte del borde (25) en el brazo de extensión (18) usando pernos (20 y 21) y tuercas (15) como se muestra. Instale los puntales (32) en el brazo de extensión y luego el en tablero como se muestra.
Mantenga el perno en U (33) y la pinza de apoyo (31) sin apretar hasta que logre la alineación del tablero. Entonces apriételos completamente.
34
34
15
15
32
32
15 | 15 |
31 |
15
18
21
20
36
26
25
33
23 | 02/07 | ID# M7703241 |
