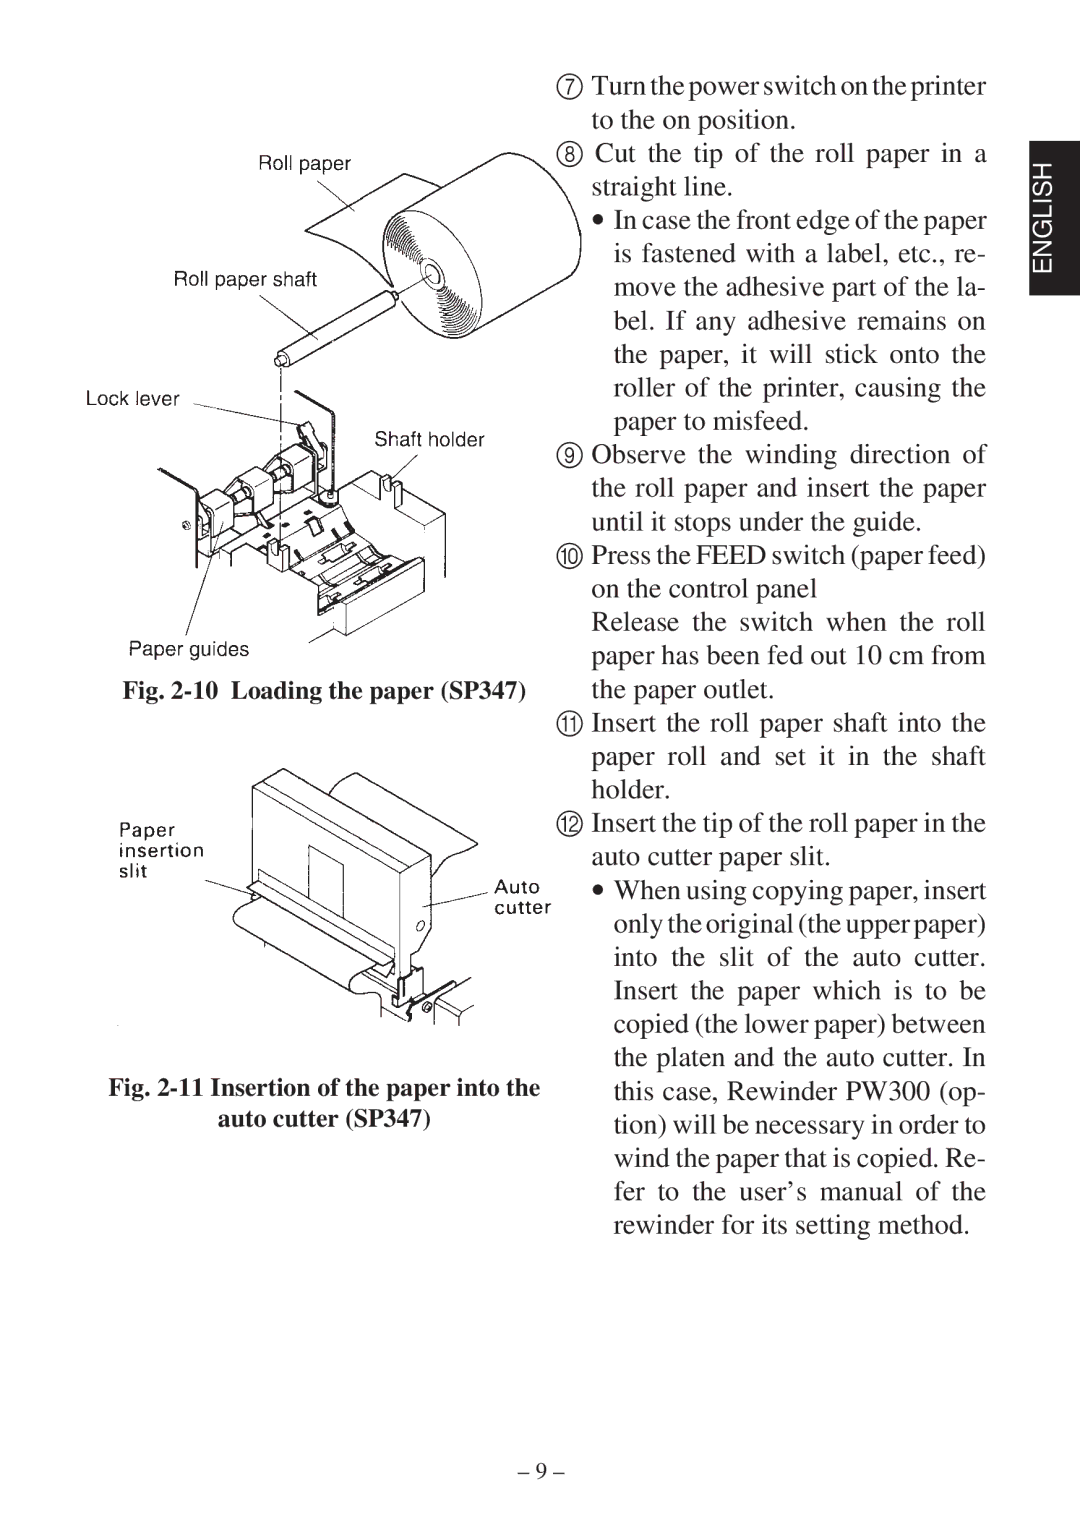
Fig. 2-10 Loading the paper (SP347)
Fig. 2-11 Insertion of the paper into the
auto cutter (SP347)
7Turn the power switch on the printer to the on position.
8Cut the tip of the roll paper in a straight line.
∙In case the front edge of the paper is fastened with a label, etc., re- move the adhesive part of the la- bel. If any adhesive remains on the paper, it will stick onto the
roller of the printer, causing the paper to misfeed.
9Observe the winding direction of the roll paper and insert the paper
until it stops under the guide.
0Press the FEED switch (paper feed) on the control panel
Release the switch when the roll
paper has been fed out 10 cm from the paper outlet.
AInsert the roll paper shaft into the
paper roll and set it in the shaft holder.
BInsert the tip of the roll paper in the auto cutter paper slit.
∙When using copying paper, insert only the original (the upper paper) into the slit of the auto cutter. Insert the paper which is to be copied (the lower paper) between the platen and the auto cutter. In this case, Rewinder PW300 (op- tion) will be necessary in order to wind the paper that is copied. Re- fer to the user’s manual of the rewinder for its setting method.
ENGLISH
– 9 –