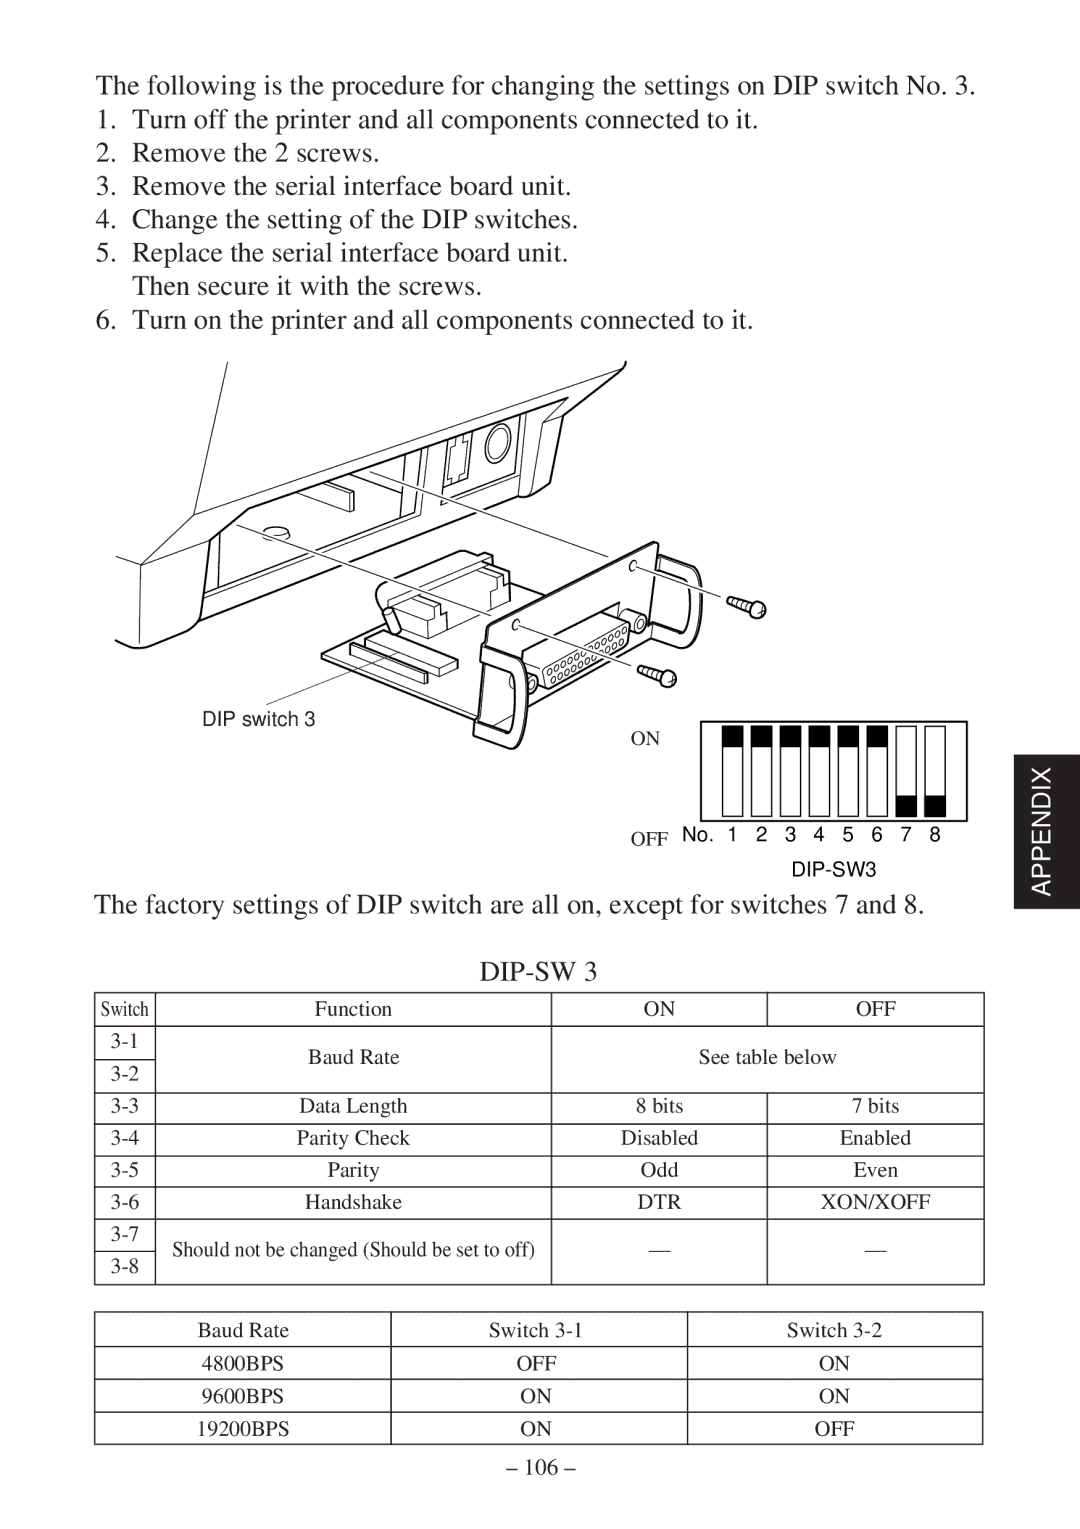
The following is the procedure for changing the settings on DIP switch No. 3.
1.Turn off the printer and all components connected to it.
2.Remove the 2 screws.
3.Remove the serial interface board unit.
4.Change the setting of the DIP switches.
5.Replace the serial interface board unit. Then secure it with the screws.
6.Turn on the printer and all components connected to it.
DIP switch 3
ON
OFF No. 1 2 3 4 5 6 7 8
The factory settings of DIP switch are all on, except for switches 7 and 8.
DIP-SW 3
Switch |
| Function |
| ON |
| OFF | ||
|
|
|
|
|
|
|
|
|
| Baud Rate |
|
|
| See table below | |||
|
|
|
|
| ||||
|
|
| ||||||
|
|
|
|
|
|
|
| |
|
|
|
|
|
|
| ||
| Data Length |
| 8 bits |
| 7 bits | |||
|
|
|
|
|
|
| ||
| Parity Check |
| Disabled |
| Enabled | |||
|
|
|
|
|
|
| ||
| Parity |
| Odd |
| Even | |||
|
|
|
|
|
|
| ||
| Handshake |
| DTR |
| XON/XOFF | |||
|
|
|
|
|
|
|
|
|
Should not be changed (Should be set to off) |
| — |
| — | ||||
|
|
| ||||||
|
| |||||||
|
|
|
|
|
|
|
| |
|
|
|
|
|
|
|
|
|
|
|
|
|
|
|
|
|
|
| Baud Rate |
| Switch |
|
|
| Switch | |
|
|
|
|
|
|
|
| |
| 4800BPS |
| OFF |
|
|
| ON | |
|
|
|
|
|
|
|
| |
| 9600BPS |
| ON |
|
|
| ON | |
|
|
|
|
|
|
|
| |
| 19200BPS |
| ON |
|
|
| OFF | |
|
|
|
|
|
|
|
|
|
APPENDIX