✓Always use all eight (8) screw holes in the mounting bracket when securing the mounting bracket to the wall.
✓Mount the bracket to the wall so that its mounting accuracy is within a range of ±2° perpendicular.
✓The wall used for mounting should be 90°±2° to the horizontal reference.
1-2-1. Specifications of the wall mounting bracket
Wall mounting bracket | 121 × 168 × 14.5 mm (Width × Height × Depth) |
| ||
outer dimensions |
|
|
|
|
|
|
|
|
|
Wall mounting bracket | Approx. 0.27 kg. |
|
|
|
weight |
|
|
|
|
|
|
|
|
|
Screws for wall mounting | Wood structure wall | The eight (8) screws |
| Use commercially |
bracket |
| used must have both a |
| available screws that |
• Not included in the |
| shear and tensile |
| have sufficient |
package. The customer |
| strength capable of |
| strength to withstand |
is to prepare the screws |
| withstanding a load of |
| the weight of the |
that meet the type of |
| 12 kgf (118 N) or more |
| printer. |
wall to be used for |
|
|
|
|
Concrete wall | The anchor nuts used |
|
| |
mounting. |
|
| ||
| must have both a shear |
|
| |
|
|
|
| |
|
| and tensile strength |
|
|
|
| capable of withstand- |
|
|
|
| ing a load of 12 kgf |
|
|
|
| (118 N) or more |
|
|
|
|
|
|
|
1-2-2. Mounting the bracket for the wall mount model
ENGLISH
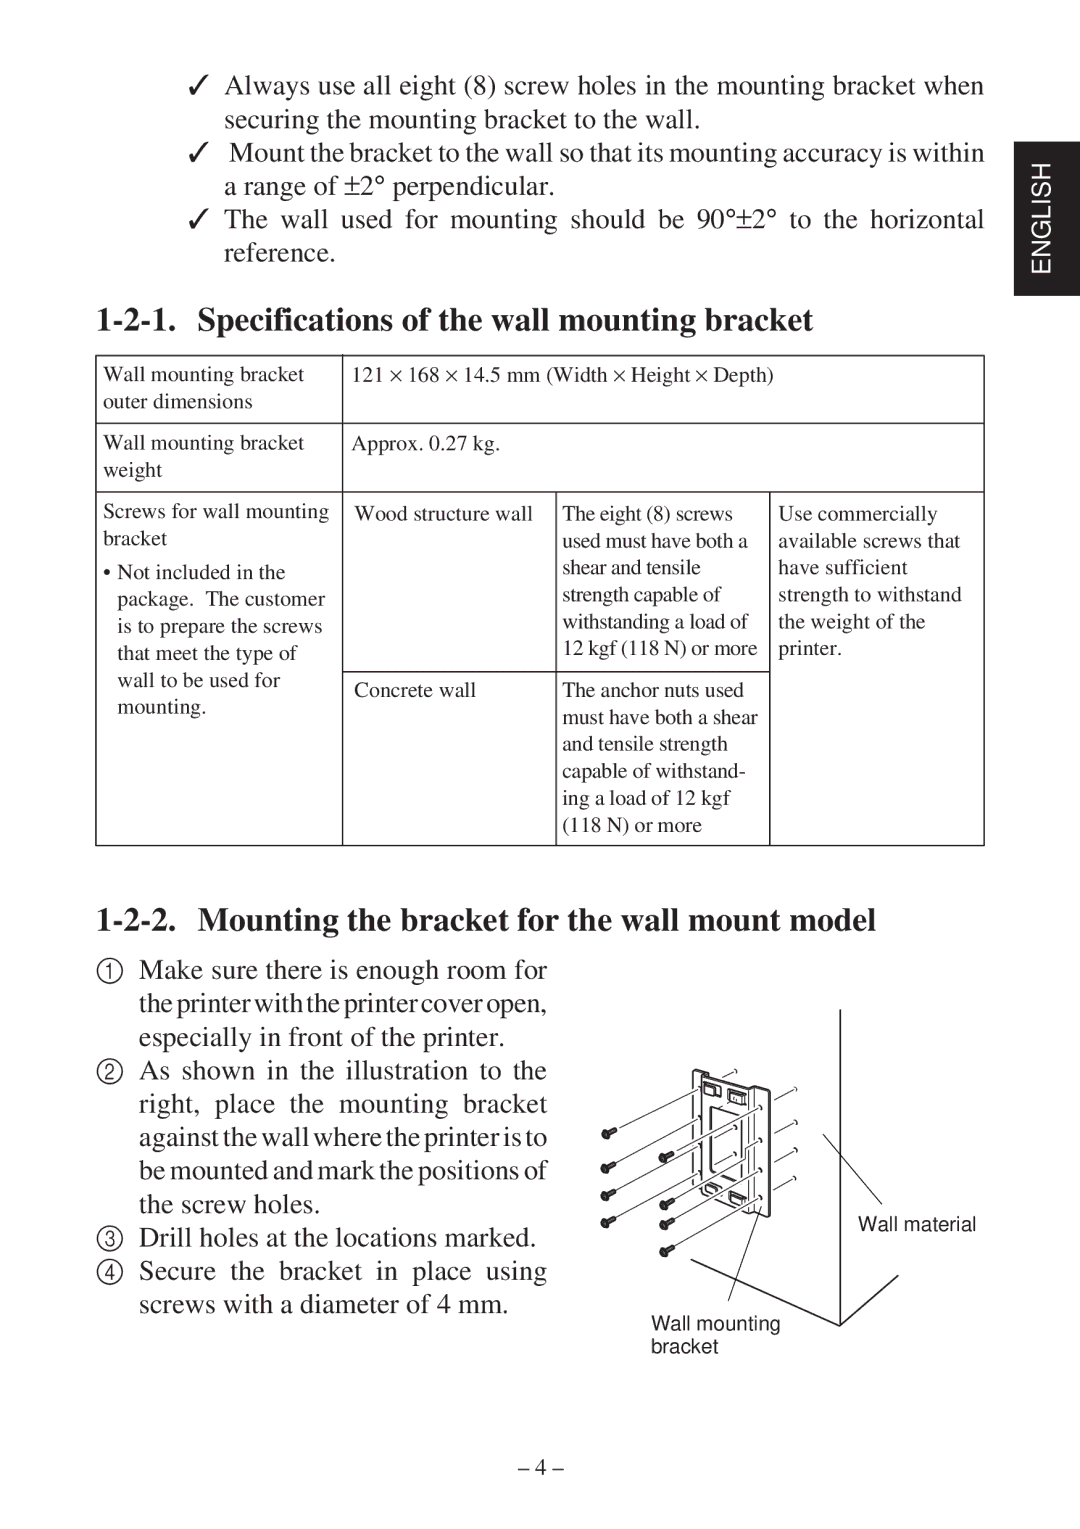
1Make sure there is enough room for the printer with the printer cover open,
especially in front of the printer.
2As shown in the illustration to the right, place the mounting bracket against the wall where the printer is to be mounted and mark the positions of
the screw holes.
3Drill holes at the locations marked.
4 Secure the bracket in place using screws with a diameter of 4 mm.
Wall material
Wall mounting bracket
– 4 –