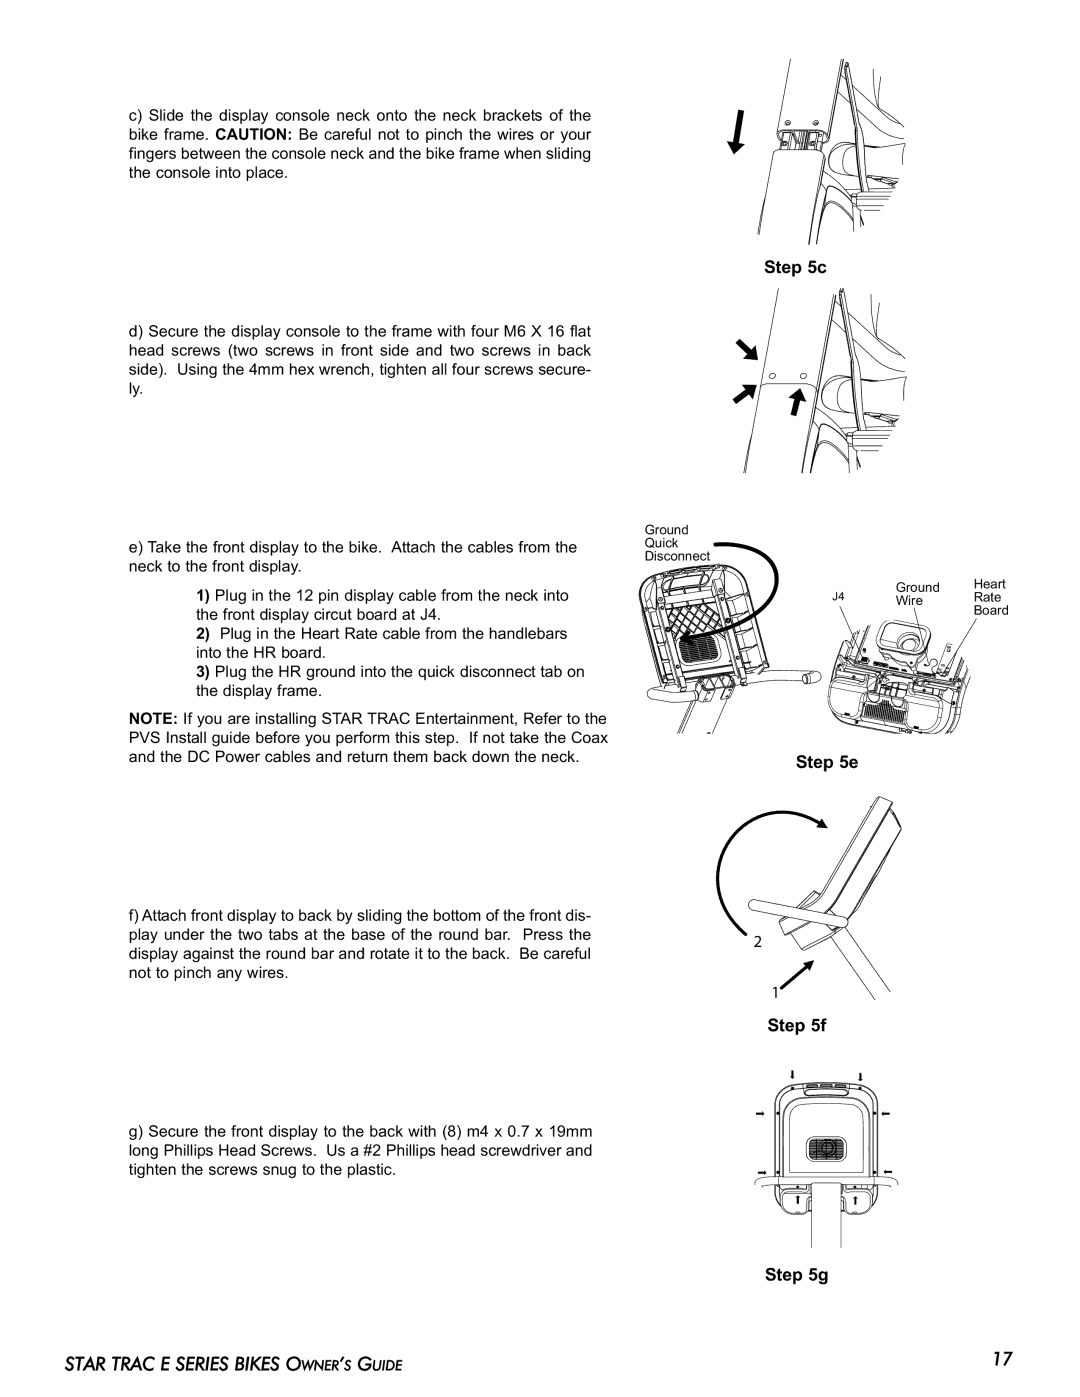
c)Slide the display console neck onto the neck brackets of the bike frame. CAUTION: Be careful not to pinch the wires or your fingers between the console neck and the bike frame when sliding the console into place.
d)Secure the display console to the frame with four M6 X 16 flat head screws (two screws in front side and two screws in back side). Using the 4mm hex wrench, tighten all four screws secure- ly.
e)Take the front display to the bike. Attach the cables from the neck to the front display.
1)Plug in the 12 pin display cable from the neck into the front display circut board at J4.
2)Plug in the Heart Rate cable from the handlebars into the HR board.
3)Plug the HR ground into the quick disconnect tab on the display frame.
NOTE: If you are installing STAR TRAC Entertainment, Refer to the PVS Install guide before you perform this step. If not take the Coax and the DC Power cables and return them back down the neck.
f)Attach front display to back by sliding the bottom of the front dis- play under the two tabs at the base of the round bar. Press the display against the round bar and rotate it to the back. Be careful not to pinch any wires.
g)Secure the front display to the back with (8) m4 x 0.7 x 19mm long Phillips Head Screws. Us a #2 Phillips head screwdriver and tighten the screws snug to the plastic.
Step 5c
Ground
Quick
Disconnect
| Ground | Heart |
J4 | Wire | Rate |
|
| Board |
Step 5e
2
1
Step 5f
Step 5g
STAR TRAC E SERIES BIKES OWNER’S GUIDE | 17 |