INSTALLATION INSTRUCTIONS
INSTALLATION
5.3.6Ensure that no beads have fallen into the pilot area.
5.3.7Ensure that the pilot shield is fitted correctly and that it fits tightly onto the edge of the tray. See diagram 5.
5
AR0558
5.4Coal & Pebble Layout - Small Aspen & Chamonix
5.4.1Place 8 large square blocks in a solid mass in the centre of the burner tray as shown, ensure they fit tightly together. See diagram 6.
6
AR1262
5.4.2Place 14 small coals or pebbles around the edge of the tray as shown, ensure that there are gaps between each coal or pebble. Place one on top of the pilot shield. See diagram 7.
7
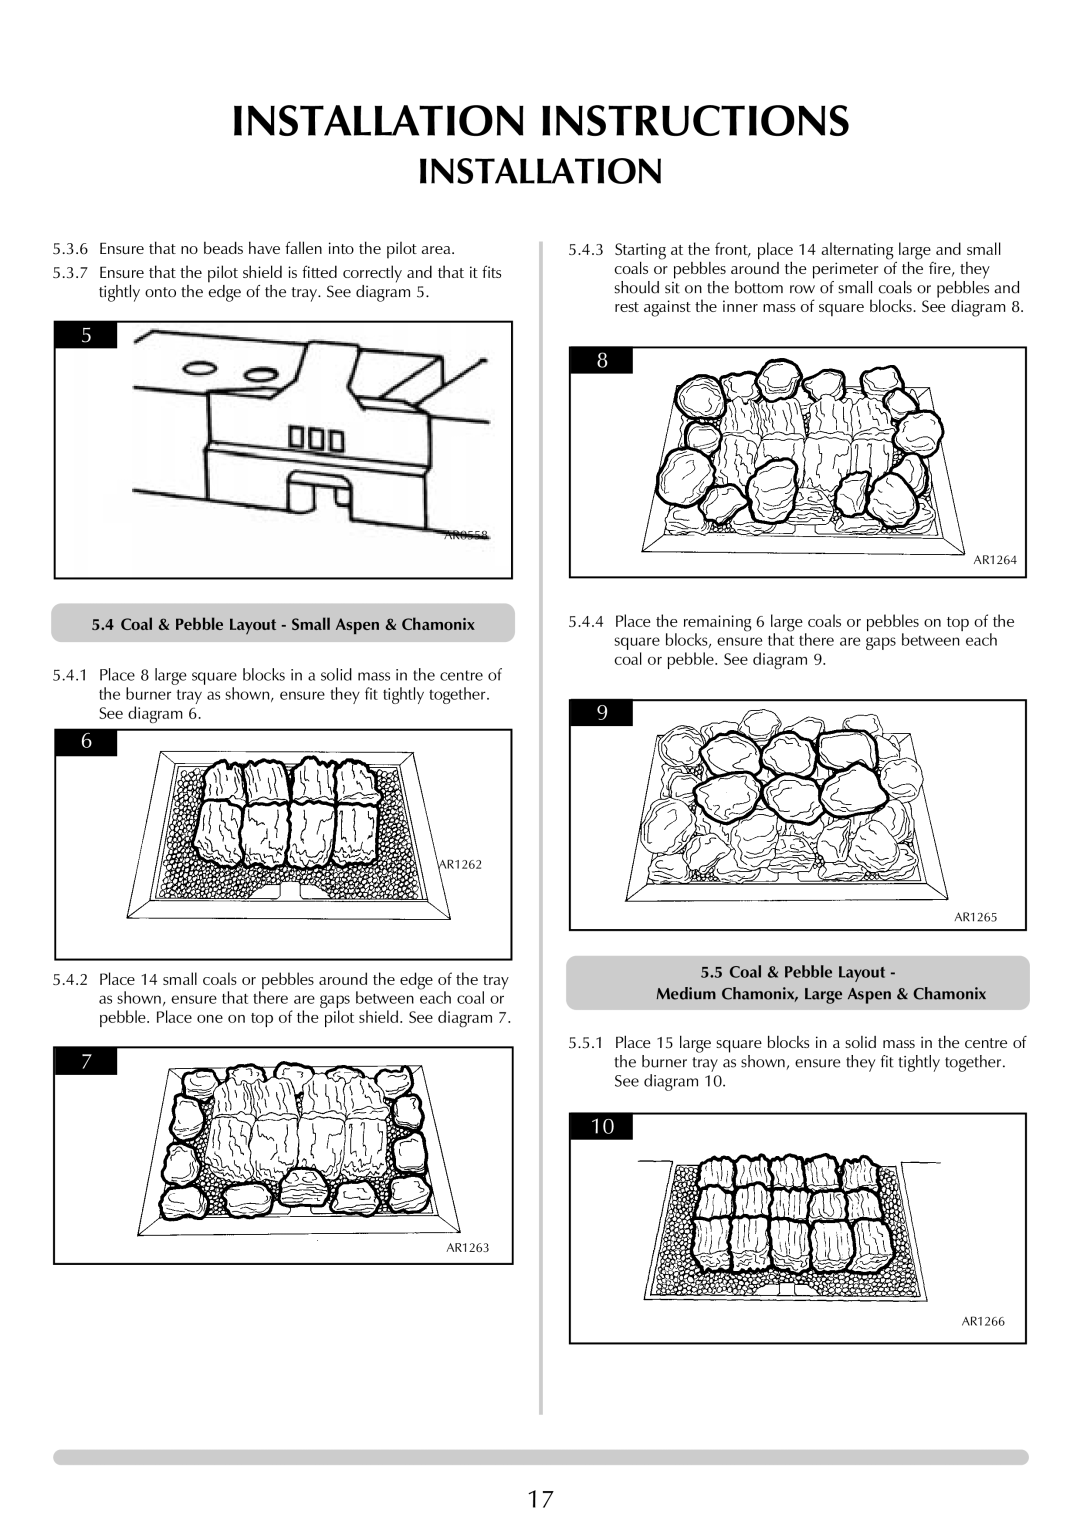
5.4.3Starting at the front, place 14 alternating large and small coals or pebbles around the perimeter of the fire, they should sit on the bottom row of small coals or pebbles and rest against the inner mass of square blocks. See diagram 8.
8
AR1264
5.4.4Place the remaining 6 large coals or pebbles on top of the square blocks, ensure that there are gaps between each coal or pebble. See diagram 9.
9
AR1265
5.5 Coal & Pebble Layout -
Medium Chamonix, Large Aspen & Chamonix
5.5.1Place 15 large square blocks in a solid mass in the centre of the burner tray as shown, ensure they fit tightly together. See diagram 10.
10
AR1263
AR1266
17