Setup
Chapter 2. Using the Rackmount DVD/CD Duplicator
This chapter explains how to set up the Rackmount DVD/CD Duplicator. It also explains basic operation and menu functions.
Note: The following instructions are applicable to TEAC and TASCAM branded Rackmount DVD/CD Duplicators. The primary differences between models are the TEAC or TASCAM logo on the LCD Control Panel and the model number on the corresponding nameplate label. Please refer to “Specifications” on page 31 for detailed information on your model.
Setup
1.Carefully remove the DVD/CD Duplicator unit, AC power cord, warranty card, optional rubber feet and user’s manual from the shipping box.
Note: Please keep the original box and packaging materials for use in the event of future storage or transportation of the unit.
2.If the unit will not be mounted onto a rack, you may wish to affix the four included rubber feet to the bottom of the Rackmount DVD/CD Duplicator. Then skip Step 3 and proceed directly to Step 4.
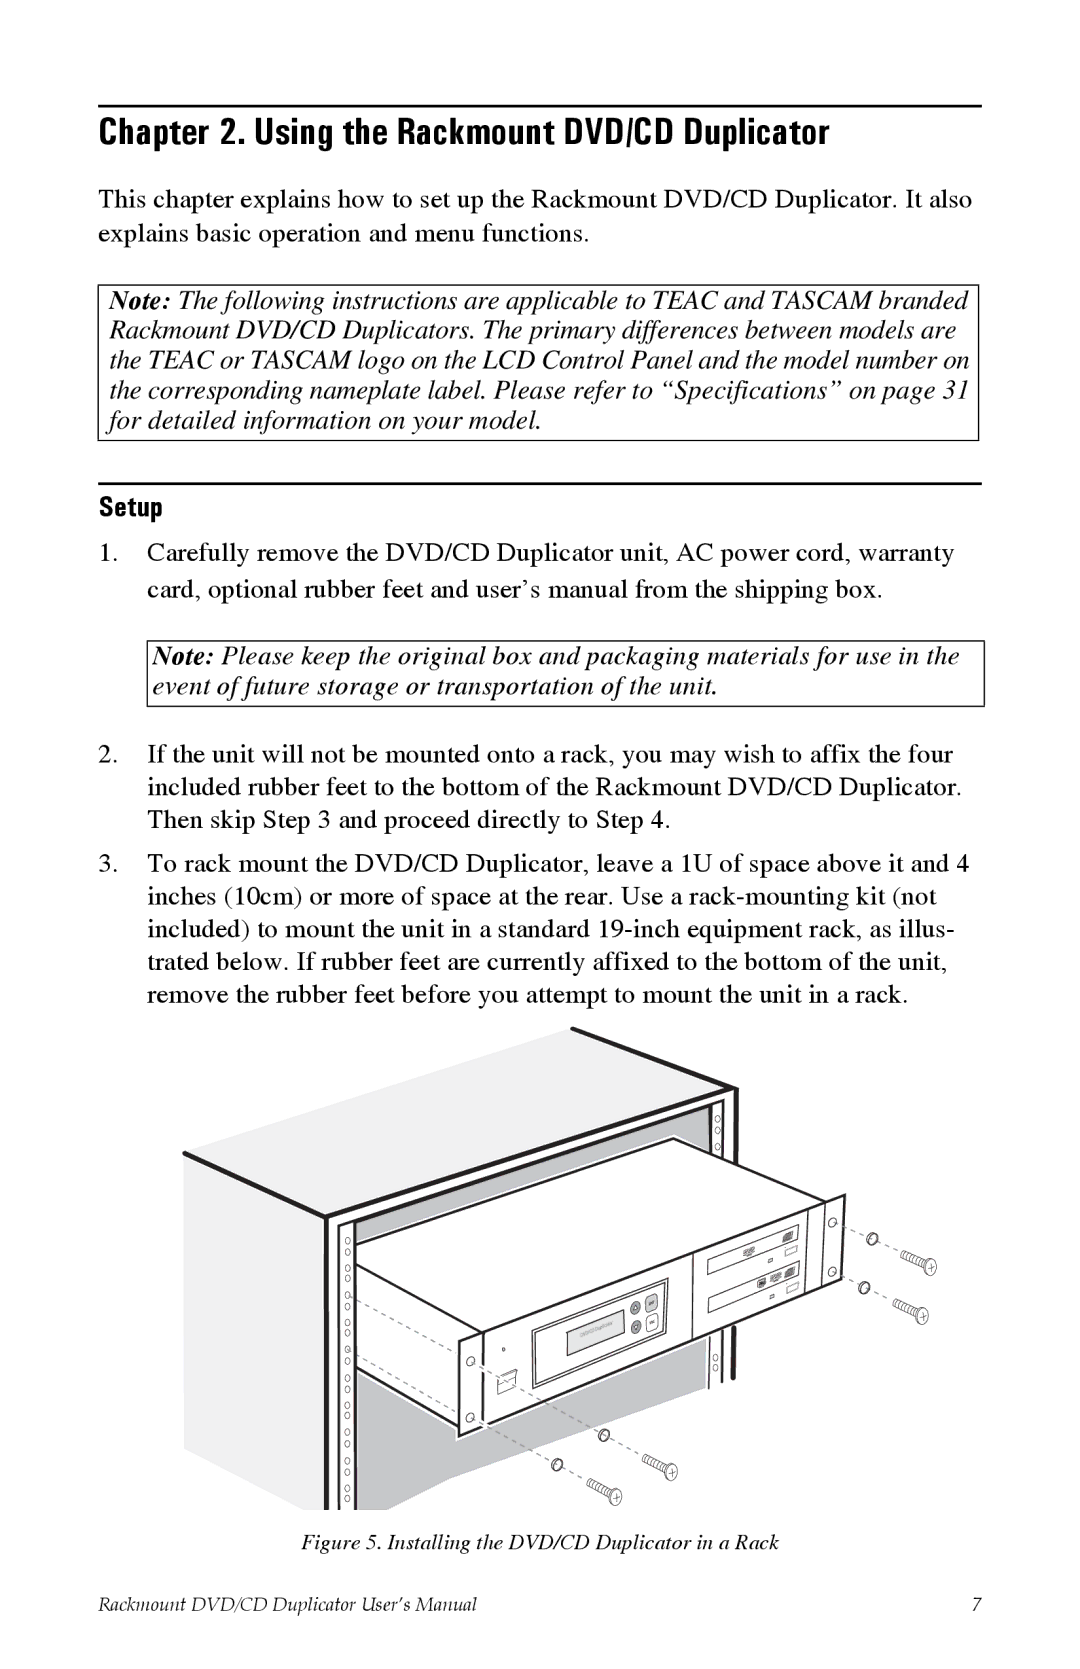
3.To rack mount the DVD/CD Duplicator, leave a 1U of space above it and 4 inches (10cm) or more of space at the rear. Use a
Figure 5. Installing the DVD/CD Duplicator in a Rack
Rackmount DVD/CD Duplicator User’s Manual | 7 |
