3

1

2

3

4

28

2 1

4

Programmed Playback (3)

Changing the program

After programming is completed, unnec- essary tracks can be deleted from the original program or new tracks can be added after a track originally programmed, in the following way.

Renewing a track

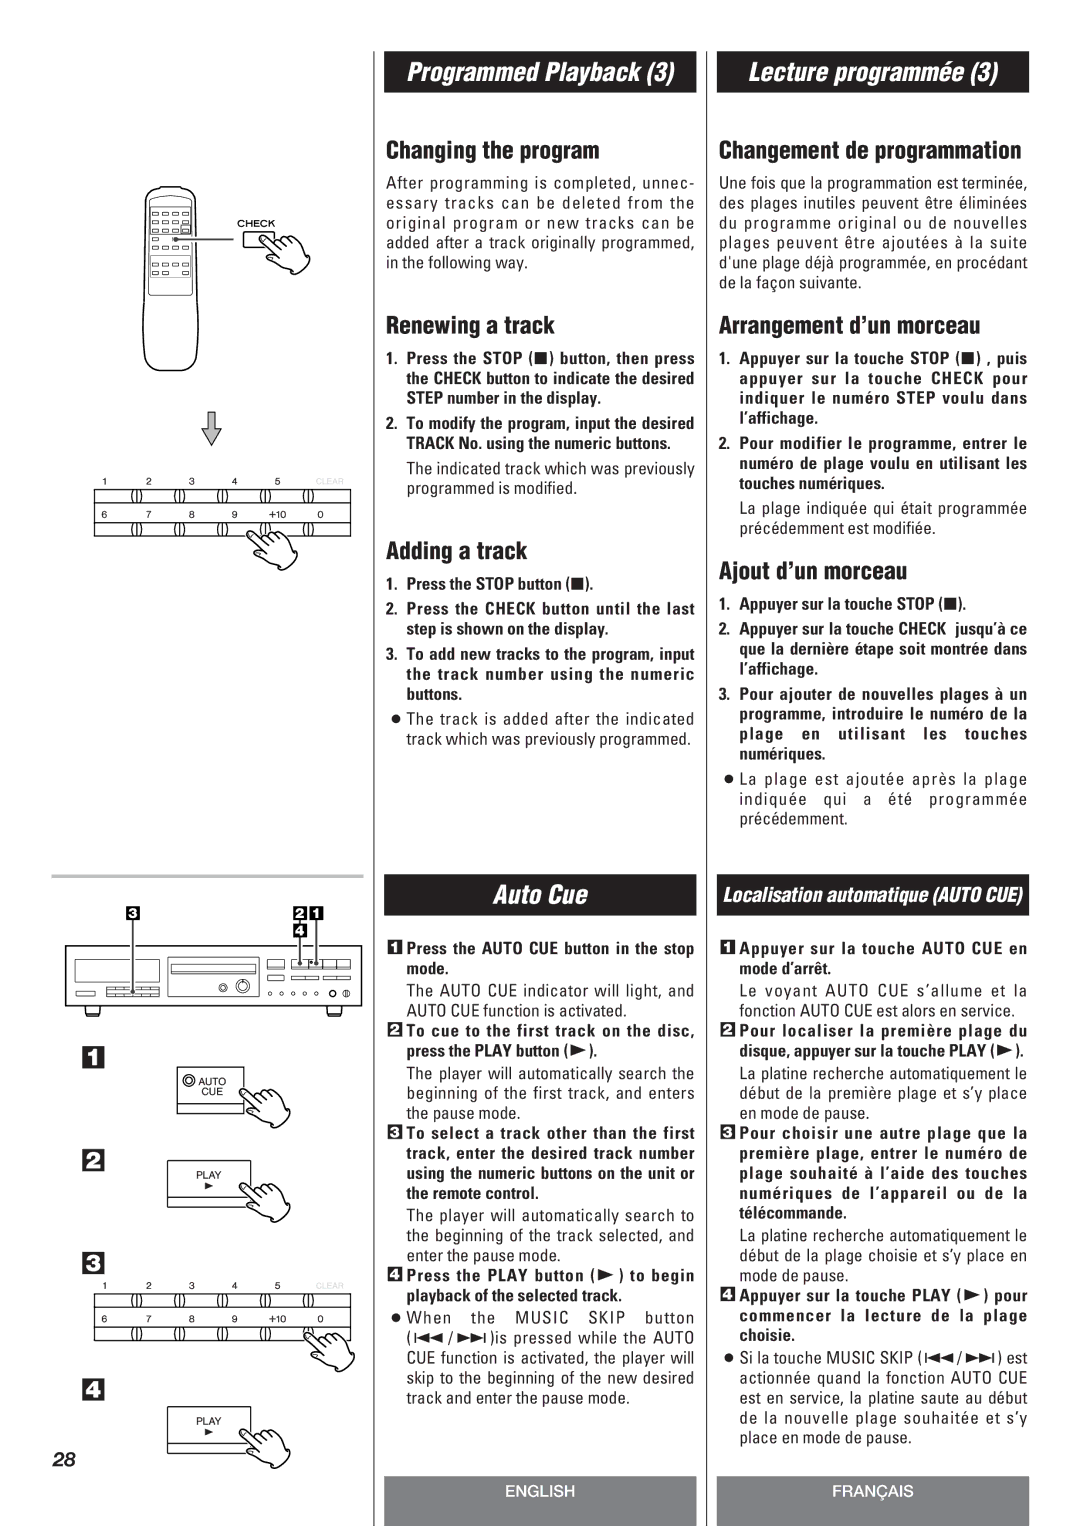
1.Press the STOP (H) button, then press the CHECK button to indicate the desired STEP number in the display.

2.To modify the program, input the desired TRACK No. using the numeric buttons.

The indicated track which was previously programmed is modified.

Adding a track

1.Press the STOP button (H).

2.Press the CHECK button until the last step is shown on the display.

3.To add new tracks to the program, input the track number using the numeric buttons.

<The track is added after the indicated track which was previously programmed.

Auto Cue

1Press the AUTO CUE button in the stop mode.

The AUTO CUE indicator will light, and AUTO CUE function is activated.

2To cue to the first track on the disc, press the PLAY button (y).

The player will automatically search the beginning of the first track, and enters the pause mode.

3To select a track other than the first track, enter the desired track number using the numeric buttons on the unit or the remote control.

The player will automatically search to the beginning of the track selected, and enter the pause mode.

4Press the PLAY button (y) to begin playback of the selected track.

<When the MUSIC SKIP button (.//)is pressed while the AUTO CUE function is activated, the player will skip to the beginning of the new desired track and enter the pause mode.

ENGLISH

Lecture programmée (3)

Changement de programmation

Une fois que la programmation est terminée, des plages inutiles peuvent être éliminées du programme original ou de nouvelles plages peuvent être ajoutées à la suite d'une plage déjà programmée, en procédant de la façon suivante.

Arrangement d’un morceau

1.Appuyer sur la touche STOP (H) , puis appuyer sur la touche CHECK pour indiquer le numéro STEP voulu dans l’affichage.

2.Pour modifier le programme, entrer le numéro de plage voulu en utilisant les touches numériques.

La plage indiquée qui était programmée précédemment est modifiée.

Ajout d’un morceau

1.Appuyer sur la touche STOP (H).

2.Appuyer sur la touche CHECK jusqu’à ce que la dernière étape soit montrée dans l’affichage.

3.Pour ajouter de nouvelles plages à un programme, introduire le numéro de la plage en utilisant les touches numériques.

<La plage est ajoutée après la plage indiquée qui a été programmée précédemment.

Localisation automatique (AUTO CUE)

1Appuyer sur la touche AUTO CUE en mode d’arrêt.

Le voyant AUTO CUE s’allume et la fonction AUTO CUE est alors en service.

2Pour localiser la première plage du disque, appuyer sur la touche PLAY (y).

La platine recherche automatiquement le début de la première plage et s’y place en mode de pause.

3Pour choisir une autre plage que la première plage, entrer le numéro de plage souhaité à l’aide des touches numériques de l’appareil ou de la télécommande.

La platine recherche automatiquement le début de la plage choisie et s’y place en mode de pause.

4Appuyer sur la touche PLAY (y) pour commencer la lecture de la plage choisie.

<Si la touche MUSIC SKIP (.//) est actionnée quand la fonction AUTO CUE est en service, la platine saute au début de la nouvelle plage souhaitée et s’y place en mode de pause.

FRANÇAIS

Page 28
Image 28
Teac CD-P140 owner manual Auto Cue

CD-P140 specifications

The Teac CD-P140 is a versatile and high-performance CD player that caters to both audio enthusiasts and everyday listeners. This model stands out due to its combination of advanced technology, user-friendly features, and a sleek design, making it an excellent choice for anyone looking to enjoy high-quality sound from compact discs.

At the heart of the CD-P140 is the high-precision CD transport mechanism which ensures reliable playback and durability. This mechanism minimizes jitter and boosts audio accuracy, making it an ideal match for audiophiles who appreciate pristine sound quality. The device is compatible with various disc formats, including standard CDs, CD-Rs, and CD-RWs, providing flexibility for users who want to play their extensive music collections.

One of the notable features of the Teac CD-P140 is its digital-to-analog converter (DAC), which enhances audio playback by providing clearer and more detailed sound. With support for multiple sampling frequencies, the DAC allows users to enjoy their music in the resolution it was meant to be heard. The CD player also boasts a balanced XLR output alongside standard RCA outputs, catering to users who want to connect to high-end audio systems for a superior listening experience.

The CD-P140 includes a remote control, making it simple to navigate through tracks and settings without needing to approach the unit. The front panel features a user-friendly interface with a clear display, allowing for easy access to the player’s functions. The player’s ability to create random play and program play features adds convenience for users seeking to customize their listening experience.

In terms of aesthetics, the Teac CD-P140 presents a compact and elegant design that fits seamlessly into any audio setup. Its solid build quality reflects Teac's dedication to craftsmanship, ensuring longevity and resilience. The unit is also designed with minimalistic features, making it an attractive addition to both modern and classic environments.

Overall, the Teac CD-P140 is an exceptional CD player that combines advanced technology with user-friendly features. Its high-quality audio output, versatile connectivity options, and elegant design make it a valuable addition for anyone passionate about music. Whether you are rediscovering your CD collection or simply seeking a reliable player for everyday listening, the Teac CD-P140 stands out as a top contender in its class.