11Controlling the rest of your system
Chapter 11:
Controlling the rest of your system
Operating other Pioneer components
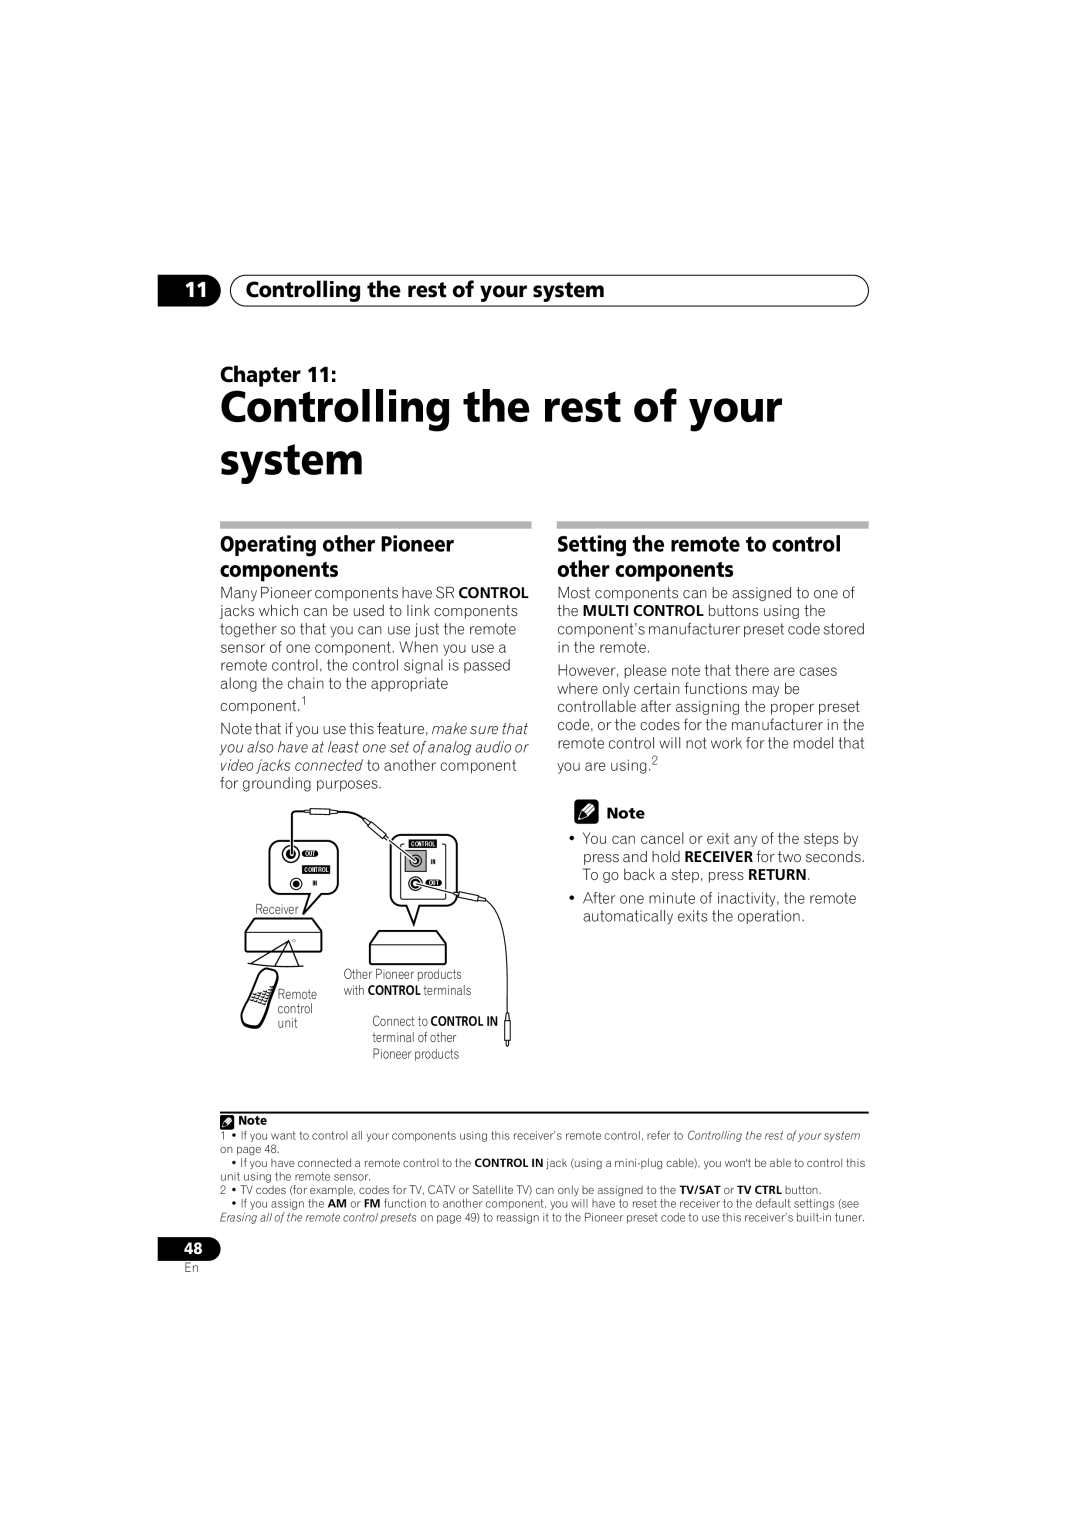
Many Pioneer components have SR CONTROL jacks which can be used to link components together so that you can use just the remote sensor of one component. When you use a remote control, the control signal is passed along the chain to the appropriate
component.1
Note that if you use this feature, make sure that you also have at least one set of analog audio or video jacks connected to another component for grounding purposes.
Setting the remote to control other components
Most components can be assigned to one of the MULTI CONTROL buttons using the component’s manufacturer preset code stored in the remote.
However, please note that there are cases where only certain functions may be controllable after assigning the proper preset code, or the codes for the manufacturer in the remote control will not work for the model that
you are using.2
| CONTROL |
OUT | IN |
| |
CONTROL |
|
IN | OUT |
Receiver |
|
| Other Pioneer products |
Remote | with CONTROL terminals |
control | Connect to CONTROL IN |
unit | |
| terminal of other |
| Pioneer products |
![]() Note
Note
•You can cancel or exit any of the steps by press and hold RECEIVER for two seconds. To go back a step, press RETURN.
•After one minute of inactivity, the remote automatically exits the operation.
![]() Note
Note
1• If you want to control all your components using this receiver’s remote control, refer to Controlling the rest of your system on page 48.
•If you have connected a remote control to the CONTROL IN jack (using a
2• TV codes (for example, codes for TV, CATV or Satellite TV) can only be assigned to the TV/SAT or TV CTRL button.
•If you assign the AM or FM function to another component, you will have to reset the receiver to the default settings (see Erasing all of the remote control presets on page 49) to reassign it to the Pioneer preset code to use this receiver’s
48
En
