Operation |
| |
|
|
|
4.
Note: When batteries are first installed or power is lost for any reason the instrument defaults to the calibration mode. All keys except the CAL and ON/Off (I/O) keys are inoperable until a successful calibration is achieved.
5.To test the batteries. Press the BATT TEST key once. The battery display, located below the oxygen readout display, should show a bar graph of the remaining life to the batteries. In the case of fresh batteries, it should illuminate all 5 segments from the left to the right end of the bar.
2.1.3Calibration
The
Whenever new batteries are installed or removed for |
|
any reason, the oxygen monitor defaults to the calibration |
|
mode with the LCD display flashing 00.0. Only the CAL |
|
and ON/OFF (I/O) keys are functional at this point. The |
|
alarm set points will also need to be reset after calibration |
|
is completed. |
|
Note: For first time and for routine maintenance |
|
calibrations, make sure the sensor and sensor |
|
cable are installed correctly before attempting |
|
to calibrate the instrument |
|
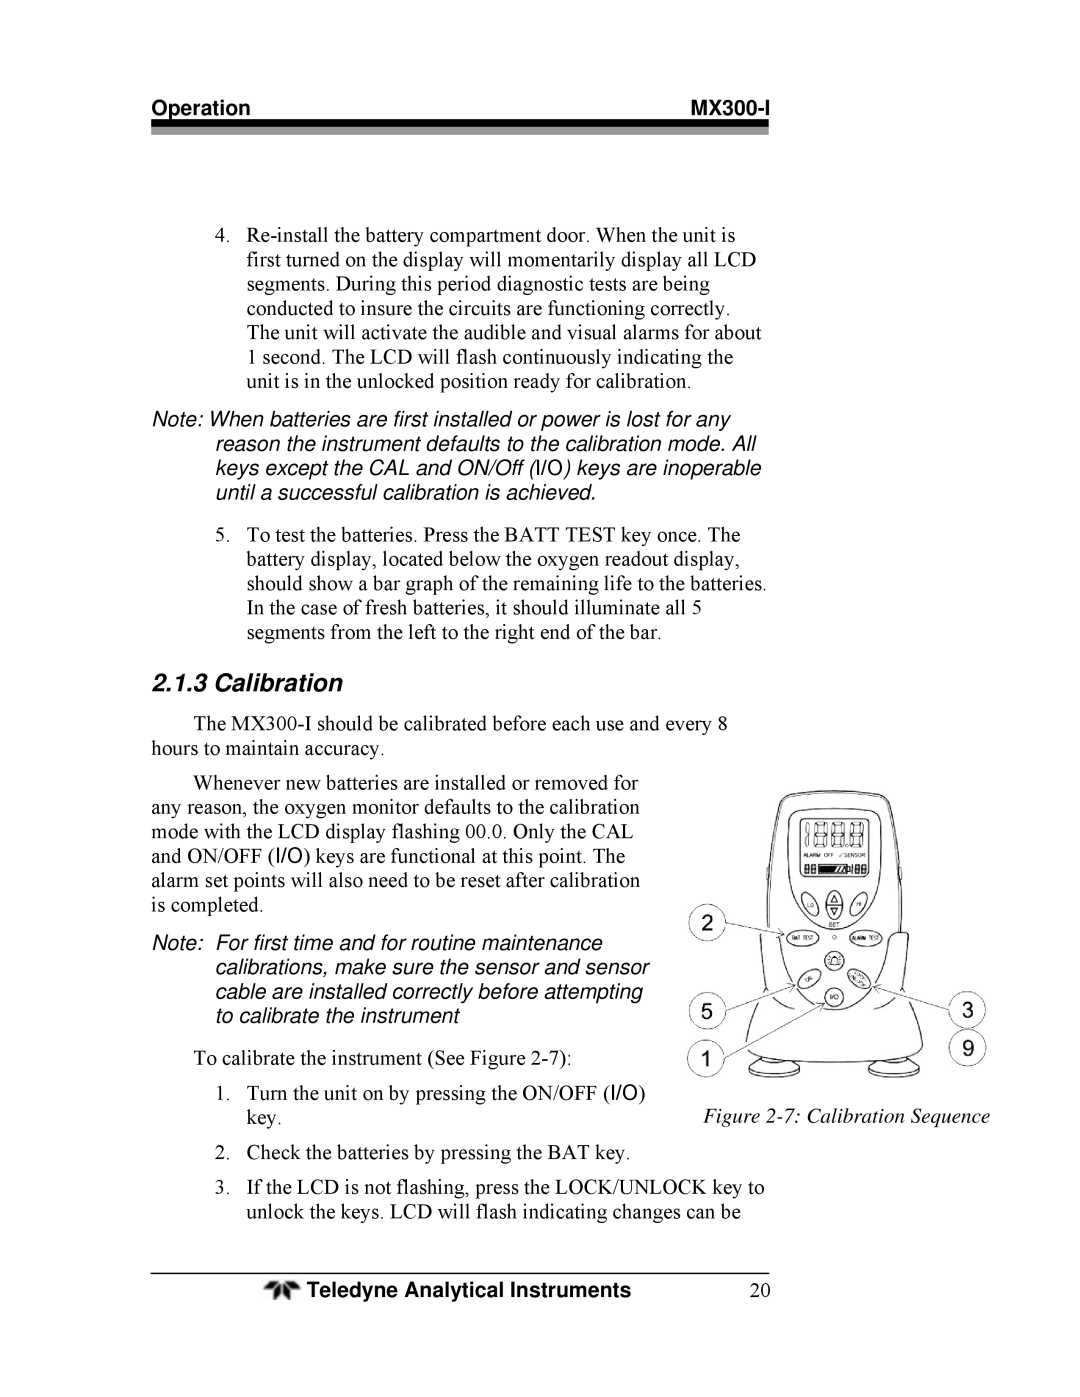
To calibrate the instrument (See Figure |
|
1. Turn the unit on by pressing the ON/OFF (I/O) | Figure |
key. |
2.Check the batteries by pressing the BAT key.
3.If the LCD is not flashing, press the LOCK/UNLOCK key to unlock the keys. LCD will flash indicating changes can be
Teledyne Analytical Instruments | 20 |