MAKING YOUR FIRST SCAN
Your Neat scanner is the easiest way to transform paper information into organized digital files. Here’s how to get your paper into Neat!
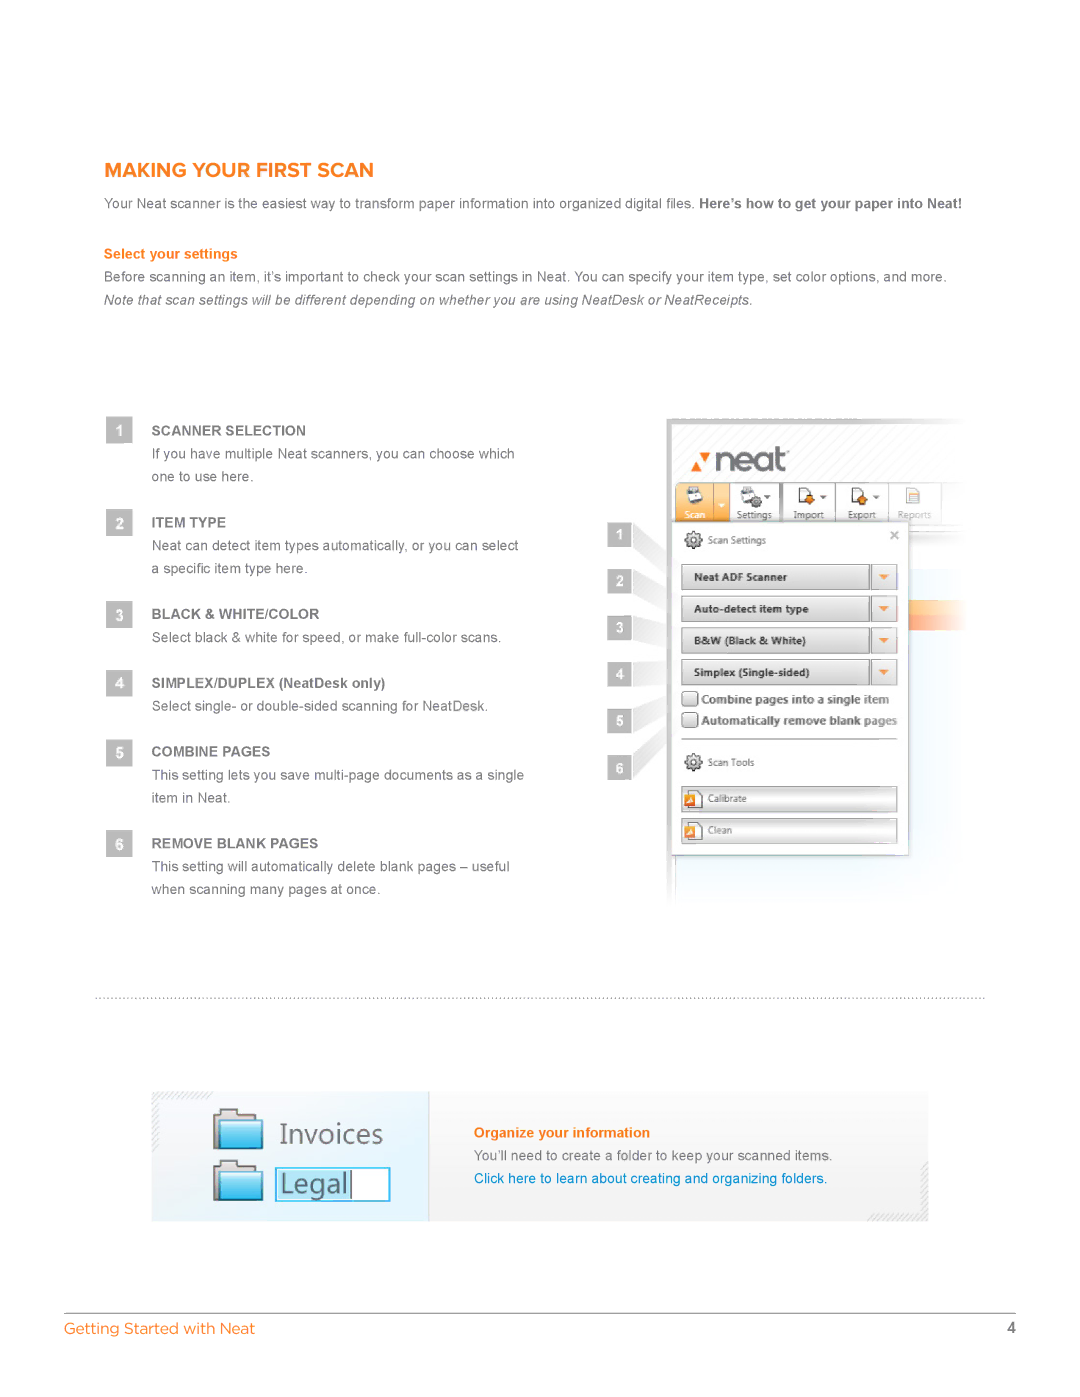
Select your settings
Before scanning an item, it’s important to check your scan settings in Neat. You can specify your item type, set color options, and more. Note that scan settings will be different depending on whether you are using NeatDesk or NeatReceipts.
SCANNER SELECTION
If you have multiple Neat scanners, you can choose which one to use here.
ITEM TYPE
Neat can detect item types automatically, or you can select a specific item type here.
BLACK & WHITE/COLOR
Select black & white for speed, or make
SIMPLEX/DUPLEX (NeatDesk only)
Select single- or
COMBINE PAGES
This setting lets you save
REMOVE BLANK PAGES
This setting will automatically delete blank pages – useful when scanning many pages at once.
Organize your information
You’ll need to create a folder to keep your scanned items.
Click here to learn about creating and organizing folders.
Getting Started with Neat | 4 |