2. MAJOR UNIT REPLACEMENT
2.8 REPLACING THE MEDIA SENSOR
2.8.2 Feed Gap Sensor (LED) and Black Mark Sensor (Lower Side)
1)Remove the platen holder R, platen holder L, platen, and strip plate from the printer
2)Remove the
3)Unhook the two springs.
4)Remove the two
| A | |
|
| |
|
| Sensor Block |
|
| Spring |
|
| |
To CN15 on the |
| Front Cover |
CPU PC board |
|
|
ass’y |
| A |
|
| |
| Spring |
|
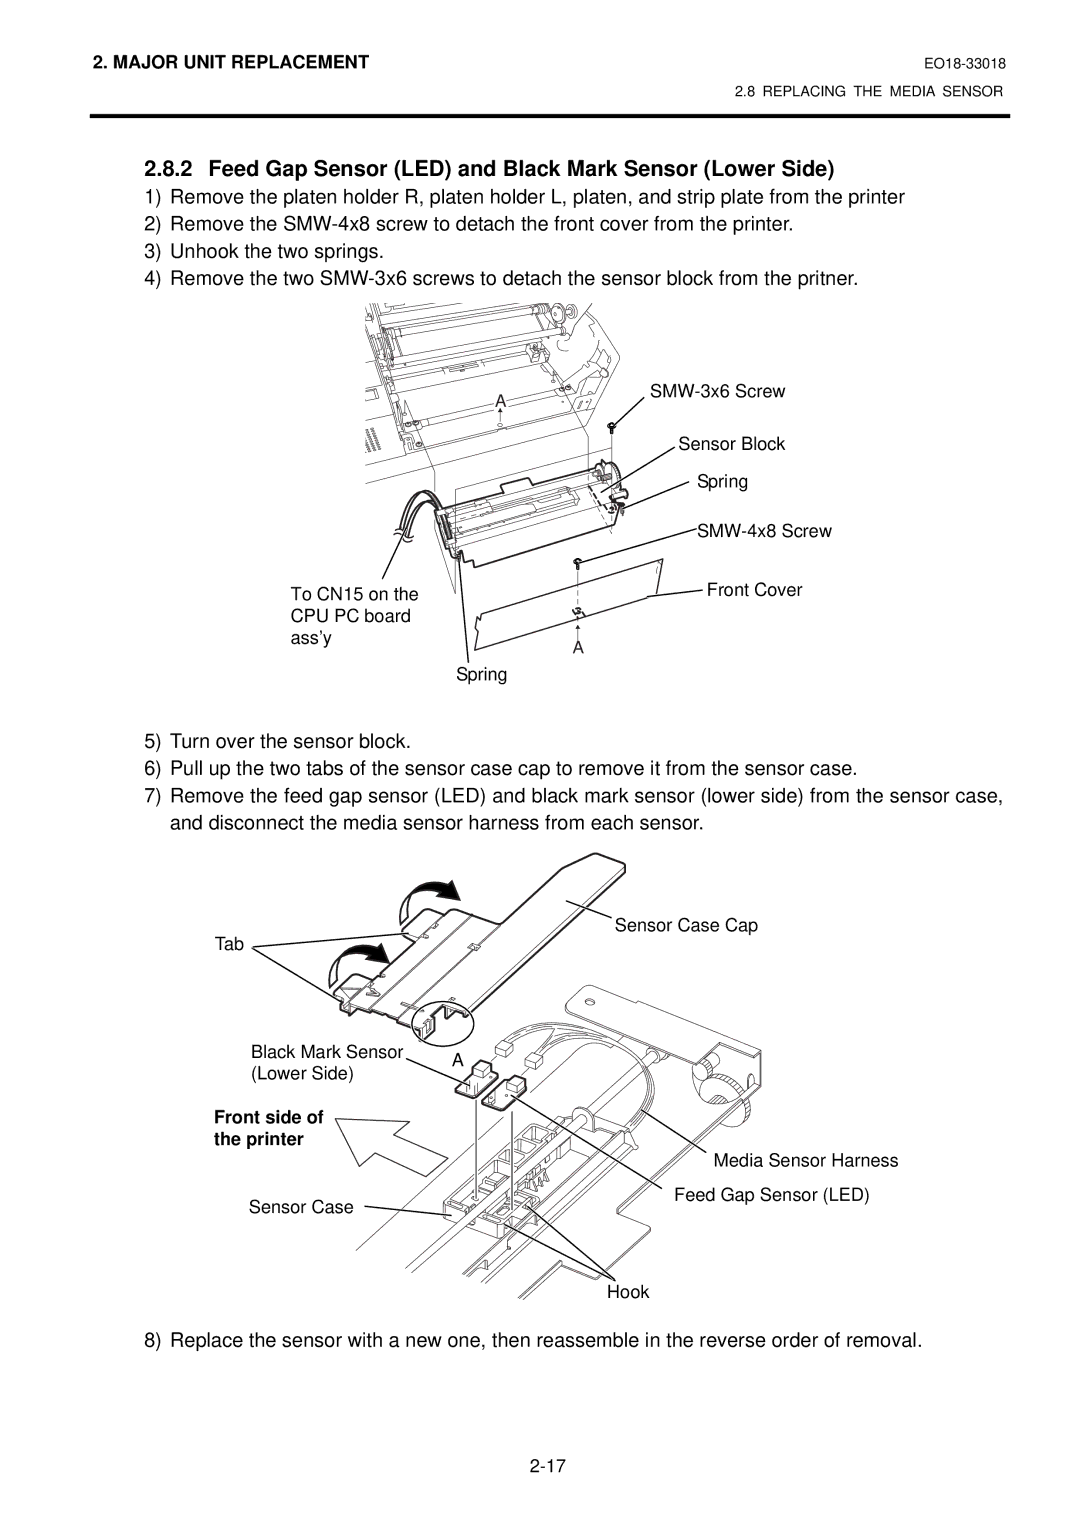
5)Turn over the sensor block.
6)Pull up the two tabs of the sensor case cap to remove it from the sensor case.
7)Remove the feed gap sensor (LED) and black mark sensor (lower side) from the sensor case, and disconnect the media sensor harness from each sensor.
Tab ![]()
Black Mark Sensor | A | |
(Lower Side) | ||
|
Front side of the printer
Sensor Case
Sensor Case Cap
Media Sensor Harness Feed Gap Sensor (LED)
Hook
8) Replace the sensor with a new one, then reassemble in the reverse order of removal.