INITIAL SETTING
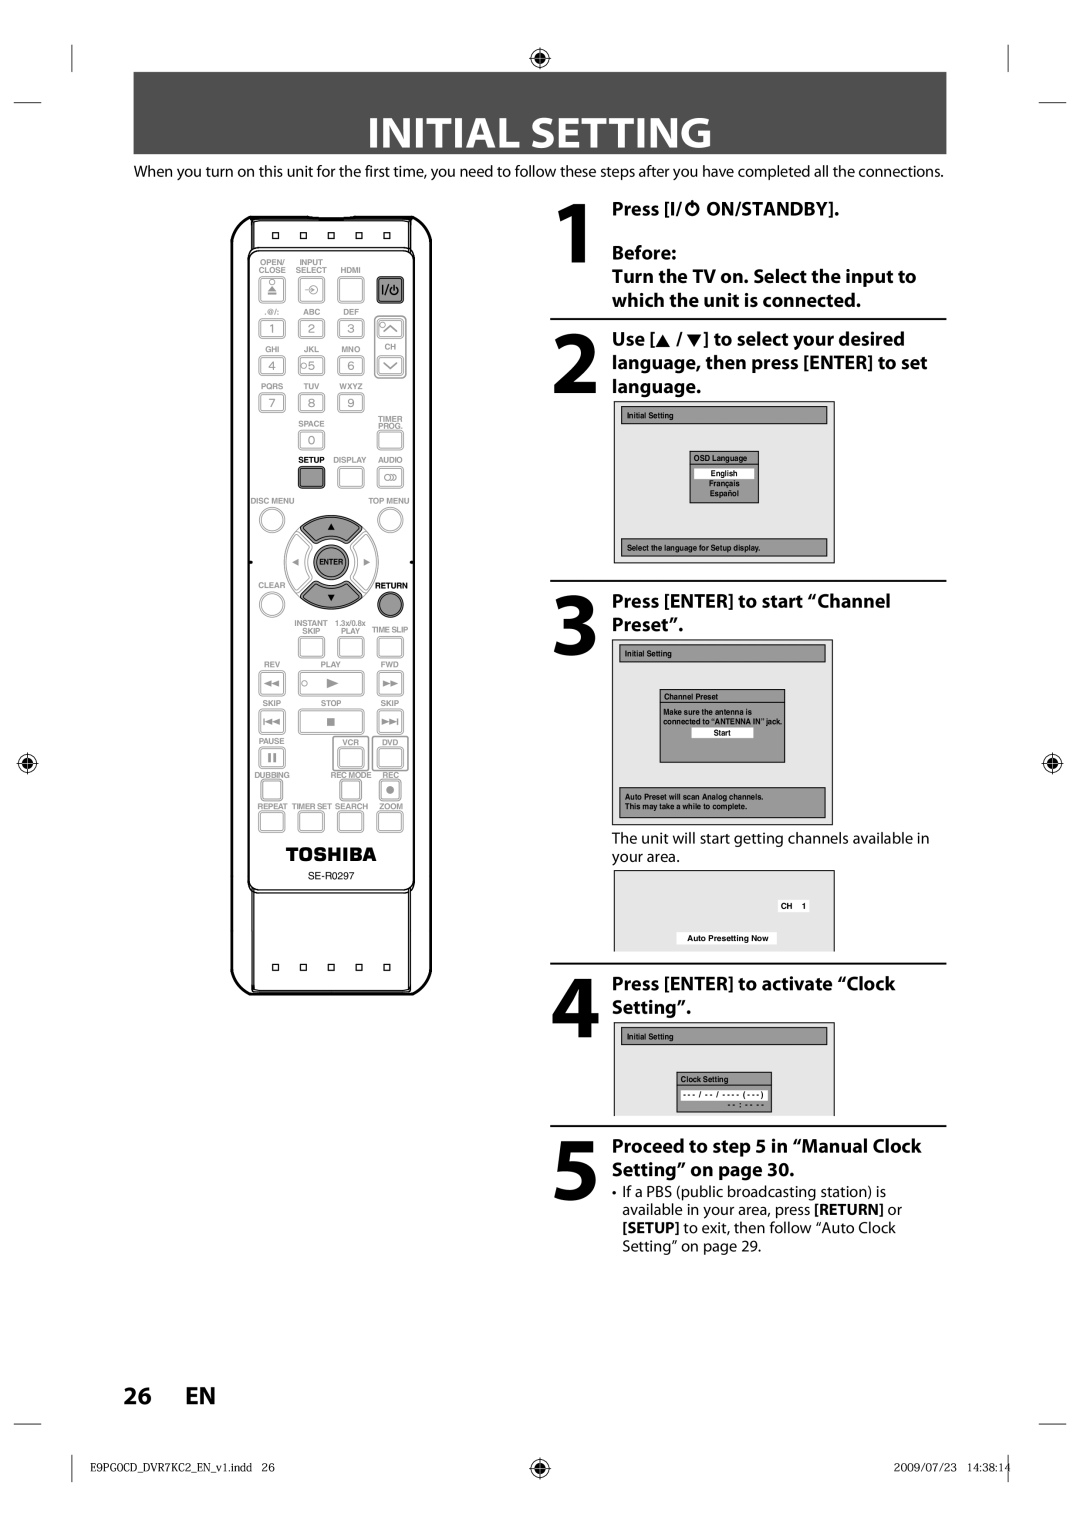
When you turn on this unit for the first time, you need to follow these steps after you have completed all the connections.
OPEN/ | INPUT | HDMI |
|
CLOSE | SELECT |
| |
.@/: | ABC | DEF |
|
GHI | JKL | MNO | CH |
PQRS | TUV | WXYZ |
|
| SPACE |
| TIMER |
|
| PROG. | |
| SETUP | DISPLAY | AUDIO |
DISC MENU |
| TOP MENU | |
| ENTER |
| |
CLEAR |
|
| RETURN |
| INSTANT | 1.3x/0.8x | TIME SLIP |
| SKIP | PLAY | |
REV | PLAY | FWD | |
SKIP | STOP | SKIP | |
PAUSE |
| VCR | DVD |
DUBBING |
| REC MODE | REC |
REPEAT TIMER SET SEARCH | ZOOM | ||
1Press [I/y ON/STANDBY].Before:
Turn the TV on. Select the input to which the unit is connected.
2Use [K / L] to select your desired language, then press [ENTER] to set language.
Initial Setting
OSD Language
English
Français
Español
Select the language for Setup display.
3Press [ENTER] to start “Channel
Preset”.Initial Setting
Channel Preset
Make sure the antenna is connected to “ANTENNA IN” jack.
Start
Auto Preset will scan Analog channels.
This may take a while to complete.
The unit will start getting channels available in your area.
CH 1
Auto Presetting Now
4Press [ENTER] to activate “Clock
Setting”.Initial Setting
| Clock | Setting |
|
|
|
| - - | - | ( - - - | ) |
|
|
| - - | : - - - | - |
|
|
|
|
|
|
|
5Proceed to step 5 in “Manual Clock Setting” on page 30.
•If a PBS (public broadcasting station) is available in your area, press [RETURN] or [SETUP] to exit, then follow “Auto Clock Setting” on page 29.
26 EN
E9PG0CD_DVR7KC2_EN_v1.indd 26
2009/07/23 14:38:14
