Operators Manual for Facsimile Function
Page
Contents
Troubleshooting
For U.S.A. only
Toshiba America Business SOLUTIONS, INC
For Canada only
Toshiba of Canada Limited
For NEW Zealand only
Toshiba Australia PTY Limited
Working environment
CE compliance
Preface
Features of the GD-1170
General Precautions
When power failure occurs
Disclaimer Notice
General Precautions
Before Using FAX
Description of Each Component
Main components STUDIO520/600/720/850
Configuration of options
FAX Unit GD-1170
Control panel
JOB Status button
Access button
Error lamp
Energy Saver button
Touch panel
Message area
Touch-button area
Clearing and canceling function selected
Connecting cables
TEL
Sending a FAX
Transmission Mode
Batch Transmission
Delayed Communications
Chain Dial Communication
Redialing
Preparation for Transmission
Operations
About Originals
Original size/Original scanning range
Original scanning range
Setting originals When setting originals on the glass
Lower the Reversing Automatic Document Feeder slowly
Page
Place them with their face up and slide
When using the Reversing Automatic Document Feeder
After aligning the edges of originals
Guides to the width of the originals
Setting the Transmission Conditions
Variety of optional functions
Quality TX
Subject, Body
Setting the transmission conditions Place the originals
Specify the remote Fax and press the Start button
Sending different width originals
Specify the remote Fax and press the Start button
Specify the remote Fax
Setting the scanning conditions for each
Place the original on the glass
Press the Start button
Originals are sent
Specifying the Remote Fax
Direct entry with digital keys
Address book entry
Group entry
Known ID button
Searching by ID number
Press the Address button to enter the address menu, then
Key in the desired ID number, and press the Enter button
Press the button for the remote Fax that you want to send to
Search Address button
Searching by address Search address
Press the Address button to enter the address menu. Press
Press the button you want to search
Page
Specifying the Remote Fax
Searching address using Ldap server
Press the DIR Service button
Specifying the Remote Fax
Multi-address transmission
Specify the remote Fax numbers
Specify all remote Faxes, then press the Start button
Confirming the destinations
Press the Destination button
Direct transmission by optional setting Place the originals
Sending Originals
Direct transmission
Specify the remote Fax
Memory transmission
Original will be scanned and stored in memory
Page
Off-hook transmission
Replace the handset of the external telephone
Sending a Tone
Sending a FAX
Receiving a FAX
Reception Modes
Reception Settings
Auto reception
Reception Settings
Manual reception
Setting RX printing during default setup
Relationship between Original and Paper
Acceptable size of paper
Paper priority when there is no same size paper
Priority
Folio
Checking and Canceling the Communications
Checking Transmission Result
Checking reserved transmissions
Releasing the department code error
Checking communication status log
Page
Address registration from send/receive log
Press the Enter button
When an original is being scanned on the original glass
Canceling Transmissions
Canceling transmissions during scanning
Press the Yes button
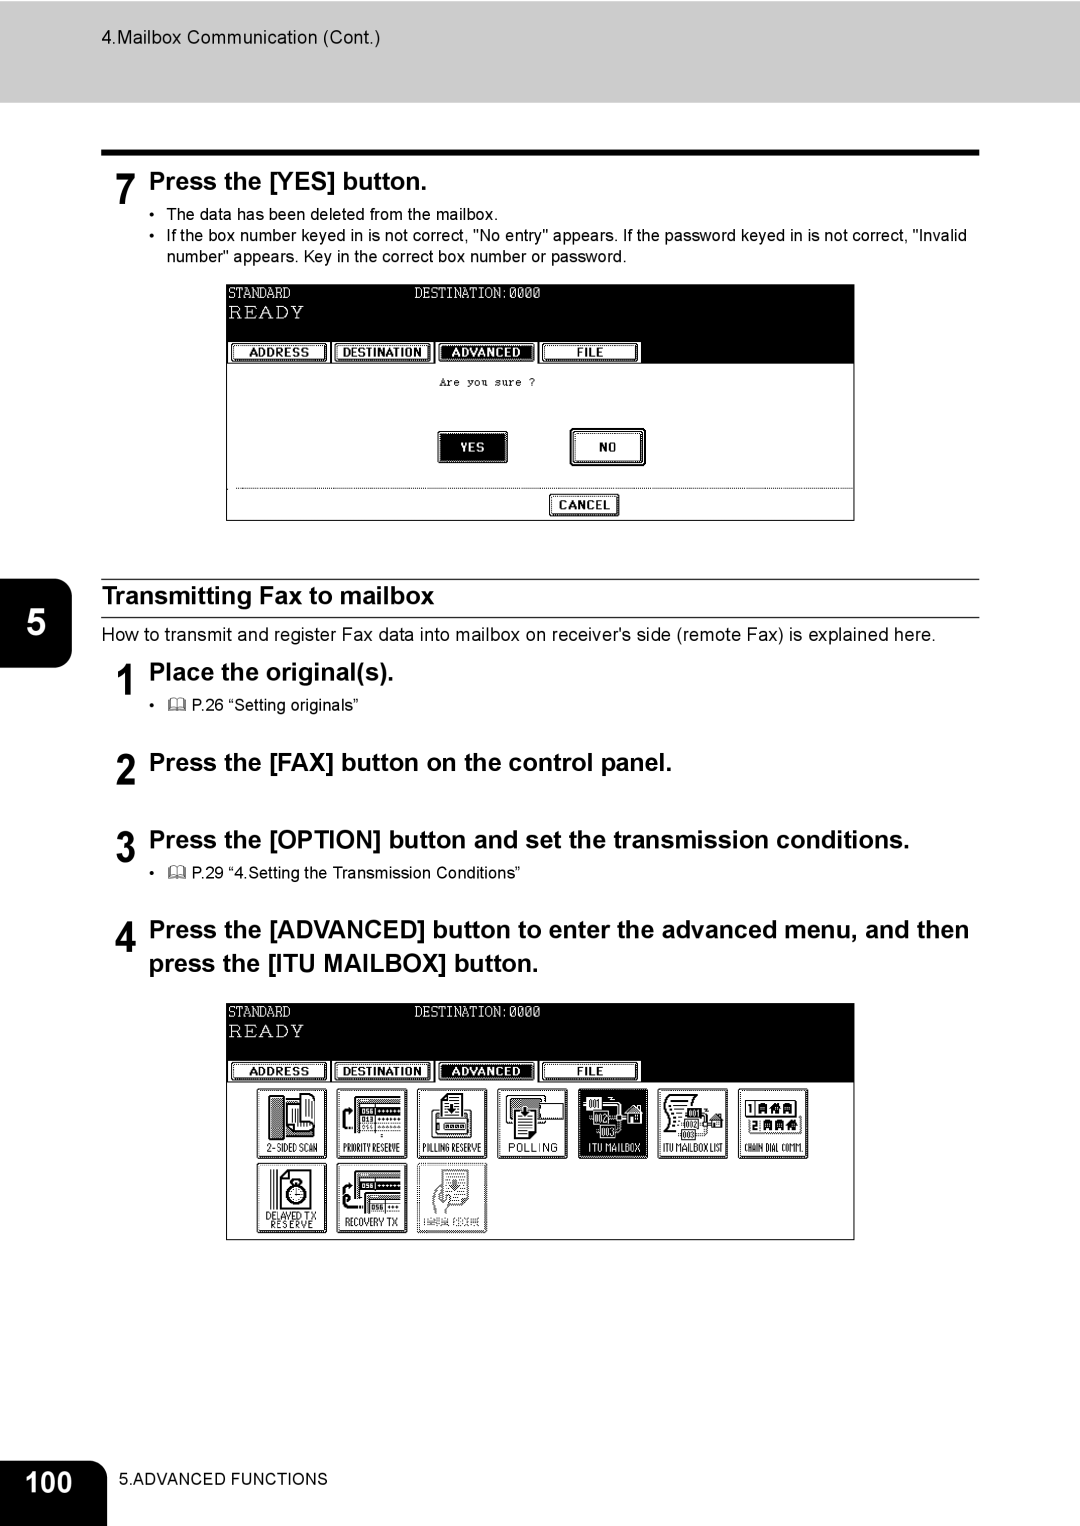
Press the YES button
Canceling reserved memory transmissions
Page
Canceling Transmissions
Advanced Functions
Transmitting 2-Sided Originals
Entering the Fax number P.37 Direct entry with digital keys
Priority Transmission
Press the Priority Reserve button
Press the Enter button Specify the remote Fax
Polling Communication
Polling transmission Place the originals
Polling Communication
Polling reception
Mailbox Communication
Example of multi-address relay mailbox
Page
Mailbox Communication
Setting up relay mailbox
Mailbox Communication
For the relay destination transmission report, see
Mailbox Communication
Deleting mailbox
Press the Enter button Press the YES button
Modifying relay mailbox
Press the Enter button
Mailbox has been set
Printing Fax out of mailbox
Inputting data in confidential / bulletin board mailbox
Press the Enter button
Canceling data in mailbox
100
Transmitting Fax to mailbox
101
10Press the Start button
102
Polling data out of mailbox
103
Chain Dial Communication
104
Press the Chain Dial COMM. button
105
Press the Delayed TX Reserve button
Delayed Transmission Reservation
Using delayed transmission reservation Place the originals
106
Releasing delayed transmission reservation
107
108
Press the Release button
Recovery Transmission
109
Press the Send button
110
Onramp Gateway
111
Onramp gateway overview
Setting relay mailbox
112
Offramp Gateway
113
Offramp gateway overview
To receive an E-mail using Smtp
114
Transmitting data in offramp gateway
Save as File
115
Select the location where the data is saved
116
117
Select the file format
118
Printing Lists and Reports
119
Manually Printing Lists & Reports
120
121
Error code table
Error Code Description Remedy
122
123
Automatically Printing Lists & Reports
124
Automatically printing lists & reports
125
Auto ON, OFF
126
Select the desired number either 40 or 120 communications
127
Press the on or OFF button
Press the User Functions button on the control panel
128
Press the LIST/REPORT button
129
Press the Enter button Setting the reception list output
130
Press the LIST/REPORT button Press the Report Setting button
131
132
Lists/Reports Samples
133
Transmission journal Manually and automatically output
Dept Mode
134
135
Reception journal Manually and automatically output
136
Reservation list Manually output
137
Mailbox/relay box report Manually output
138
Memory transmission report Automatically output
139
Transmission report Automatically output
140
Multi transmission report Automatically output
141
Polling report Automatically output
142
Mailbox reception report Automatically output
Relay station report Automatically output
143
144
Relay transmission relay station report Automatically output
145
Relay transmission end terminal report Automatically output
Power failure list Automatically output
146
Registering and Setting Items
147
Setting the Initial Transmission Mode
148
RTI recording ON, OFF
149
Registering the Terminal ID
150
151
152
Press the FAX Number button
153
Key in the terminal number, and then press the Enter button
154
Monitor tone volume
Setting the Reception Mode
Reception mode
155
156
157
Discard Printing on default setting
Setting RX Printing
Setting RX printing
RX reduction printing on default setting
159
Press the FAX button Press the RX Print button
160
Setting duplex printing
161
162
163
Setting the rotate sort Alternation
164
165
Setting Recovery Transmission
166
167
168
Troubleshooting
169
When The Following Messages Appear
Message Cause Remedy
Transmission Trouble
171
Trouble Check Point
Reception Trouble
Specifications
173
Main Specifications
LD, LG, LT, LT-R, ST, ST-R, Comp
Index
175
Precautions for using the Reversing
176
Setting up mailbox for confidential
177
178
Page
GD-1170
Operators Manual for Facsimile Function