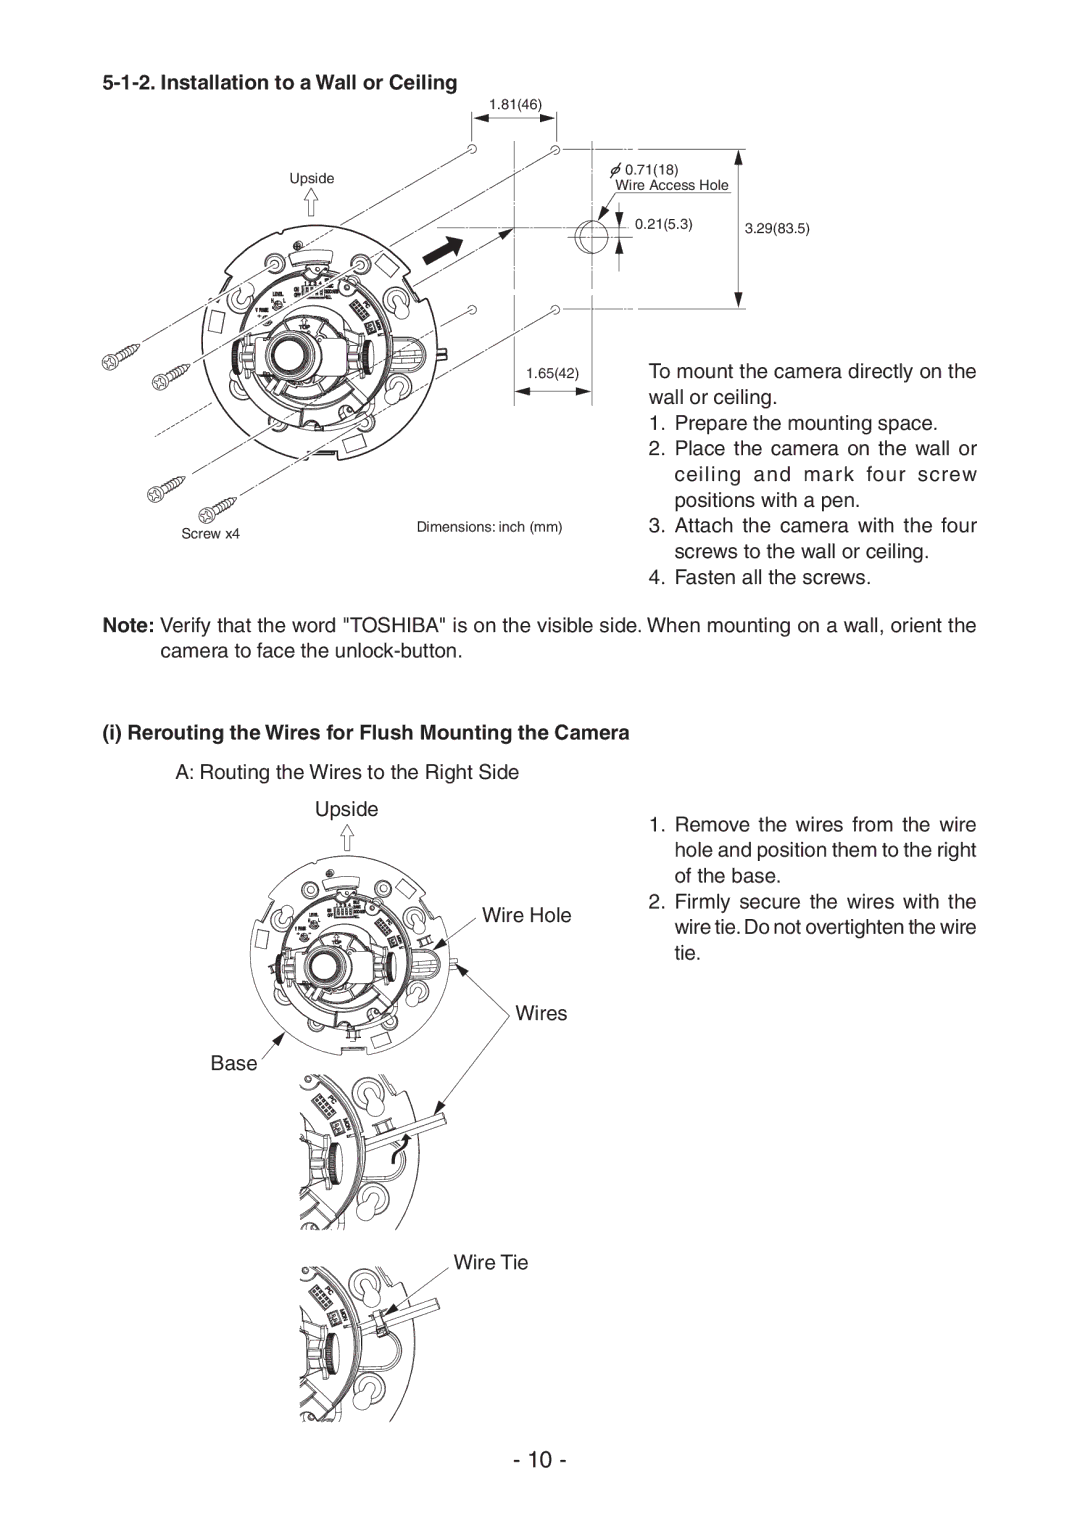
5-1-2. Installation to a Wall or Ceiling
1.81(46)
Upside
1.65(42)
Screw x4 | Dimensions: inch (mm) |
|
![]() 0.71(18)
0.71(18)
Wire Access Hole
0.21(5.3) | 3.29(83.5) |
To mount the camera directly on the wall or ceiling.
1.Prepare the mounting space.
2.Place the camera on the wall or ceiling and mark four screw positions with a pen.
3.Attach the camera with the four screws to the wall or ceiling.
4.Fasten all the screws.
Note: Verify that the word "TOSHIBA" is on the visible side. When mounting on a wall, orient the camera to face the
(i) Rerouting the Wires for Flush Mounting the Camera
A:Routing the Wires to the Right Side Upside
Wire Hole
![]() Wires
Wires
1.Remove the wires from the wire hole and position them to the right of the base.
2.Firmly secure the wires with the wire tie. Do not overtighten the wire tie.
Base
Wire Tie
- 10 -