5-2. Adjusting the Viewing Angle
| Tilt rotation | 5Focus Lock Lever | Far (∞) | |
|
| |||
|
|
| Tele | |
|
|
|
| |
2Tilt Lock |
|
|
|
|
|
| Horizontal |
| Near |
|
|
| Wide | |
|
| rotation |
| |
|
|
|
| |
1Pan Lock |
| 4Horizontal |
| 3Zoom Lock |
|
| Lever | ||
|
| ADJ Ring |
| |
|
|
|
| |
|
| 2Tilt Lock | Top mark |
|
| Pan |
|
| |
|
|
|
| |
|
|
| To Monitor | |
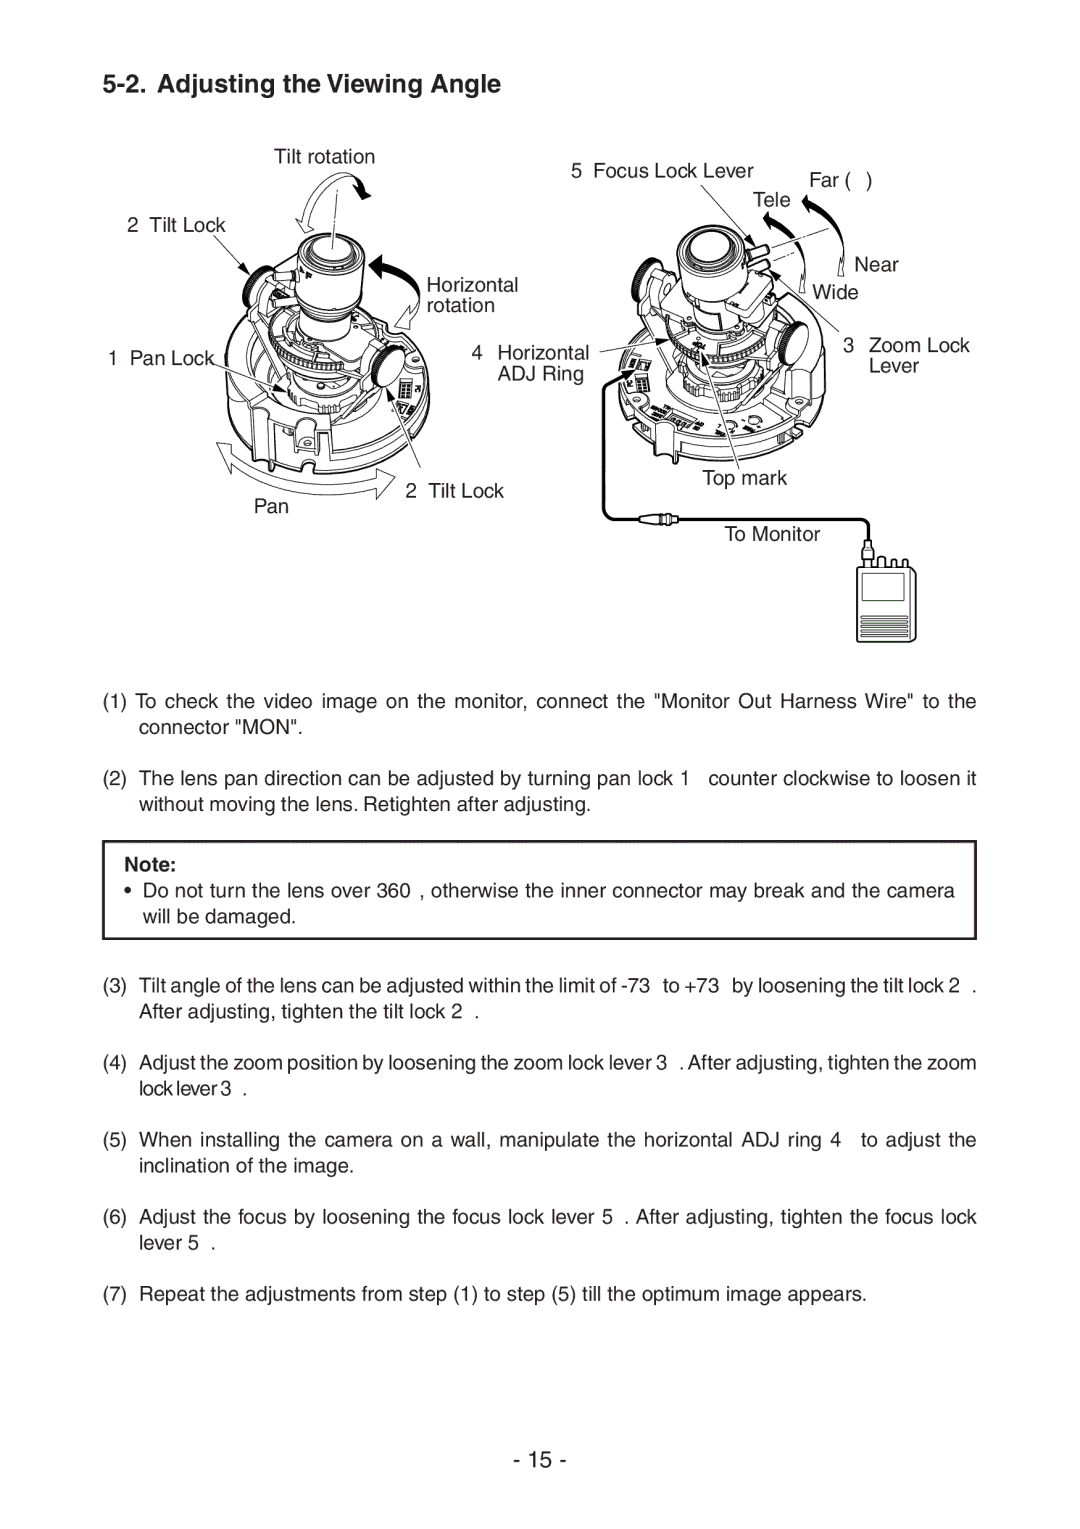
(1)To check the video image on the monitor, connect the "Monitor Out Harness Wire" to the connector "MON".
(2)The lens pan direction can be adjusted by turning pan lock 1 counter clockwise to loosen it without moving the lens. Retighten after adjusting.
Note:
¥Do not turn the lens over 360°, otherwise the inner connector may break and the camera will be damaged.
(3)Tilt angle of the lens can be adjusted within the limit of
(4)Adjust the zoom position by loosening the zoom lock lever 3. After adjusting, tighten the zoom lock lever 3.
(5)When installing the camera on a wall, manipulate the horizontal ADJ ring 4 to adjust the inclination of the image.
(6)Adjust the focus by loosening the focus lock lever 5. After adjusting, tighten the focus lock lever 5.
(7)Repeat the adjustments from step (1) to step (5) till the optimum image appears.
- 15 -
