Installation
Hardware Installation
Please verify that your product package contains all the accessories listed in the Package Contents listed on page 11. Depending on the user’s application, an Ethernet cable may be needed. The Ethernet cable should meet the specs of UTP Category 5 or higher.
Hardware Installation is shown in the Quick Start Guide(QSG). Please refer to page 12 of the QSG.
Network Deployment
In this user’s manual, “User” refers to whoever has access to the Network Camera, and “Administrator” refers to the person who can configure the Network Camera and grant user access to the camera.
Network Deployment is shown in the Quick Start Guide(QSG). Please refer to page 16 of the QSG.
Setting up the Network Camera over the Internet
There are several ways to set up the Network Camera over the Internet. The first way is to set up the Network Camera behind a router. The second way is to utilize a static IP. The third way is to use PPPoE.
Internet connection via a router
Before setting up the Network Camera over the Internet, make sure you have a router and follow the steps below.
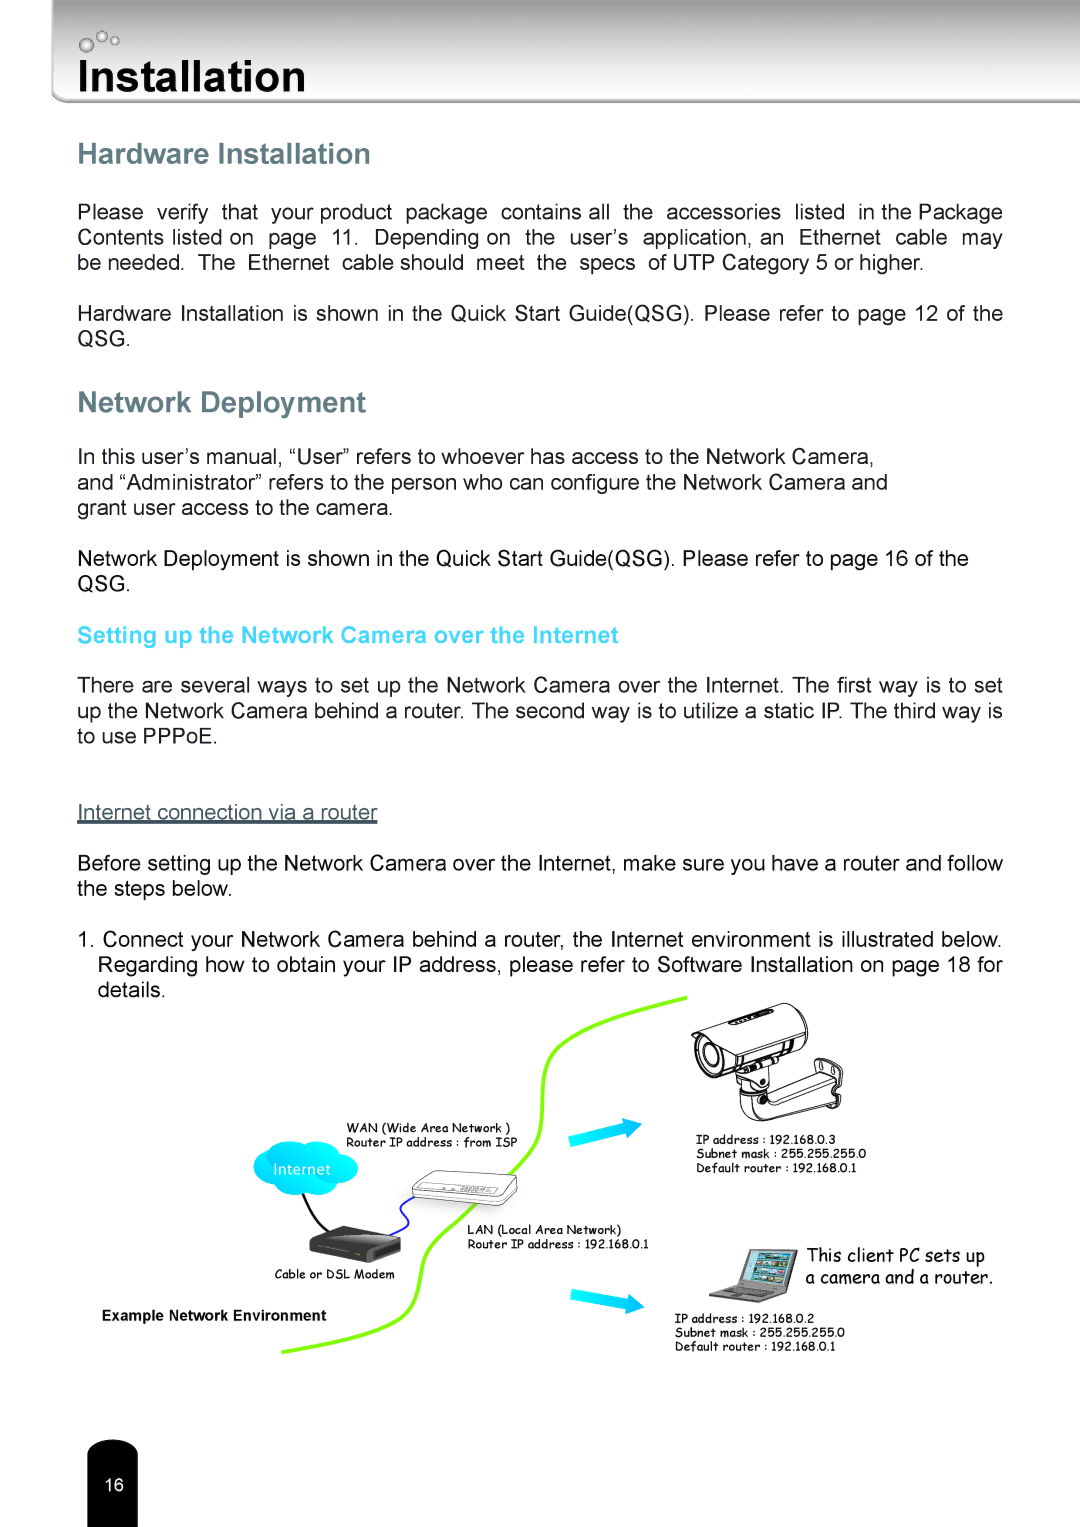
1.Connect your Network Camera behind a router, the Internet environment is illustrated below. Regarding how to obtain your IP address, please refer to Software Installation on page 18 for details.
WAN (Wide Area Network )
Router IP address : from ISP
Internet
LAN (Local Area Network)
Router IP address : 192.168.0.1
Cable or DSL Modem
Example Network Environment
IP address : 192.168.0.3
Subnet mask : 255.255.255.0
Default router : 192.168.0.1
This client PC sets up a camera and a router.
IP address : 192.168.0.2
Subnet mask : 255.255.255.0
Default router : 192.168.0.1
16