Lamp replacement (Continued)
1Unplug power cord.
2Wait until lamp is sufficiently cooled.
Wait for at least 1 hour.
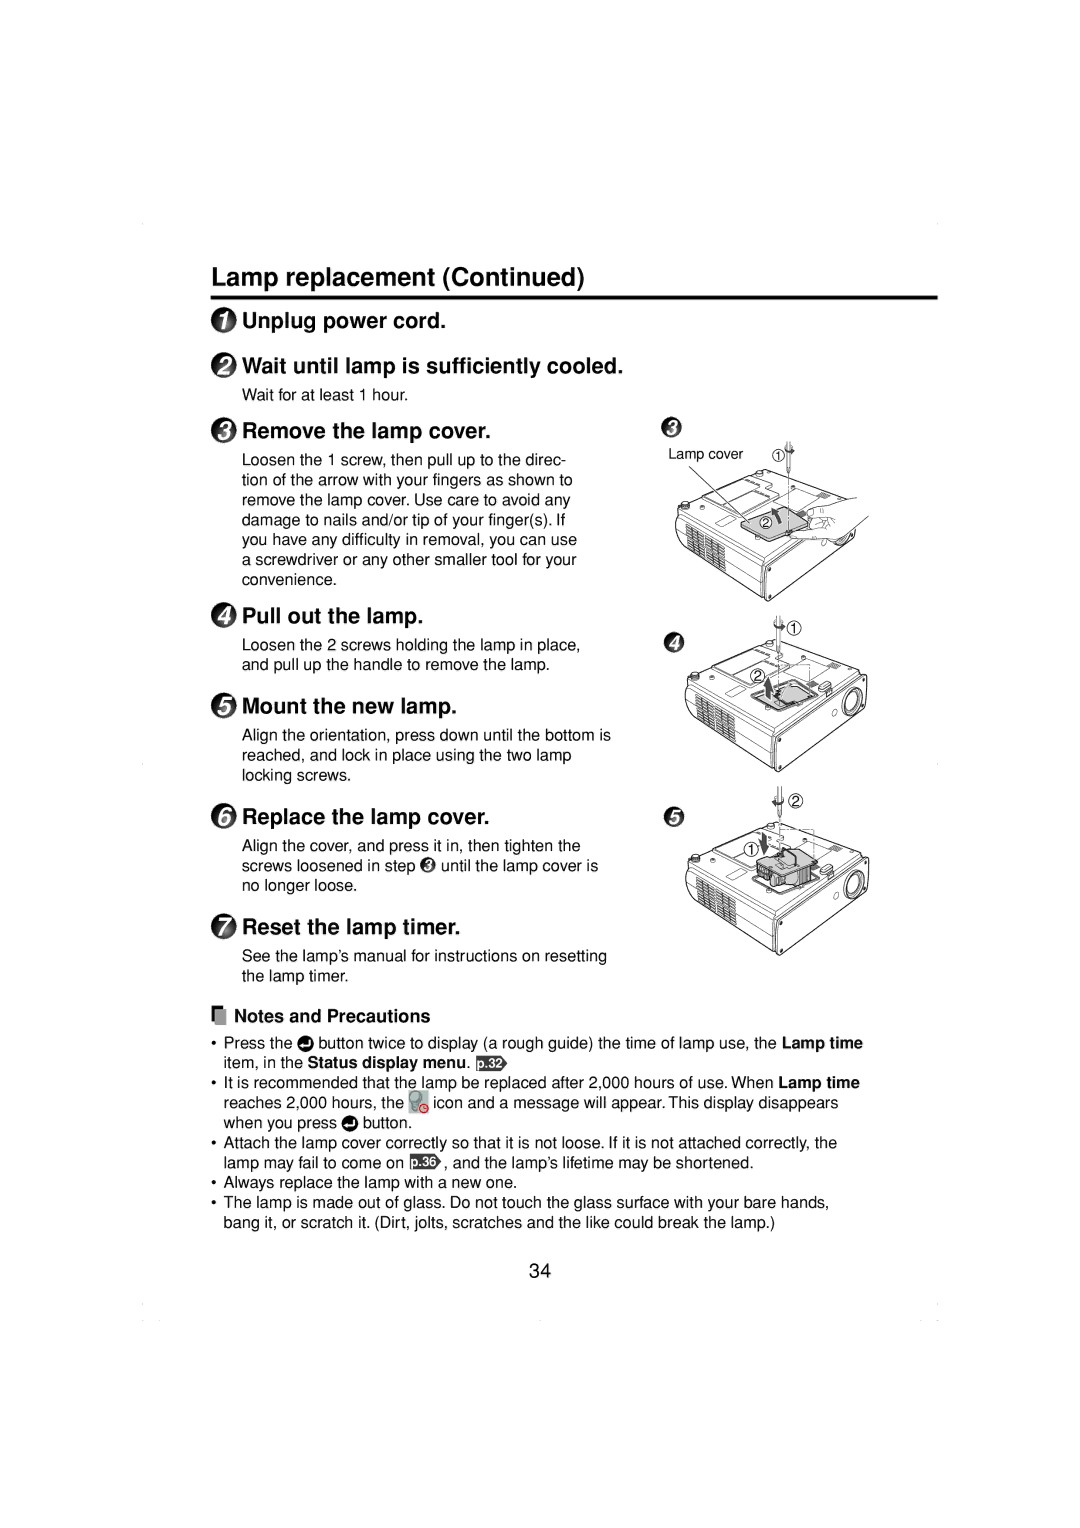
3Remove the lamp cover.
Loosen the 1 screw, then pull up to the direc- tion of the arrow with your fingers as shown to remove the lamp cover. Use care to avoid any damage to nails and/or tip of your finger(s). If you have any difficulty in removal, you can use a screwdriver or any other smaller tool for your convenience.
3
Lamp cover | 1 |
2![]()
4 | Pull out the lamp. | 1 |
| Loosen the 2 screws holding the lamp in place, | 4 |
| and pull up the handle to remove the lamp. | 2 |
|
| |
5 | Mount the new lamp. |
|
Align the orientation, press down until the bottom is reached, and lock in place using the two lamp locking screws.
6 Replace the lamp cover. | 2 |
5 | |
Align the cover, and press it in, then tighten the | 1 |
screws loosened in step 3 until the lamp cover is |
|
no longer loose. |
|
7Reset the lamp timer.
See the lamp’s manual for instructions on resetting the lamp timer.
![]() Notes and Precautions
Notes and Precautions
•Press the![]() button twice to display (a rough guide) the time of lamp use, the Lamp time item, in the Status display menu. p.32
button twice to display (a rough guide) the time of lamp use, the Lamp time item, in the Status display menu. p.32
•It is recommended that the lamp be replaced after 2,000 hours of use. When Lamp time reaches 2,000 hours, the ![]() icon and a message will appear. This display disappears when you press
icon and a message will appear. This display disappears when you press ![]() button.
button.
•Attach the lamp cover correctly so that it is not loose. If it is not attached correctly, the lamp may fail to come on p.36 , and the lamp’s lifetime may be shortened.
•Always replace the lamp with a new one.
•The lamp is made out of glass. Do not touch the glass surface with your bare hands, bang it, or scratch it. (Dirt, jolts, scratches and the like could break the lamp.)
34
