How to use the supplied software

Please read this chapter if the model you purchased includes a PC card slot.

This chapter briefly describes how to use supplied software applications other than the Wireless utility.

How to use the Projector Configuration Tool

The Projector Configuration Tool is a software utility that allows you to set up the projector for Infrastructure mode communications using a wireless LAN PC card. When using this application for the first time, conduct Preparation p.34 , and start with the computer in Ad hoc transmission mode.

1Check MAC address.

The MAC address is a unique address assigned to the wireless LAN PC card. Display the MAC address on the screen, referring to “Displaying Informationp.32 . Note down the address for future use.

2Launch the Projector Configuration Tool.

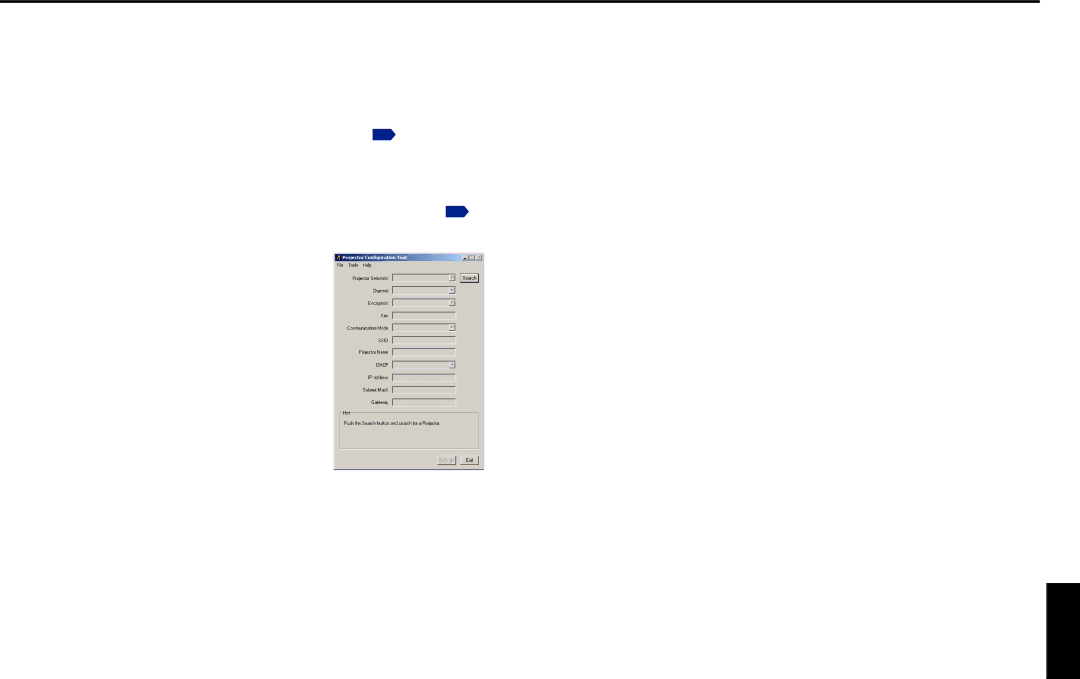
Upon launch, the window shown in the figure to the right appears on the computer screen.

3Click on the Browse button.

The computer starts searching for projectors. When it finds one, “Please select” is displayed in the Projector Selection field.

4Select a projector.

Click on the button for the Projector Selection field, then from the pull-down list that is displayed, select

the project with the MAC address you noted down in step 1 .

When a projector is selected, the computer obtains information from that projector, and displays the results in the boxes of the window.

Here, the following is possible:

From the File menu, select Save As..., and save the pre-modification settings on the computer.

From the File menu, select Open, and apply an existing settings file to the projector.

5Configure the projector.

[Channel]

A channel can be changed by your choice. However, it will be changed automatically to the other channel when the network group having the same SSID exists already in the possible communication area.

[Encryption]

Click on the button to select [Off], [64 bit], or [128 bit].

[Key]

This accepts input if Encryption is set to other than Off (input is required). Input a value from the keyboard.

[Communication mode]

Select Infrastructure by clicking the button.

[SSID]

This is an ID code for connecting to specific individuals over a wireless LAN. This field accepts input when set to Infrastructure Transmission Mode. Set the SSID to the same value as the access point. In factory shipment, this is set to DPJ.

[Projector name]

It is recommended this is set to prevent wrong transmission.

[DHCP]

Specify by clicking the button. If this is set to Used, the IP Address, Subnet Mask, and Gateway below are set automatically.

Consult with a network administrator for the settings below, if DHCP is not used.

[IP Address]

An IP (Internet Protocol) is a data communication protocol. The delivery destination is an IP address.

[Subnet Mask]

This value is to set a limit on the range of IP addresses, and set up a number of sub- networks.

[Gateway]

This is a relay point for connecting different types of network.

6Press the Settings button.

Communication begins, and the computer configures the projector. When setup is finished, a message appears in the window telling you than setup is complete.

From the File menu, select Save As..., and save the settings file on the computer.

Others

60

61

Page 31
Image 31
Toshiba TLP-T72 owner manual How to use the supplied software, How to use the Projector Configuration Tool

TLP-T72 specifications

The Toshiba TLP-T72 is a state-of-the-art thermal transfer printer designed to meet the demanding needs of various industries, including healthcare, retail, and manufacturing. This printer is renowned for its reliability, efficiency, and high-quality output, making it a popular choice for businesses looking to enhance their label printing capabilities.

One of the standout features of the TLP-T72 is its advanced thermal transfer technology. This technology utilizes a heated print head and a ribbon to transfer ink onto various label materials, providing sharp graphics and clear text. The transfer method not only improves the durability of printed labels but also ensures resistance to smudging and fading, making it ideal for long-term use.

The printer is equipped with a high-resolution print head, capable of producing stunning print quality at resolutions up to 300 dpi. This means users can create intricate designs, barcodes, and images that are easily readable and visually appealing. With a print speed of up to 6 inches per second, the TLP-T72 can efficiently handle high-volume printing tasks without compromising quality.

In terms of connectivity, the TLP-T72 offers a range of options, including USB, Serial, and Ethernet interfaces, allowing for seamless integration into existing systems. This flexibility makes it suitable for diverse operational environments, ensuring that users can easily connect and manage the printer through various channels.

Another notable feature of the TLP-T72 is its user-friendly design. The printer comes with an easy-to-navigate control panel, which simplifies operation and minimizes the learning curve for new users. Additionally, the printer supports various label formats and sizes, making it versatile for different applications ranging from shipping labels to product tags.

The TLP-T72 also supports a range of software solutions, enhancing its functionality and offering users the ability to create custom labels tailored to their specific needs. This adaptability is further complemented by its ability to handle both direct thermal and thermal transfer printing, providing users with options depending on their requirements.

In summary, the Toshiba TLP-T72 combines advanced thermal transfer technology, high print quality, and versatile connectivity, making it an essential tool for any business looking to streamline its labeling process. Its user-friendly design and robust performance characteristics reinforce its status as a reliable choice in the competitive landscape of label printers.