Installation
Vacuum pumping
For this operation, use a vane pump making it possible to obtain a partial vacuum or 100 microns or less.
When pumping out to create a vacuum, it is important to connect the pump to the high and low pressure sides of the system. Follow the pump manufacturer's recommendations.The pipes used to connect the pump to the system must be made of copper, with the largest diameter possible. A large pipe diameter reduces flow resistance and shortens the duration of the vacuum pumping.
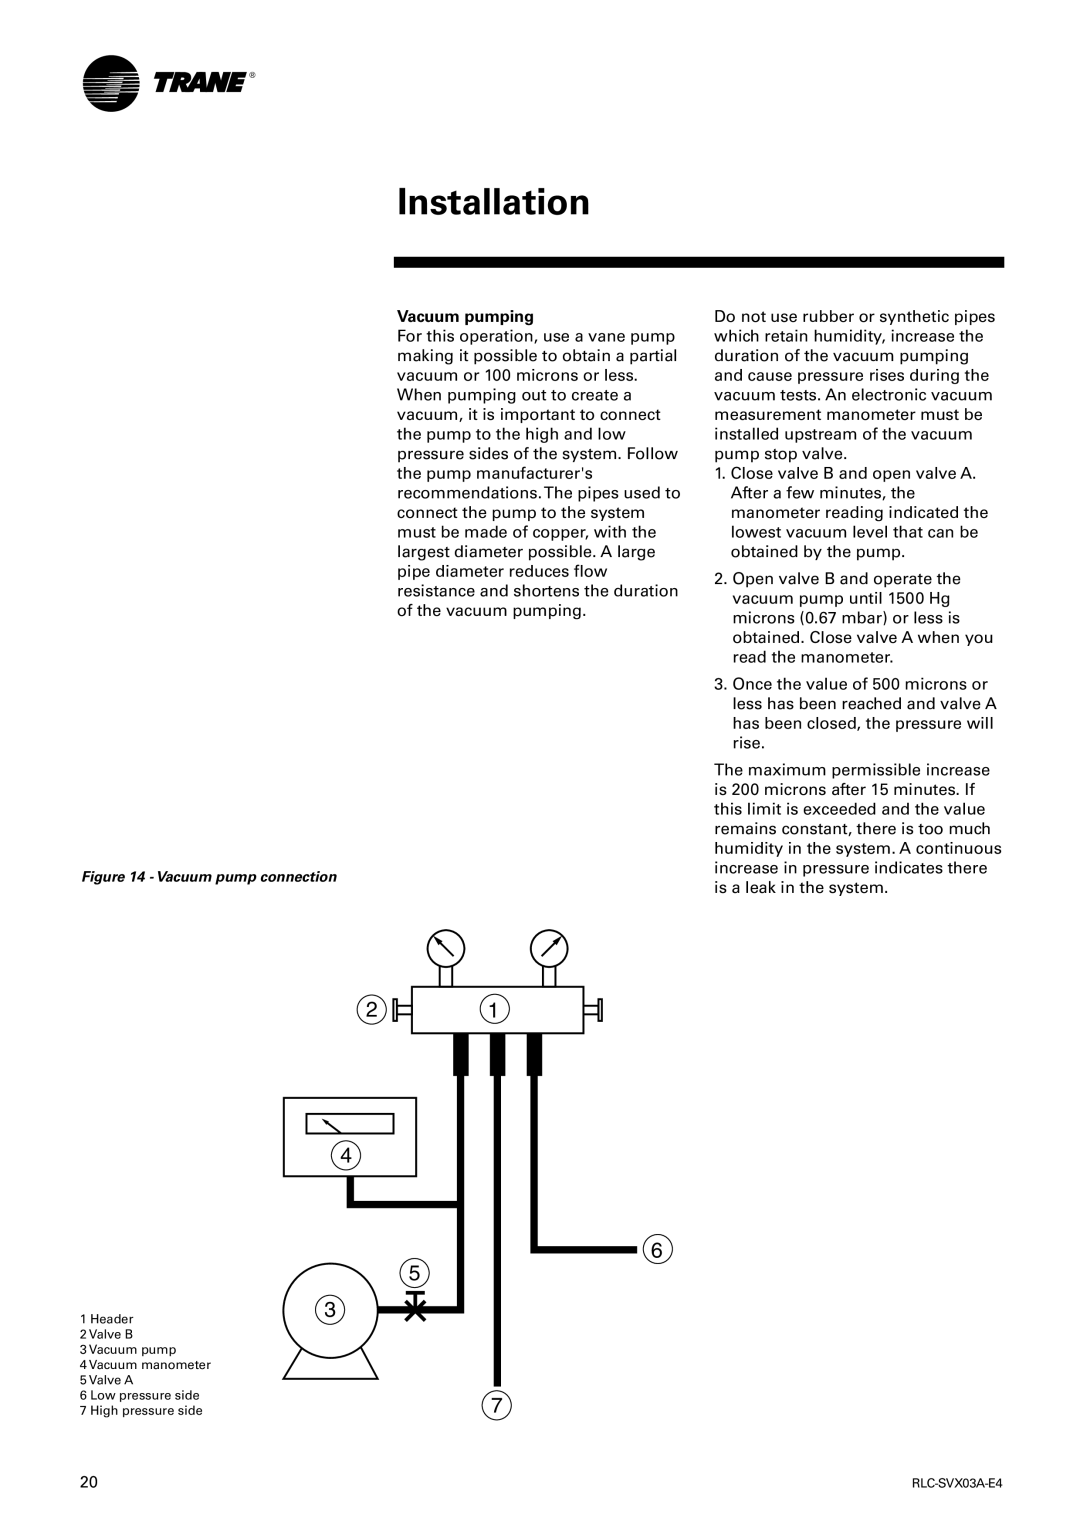
Figure 14 - Vacuum pump connection
Do not use rubber or synthetic pipes which retain humidity, increase the duration of the vacuum pumping and cause pressure rises during the vacuum tests. An electronic vacuum measurement manometer must be installed upstream of the vacuum pump stop valve.
1.Close valve B and open valve A. After a few minutes, the manometer reading indicated the lowest vacuum level that can be obtained by the pump.
2.Open valve B and operate the vacuum pump until 1500 Hg microns (0.67 mbar) or less is obtained. Close valve A when you read the manometer.
3.Once the value of 500 microns or less has been reached and valve A has been closed, the pressure will rise.
The maximum permissible increase is 200 microns after 15 minutes. If this limit is exceeded and the value remains constant, there is too much humidity in the system. A continuous increase in pressure indicates there is a leak in the system.
2 | 1 |
4
| 5 |
| |
1 Header | 3 |
|
|
|
| ||
|
| ||
|
|
| |
2 Valve B |
|
|
|
3 Vacuum pump |
|
|
|
4 Vacuum manometer |
|
|
|
5 Valve A |
|
|
|
6 Low pressure side | 7 | ||
7 High pressure side | |||
6
20 |