STEP 9
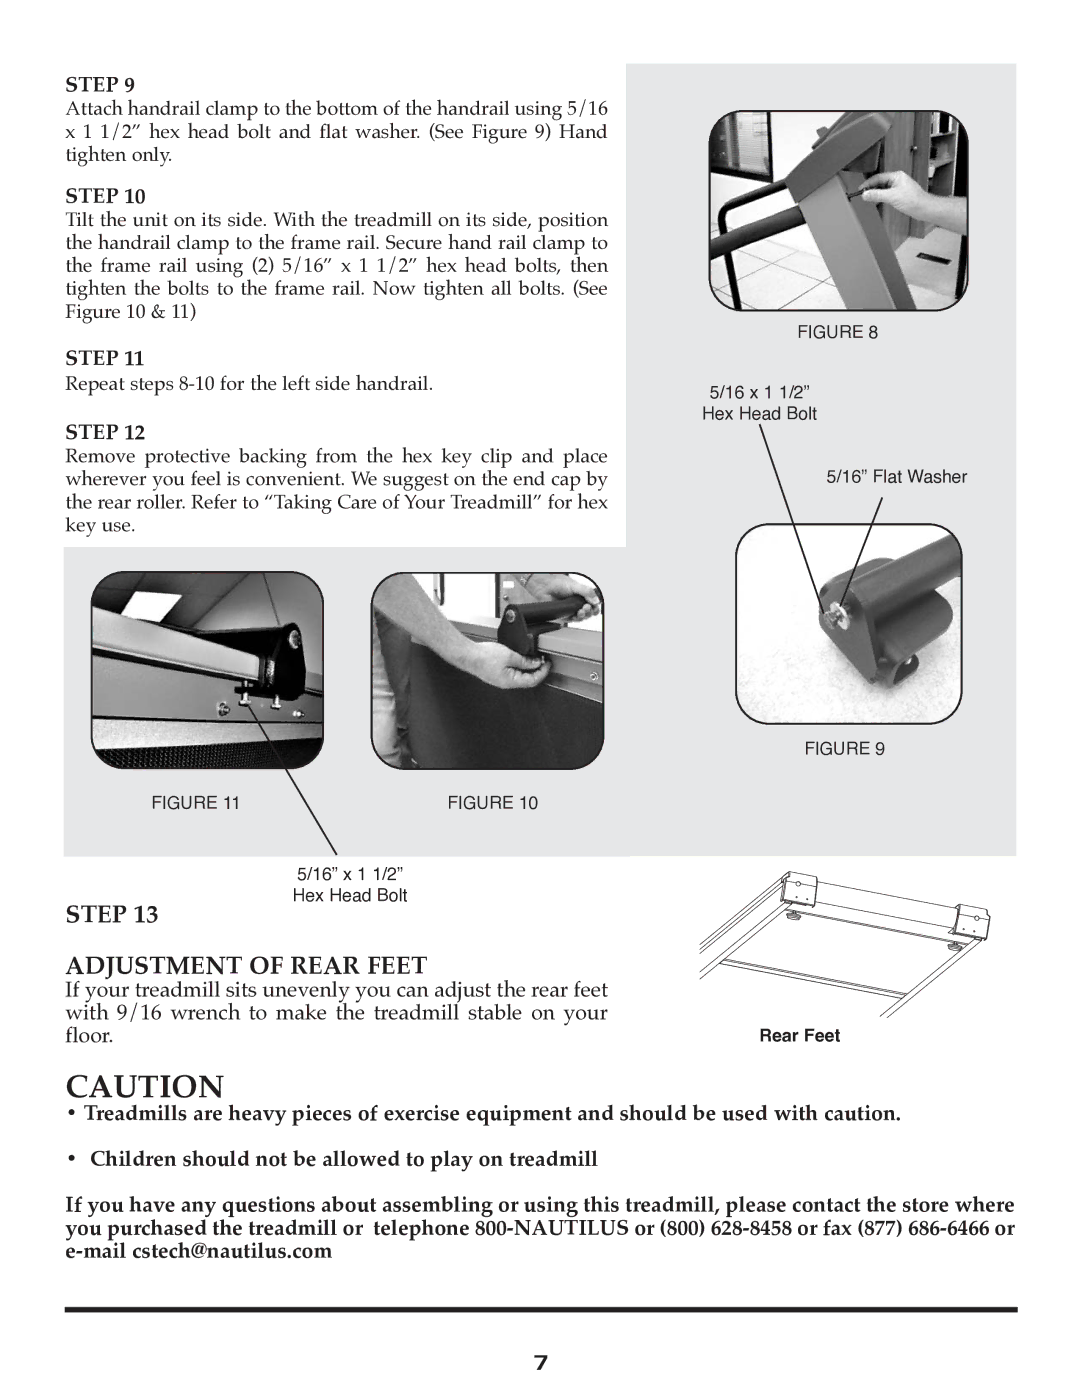
Attach handrail clamp to the bottom of the handrail using 5/16 x 1 1/2” hex head bolt and flat washer. (See Figure 9) Hand tighten only.
STEP 10
Tilt the unit on its side. With the treadmill on its side, position the handrail clamp to the frame rail. Secure hand rail clamp to the frame rail using (2) 5/16” x 1 1/2” hex head bolts, then tighten the bolts to the frame rail. Now tighten all bolts. (See Figure 10 & 11)
STEP 11
Repeat steps
STEP 12
Remove protective backing from the hex key clip and place wherever you feel is convenient. We suggest on the end cap by the rear roller. Refer to “Taking Care of Your Treadmill” for hex key use.
FIGURE 11 | FIGURE 10 |
|
|
5/16” x 1 1/2” Hex Head Bolt
STEP 13
ADJUSTMENT OF REAR FEET
If your treadmill sits unevenly you can adjust the rear feet with 9/16 wrench to make the treadmill stable on your floor.
FIGURE 8
5/16 x 1 1/2”
Hex Head Bolt
5/16” Flat Washer
FIGURE 9
Rear Feet
CAUTION
•Treadmills are heavy pieces of exercise equipment and should be used with caution.
•Children should not be allowed to play on treadmill
If you have any questions about assembling or using this treadmill, please contact the store where you purchased the treadmill or telephone
7