™ | 2015WC/2015WCOL Wine Captain® |
|
|
Side-By-Side Installation Instructions
4 Prepare Racks and Door Frame
For a complete refreshment center, install your 2015WC or 2015WCOL unit beside a
•
For example:
Placing a 2015 Wine Captain® next to a 2015 series unit would require a
Placing a 2015 Wine Captain® next to a 2075 series unit would require a
•No trim kit is required. However,
•Units must operate from separate, properly grounded electrical receptacles placed according to each unit’s Electrical Specifications.
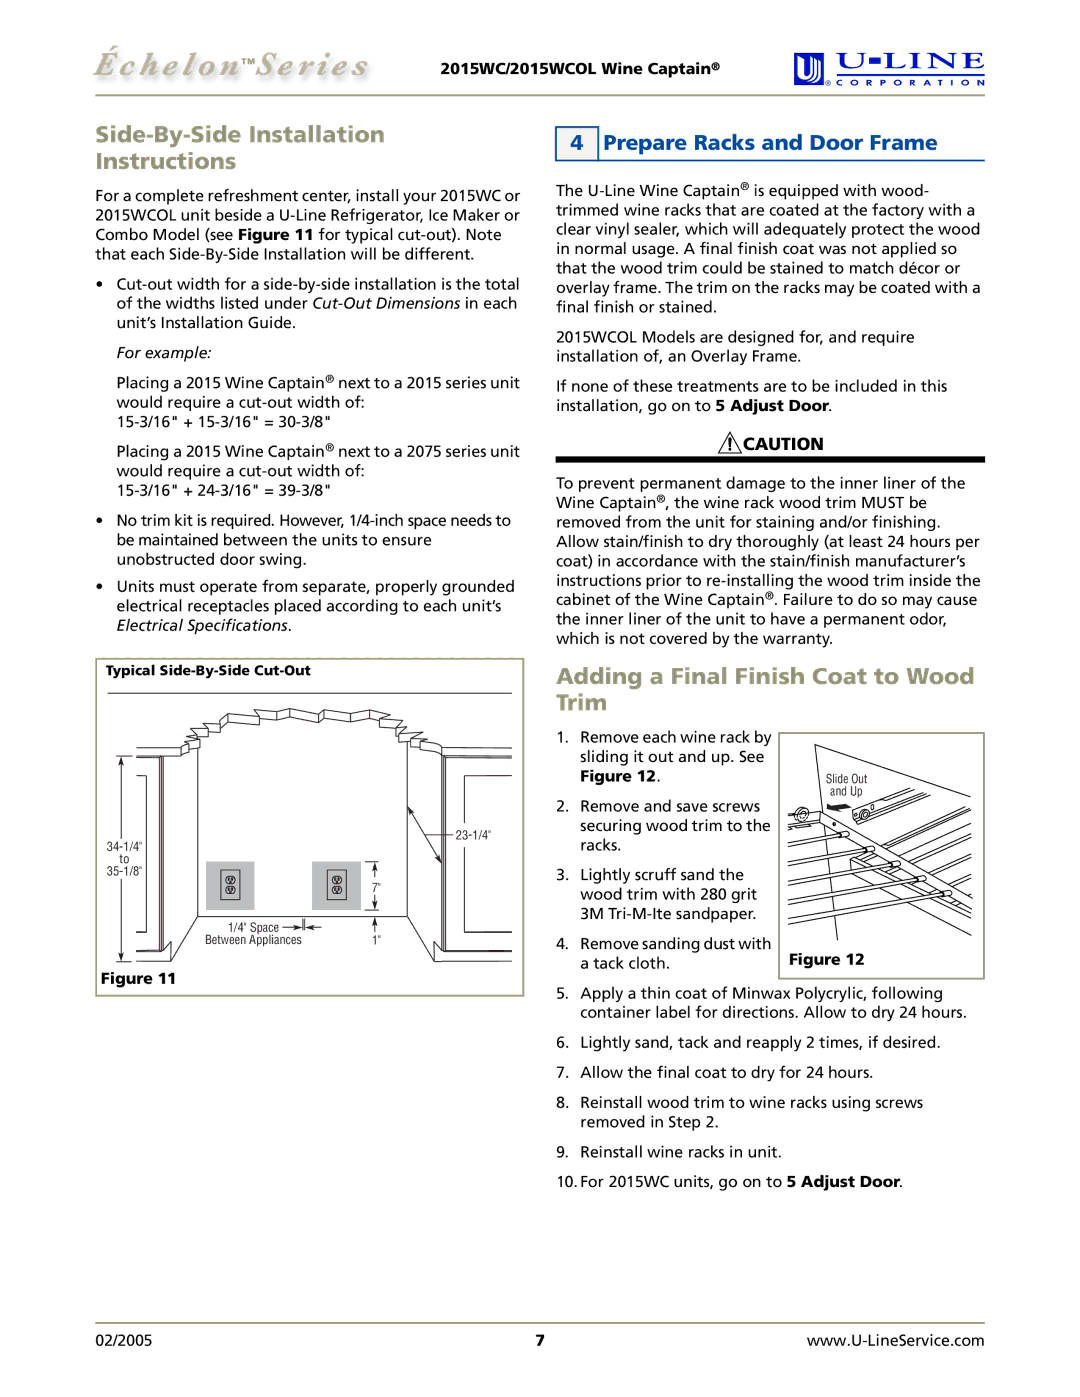
Typical |
The
2015WCOL Models are designed for, and require installation of, an Overlay Frame.
If none of these treatments are to be included in this installation, go on to 5 Adjust Door.
![]() CAUTION
CAUTION
To prevent permanent damage to the inner liner of the Wine Captain®, the wine rack wood trim MUST be removed from the unit for staining and/or finishing. Allow stain/finish to dry thoroughly (at least 24 hours per coat) in accordance with the stain/finish manufacturer’s instructions prior to
Adding a Final Finish Coat to Wood Trim
| |
to |
|
| |
| 7" |
1/4" Space |
|
Between Appliances | 1" |
Figure 11 |
|
1.Remove each wine rack by sliding it out and up. See Figure 12.
2.Remove and save screws securing wood trim to the racks.
3.Lightly scruff sand the wood trim with 280 grit 3M
4.Remove sanding dust with a tack cloth.
Slide Out |
and Up |
Figure 12 |
5.Apply a thin coat of Minwax Polycrylic, following container label for directions. Allow to dry 24 hours.
6.Lightly sand, tack and reapply 2 times, if desired.
7.Allow the final coat to dry for 24 hours.
8.Reinstall wood trim to wine racks using screws removed in Step 2.
9.Reinstall wine racks in unit.
10.For 2015WC units, go on to 5 Adjust Door.
02/2005 | 7 |