1
ULIN_0109_A
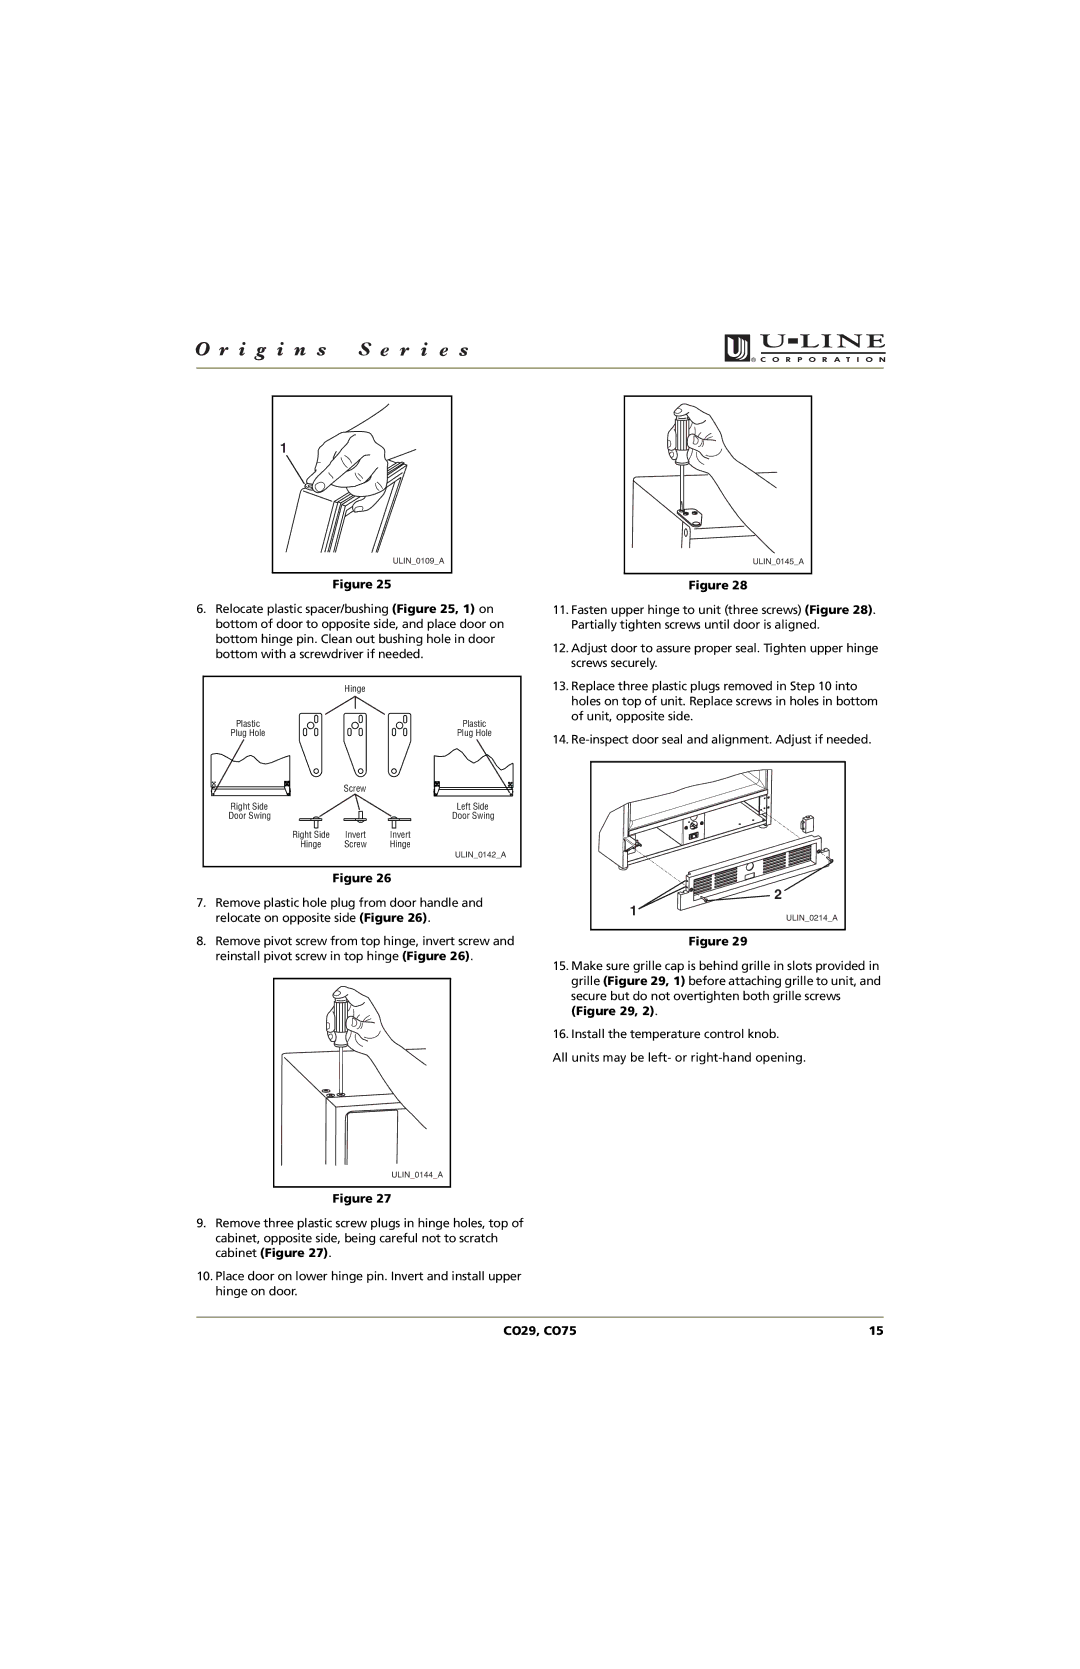
Figure 25
6.Relocate plastic spacer/bushing (Figure 25, 1) on bottom of door to opposite side, and place door on bottom hinge pin. Clean out bushing hole in door bottom with a screwdriver if needed.
| Hinge |
|
Plastic |
| Plastic |
Plug Hole |
| Plug Hole |
| Screw |
|
Right Side |
| Left Side |
Door Swing |
| Door Swing |
Right Side | Invert | Invert |
Hinge | Screw | Hinge |
|
| ULIN_0142_A |
Figure 26
7.Remove plastic hole plug from door handle and relocate on opposite side (Figure 26).
8.Remove pivot screw from top hinge, invert screw and reinstall pivot screw in top hinge (Figure 26).
ULIN_0144_A |
Figure 27
9.Remove three plastic screw plugs in hinge holes, top of cabinet, opposite side, being careful not to scratch cabinet (Figure 27).
10.Place door on lower hinge pin. Invert and install upper hinge on door.
ULIN_0145_A |
Figure 28
11.Fasten upper hinge to unit (three screws) (Figure 28). Partially tighten screws until door is aligned.
12.Adjust door to assure proper seal. Tighten upper hinge screws securely.
13.Replace three plastic plugs removed in Step 10 into holes on top of unit. Replace screws in holes in bottom of unit, opposite side.
14.
2
1
ULIN_0214_A
Figure 29
15.Make sure grille cap is behind grille in slots provided in grille (Figure 29, 1) before attaching grille to unit, and secure but do not overtighten both grille screws (Figure 29, 2).
16.Install the temperature control knob.
All units may be left- or
CO29, CO75 | 15 |