Step 1 Charging the Battery
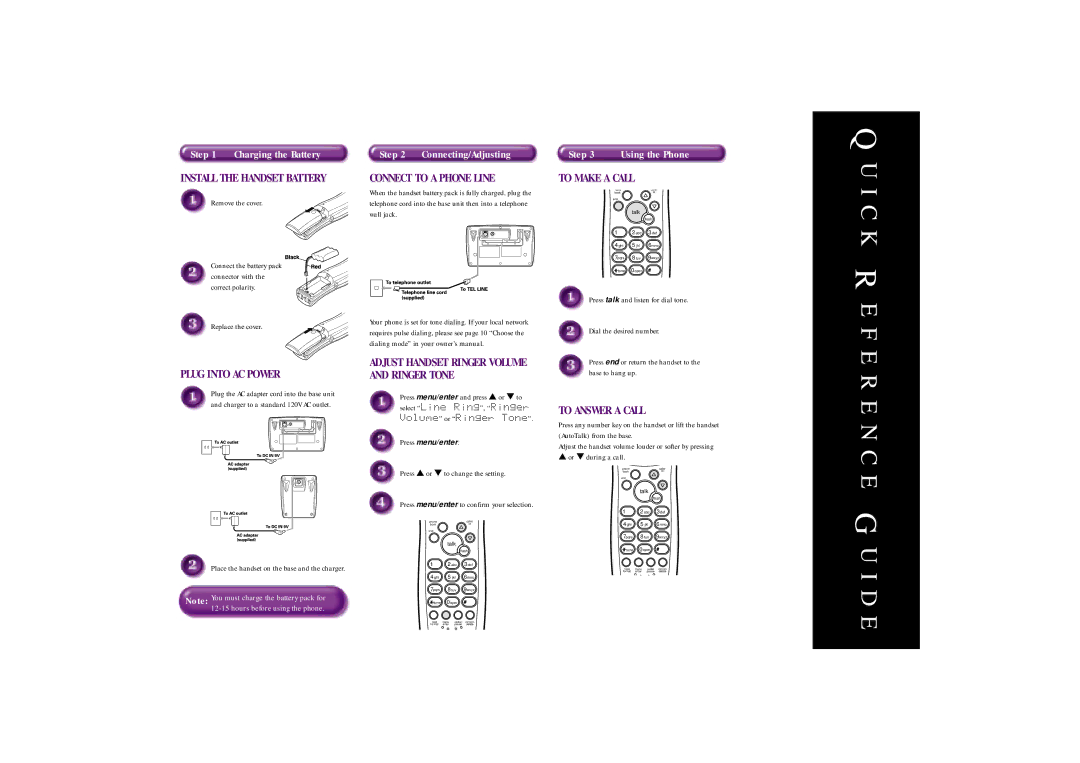
INSTALL THE HANDSET BATTERY
Remove the cover.
Connect the battery pack connector with the correct polarity.
Replace the cover.
Step 2 Connecting/Adjusting
CONNECT TO A PHONE LINE
When the handset battery pack is fully charged, plug the telephone cord into the base unit then into a telephone wall jack.
Your phone is set for tone dialing. If your local network requires pulse dialing, please see page 10 “Choose the dialing mode” in your owner’s manual.
Step 3 Using the Phone
TO MAKE A CALL
hone | caller |
book | id |
end |
|
talk
|
| flash |
1 | 2 abc | 3def |
4 ghi | 5 jkl | 6mno |
7pqrs | 8 tuv | 9wxyz |
tone | 0oper |
|
Press talk and listen for dial tone.
Dial the desired number.
Q U I C K R E F
PLUG INTO AC POWER
ADJUST HANDSET RINGER VOLUME | Press end or return the handset to the | |
AND RINGER TONE |
| base to hang up. |
|
| |
E R
Plug the AC adapter cord into the base unit and charger to a standard 120V AC outlet.
Place the handset on the base and the charger.
Note: You must charge the battery pack for
Press menu/enter and press ▲ or ▼ to select “Line Ring”, “Ringer Volume” or “Ringer Tone”.
Press menu/enter.
Press ▲ or ▼ to change the setting.
Press menu/enter to confirm your selection.
phone | caller |
book | id |
end |
|
talk
|
| flash |
1 | 2 abc | 3def |
4 ghi | 5 jkl | 6mno |
7pqrs | 8 tuv | 9wxyz |
tone | 0oper |
|
TO ANSWER A CALL
Press any number key on the handset or lift the handset (AutoTalk) from the base.
Adjust the handset volume louder or softer by pressing
▲or ▼ during a call.
phone | caller |
book | id |
end |
|
talk
|
| flash |
1 | 2 abc | 3def |
4 ghi | 5 jkl | 6mno |
7pqrs | 8 tuv | 9wxyz |
tone | 0oper |
|
hold menu redial int’com
format enter pause delete
E N C E G U I D
hold menu redial int’com
format enter pause delete
E
