
5700 specifications
The United States Stove 5700, a leading model in the world of indoor heating, combines efficiency and modern technology to deliver powerful warmth for homes, especially during the colder months. As a pellet stove, the US Stove 5700 primarily runs on compressed biomass pellets, making it an environmentally friendly alternative to traditional wood-burning stoves. Its design reflects both functionality and aesthetics, ensuring it complements a variety of home decors.One of the standout features of the 5700 is its impressive heating capacity. With the ability to heat spaces up to 2,200 square feet, it is well-suited for large living areas, making it an ideal choice for families or anyone who desires ample warmth in their home. The stove's hopper has a generous capacity, allowing for extended burn times without the need for frequent reloading. This feature translates to convenience, as users can enjoy hours of consistent heat without interruption.
The United States Stove 5700 is equipped with advanced ignition technologies, including an automatic start function that simplifies the lighting process. With a push of a button, users can enjoy a roaring fire without the hassle of matches or kindling. Additionally, the adjustable thermostat enables users to maintain their desired temperature with ease, enhancing comfort while ensuring energy efficiency.
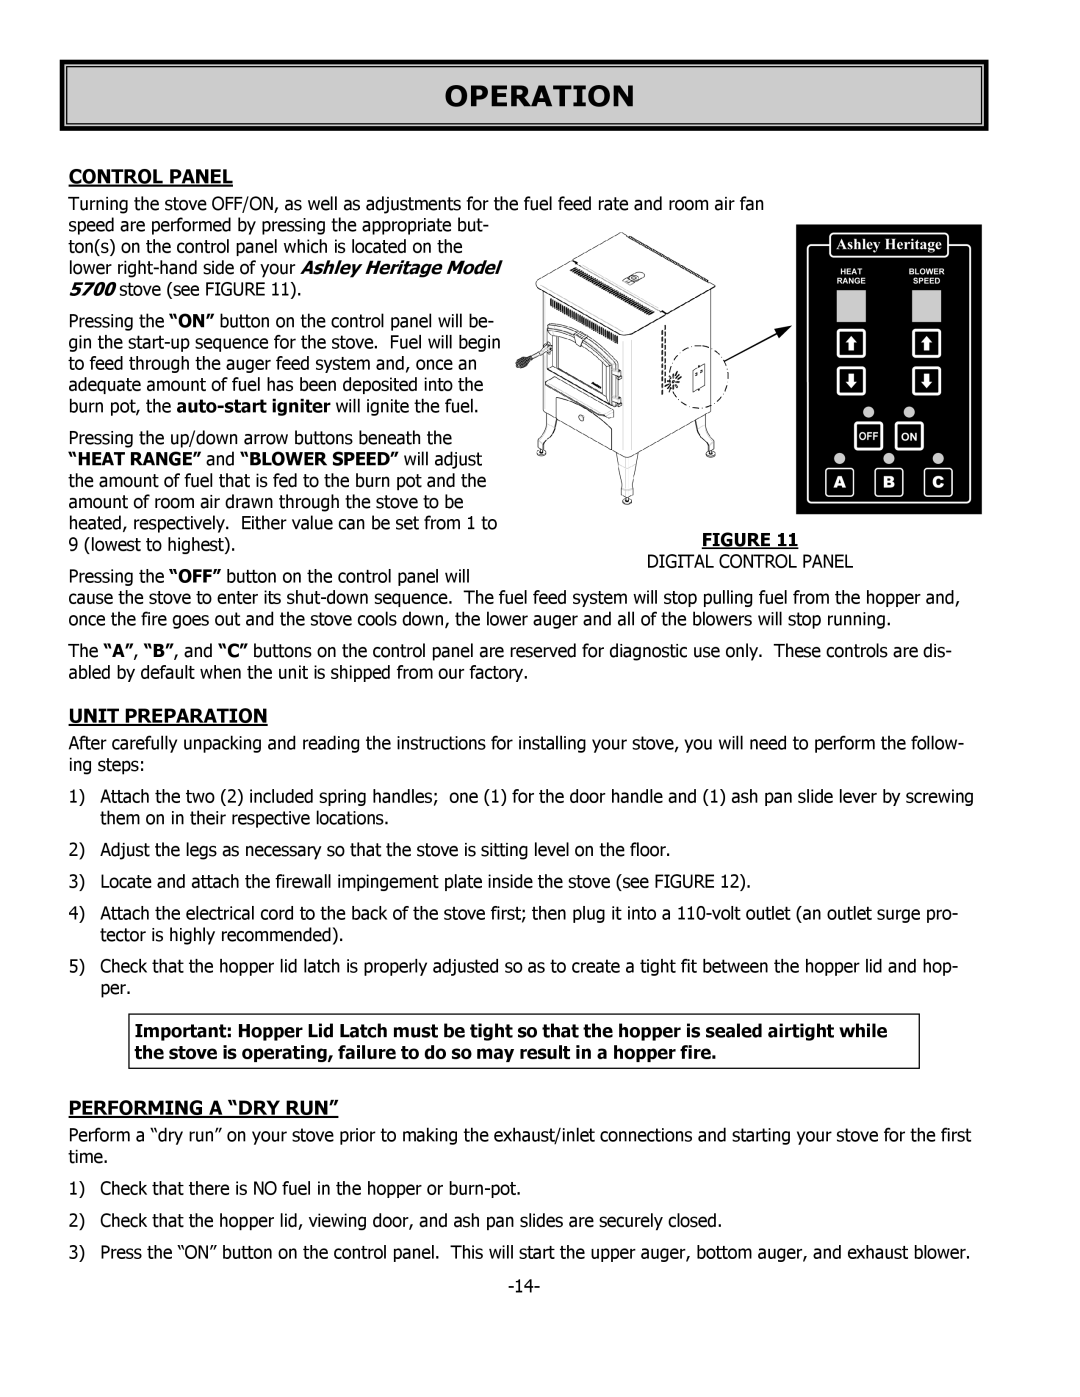
Another significant aspect of the 5700 is its user-friendly control panel. This feature allows for straightforward operation, even for those new to pellet stoves. The digital display provides vital information, including temperature settings and operational status, making it easy to monitor performance at a glance.
In terms of safety, the US Stove 5700 is designed with multiple safeguards, like a thermal shutdown switch and automatic shutdown features, ensuring peace of mind for homeowners. The sturdy construction and durable materials used in the stove’s design contribute to its longevity, while also meeting safety standards.
Moreover, the clean-burning technology employed in the United States Stove 5700 minimizes emissions, making it a responsible choice for environmentally conscious consumers. Overall, the United States Stove 5700 stands out as a reliable, efficient, and stylish heating solution that meets the diverse needs of modern households. Whether you need consistent heating for a large space or are looking for a sustainable heating alternative, the United States Stove 5700 is an excellent choice that combines functionality with modern technology.