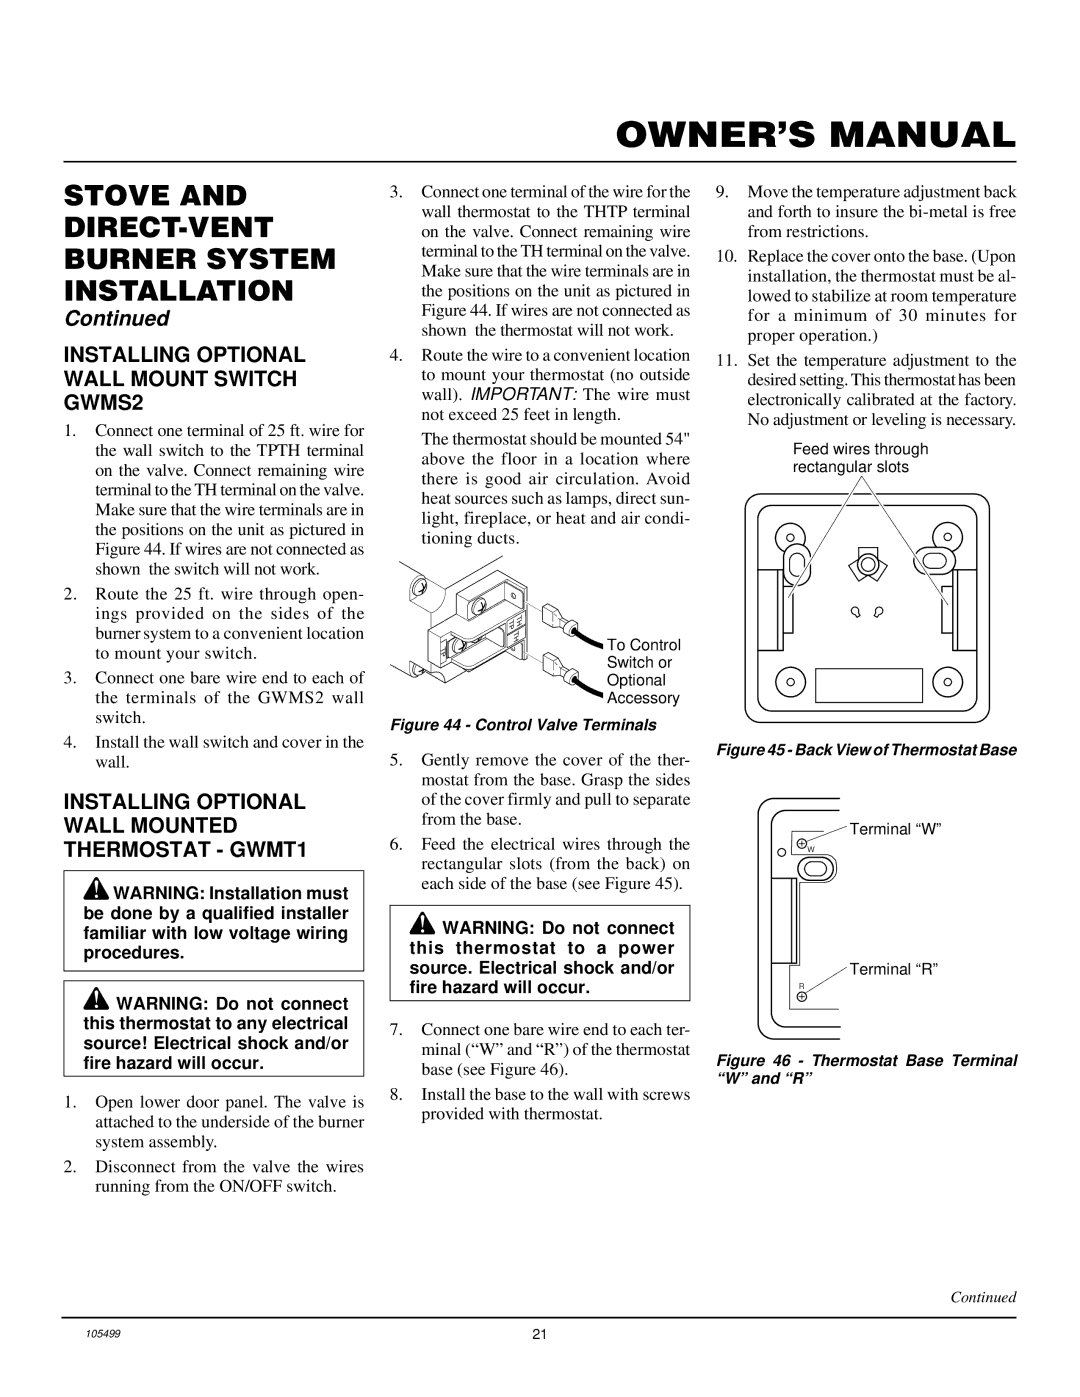
SDVBP(A), SDVBN(A) specifications
Vanguard Heating SDVBN(A) and SDVBP(A) are innovative heating solutions designed for residential and commercial applications, aiming to deliver unparalleled efficiency and comfort. These models showcase advanced technologies tailored to meet modern heating demands while ensuring minimal environmental impact.One of the standout features of the Vanguard Heating SDVBN(A) and SDVBP(A) is their highly efficient heating performance. Operating with an Annual Fuel Utilization Efficiency (AFUE) rating of up to 95%, these models convert a significant portion of fuel into heat, minimizing energy waste and lowering utility costs. This efficiency translates to substantial savings for homeowners and businesses alike, making them an economically sound choice in the long run.
The SDVBN(A) and SDVBP(A) are equipped with variable-speed blower motors, allowing for precise control of airflow. This technology not only enhances comfort by maintaining consistent temperature levels throughout spaces but also contributes to reduced noise levels during operation. The quiet performance of these units is particularly appealing for residential settings, such as bedrooms and living areas.
In terms of versatility, Vanguard offers multiple configurations, allowing installers to tailor the heating system to specific requirements. Whether it’s a large open plan or a more segmented layout, the adjustable airflow and zoned heating capabilities ensure that every corner of the space is adequately warmed.
Another notable characteristic is the integrated smart technology. Both models come with advanced control systems that can be easily connected to compatible smart thermostats. This allows users to monitor and adjust heating settings remotely, providing added convenience and optimizing energy usage according to individual schedules.
Moreover, the SDVBN(A) and SDVBP(A) feature robust construction designed for durability. With high-quality materials and components, these units can withstand the rigors of daily use, ensuring reliable performance throughout their lifespan. Regular maintenance is simplified due to accessible design, empowering users or service technicians to conduct routine checks and repairs with ease.
Vanguard Heating has also incorporated safety features, including built-in sensors that monitor system performance and automatically shut down the unit in case of any malfunctions. This proactive approach provides peace of mind, knowing that the heating system is both efficient and safe.
In summary, Vanguard Heating SDVBN(A) and SDVBP(A) models embody cutting-edge technology, efficiency, and reliability in home and commercial heating solutions. Their ability to deliver comfortable, quiet, and economical heating while prioritizing safety and ease of maintenance makes them an excellent choice for any heating application.