Manuals
/
Vermont Casting
/
Household Appliance
/
Electric Heater
Vermont Casting
1695CE Single-wallChimney Connector, Securing the Single-wallConnector to a
Models:
1695CE
1
6
28
28
Download
28 pages
47.08 Kb
3
4
5
6
7
8
9
10
Install
Warranty
Maintenance
Set Up the Stove
Chimney Connector Guidelines
Damper Adjustment
Draft Testing
Page 6
Image 6
Page 5
Page 7
Page 6
Image 6
Page 5
Page 7
Contents
Installation
Multi-FuelHeater
Model 1695CE
The Intrepid
Vermont Castings Intrepid Multi-Fuel
Table of Contents
Welcome
All of us at CFM Corporation
Vermont Castings Intrepid Multi-Fuel
Specifications
Intrepid Multi-Fuel,Model 1695CE, 1696CE, 1697CE
2000970
What Kind of Chimney to Use
Installation
Outside Air
Vermont Castings Intrepid Multi-Fuel
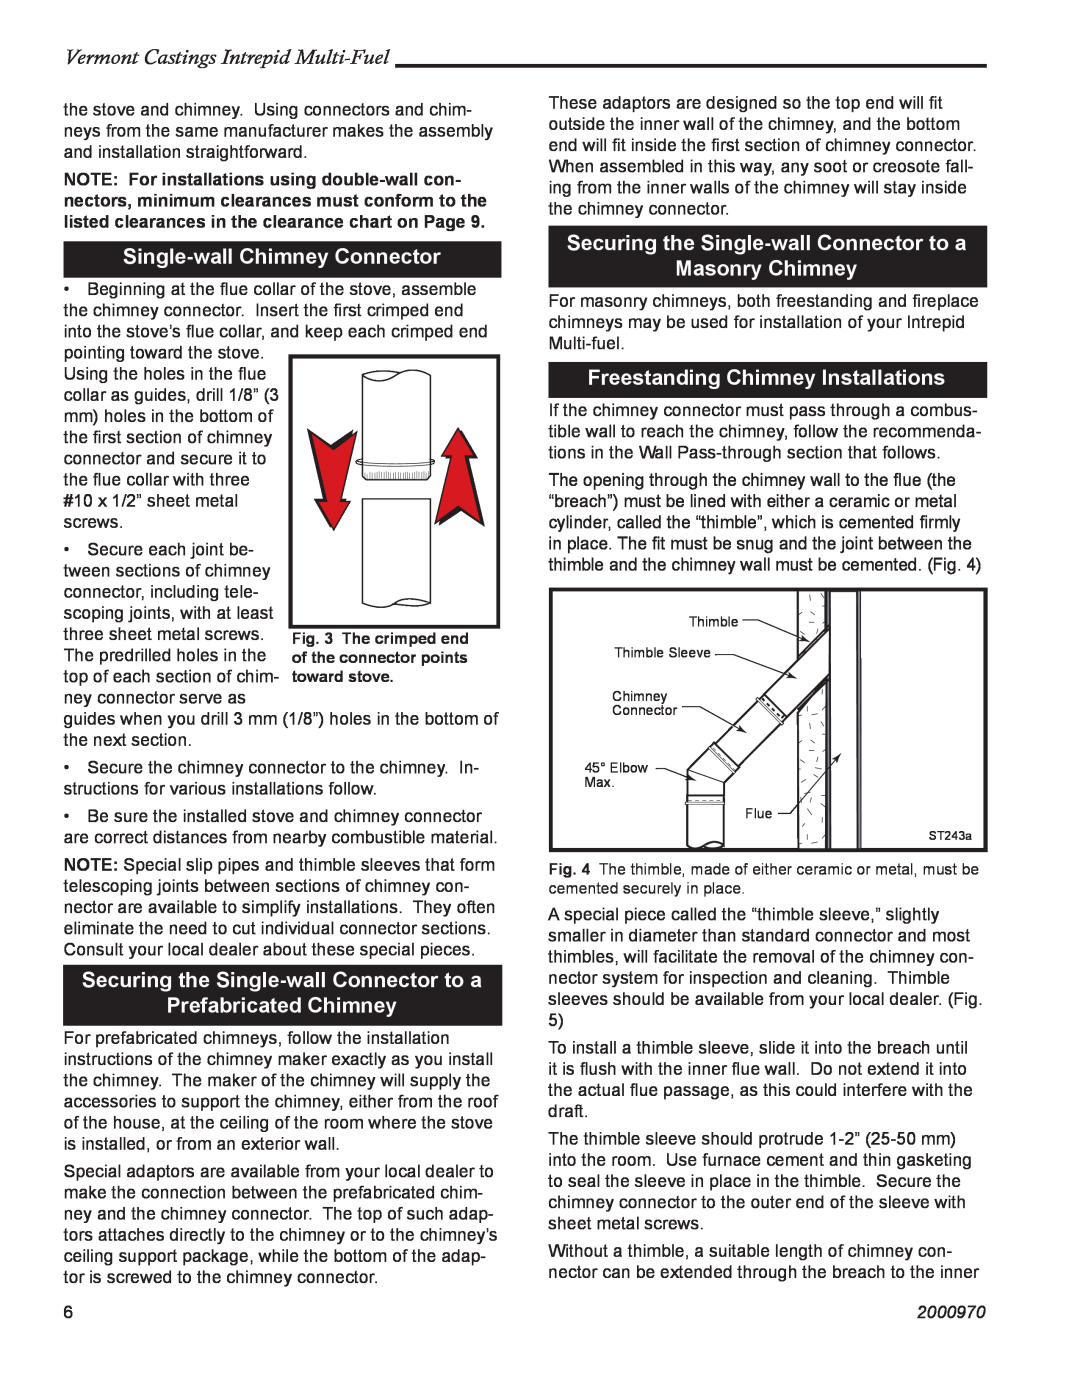
Masonry Chimneys
Chimney Connector Guidelines
Double-wallChimney Connector
Prefabricated Chimneys
Freestanding Chimney Installations
Single-wallChimney Connector
Securing the Single-wallConnector to a
Prefabricated Chimney
Through a Fireplace
Fireplace Chimney Installations Above a Fireplace
Fireplace Chimney Installations
Wall Pass-Throughs
Vermont Castings Intrepid Multi-Fuel
Floor Protection for Fireplace Installations
Hearths
2000970
Clearances
Keep the Stove a Safe Distance
from Surrounding Materials
Summary of Clearances
Connecting Flue Pipe - Clearances
Vermont Castings Intrepid Multi-Fuel
2000970
Set Up the Stove
Assembly
Clean the Griddle Before Use
Install the Bottom Heat Shield
Intrepid Multi-fuel’sControls
Operation
Attach the Griddle Handle
Primary Air Control
Two Ways to Add Fuel
Glass Door Panels
Front Grate
Vermont Castings Intrepid Multi-Fuel
Intrepid Multi-FuelControl Settings
How to Build a Wood Fire and Keep It Going
Conditioning Your Stove
Vermont Castings Intrepid Multi-Fuel
Vermont Castings Intrepid Multi-Fuel
Refuel While the Embers Are Still Hot
Ash Disposal
2000970
Indoor/Outdoor location
Draft Management
Steel Chimney
Flue sizing
Backpuffing
Draft Testing
Fuel
Negative Pressure
Glass Replacement
Maintenance
Cleaning the Glass
Care of the Cast Iron Surface
Tighten the Damper Handle as Needed
How to Adjust the Door Latch
Damper Adjustment
Replace the Stove Gaskets as Needed
Vermont Castings Intrepid Multi-Fuel
Adjust the Door if Necessary
Permanent Gaskets
2000970
Creosote
Annual Maintenance
The Chimney System
Vermont Castings Intrepid Multi-Fuel
Vermont Castings Intrepid Multi-Fuel
Intrepid Multi-FuelHeater
Model 1695CE
2000970
Vermont Castings Intrepid Multi-Fuel
Intrepid Multi-FuelHeater
Model 1695CE continued
2000970
Model 1695CE continued
Intrepid Multi-FuelHeater
Vermont Castings Intrepid Multi-Fuel
Shell Enamel Parts - Intrepid Multi-Fuel
Vermont Castings Intrepid Multi-Fuel
2000970
Vermont Castings Intrepid Multi-Fuel
2000970
Limited 1 Year Warranty
Warranty
Limited 3 Year Warranty
Limited Catalyst Warranty
CFM Corporation
Top
Page
Image
Contents