Vermont Casting VCS5017 Secure Shelves Parts Required, Secure Side Shelf to Grill Parts Required

Models: VCS5017

1 27
Download 27 pages 63.66 Kb
Page 22
Image 22

VCS4007 / VCS4017 / VCS4027 / VCS4037 / VCS5007 / VCS5017 / VCS5027 / VCS5037 Assembly

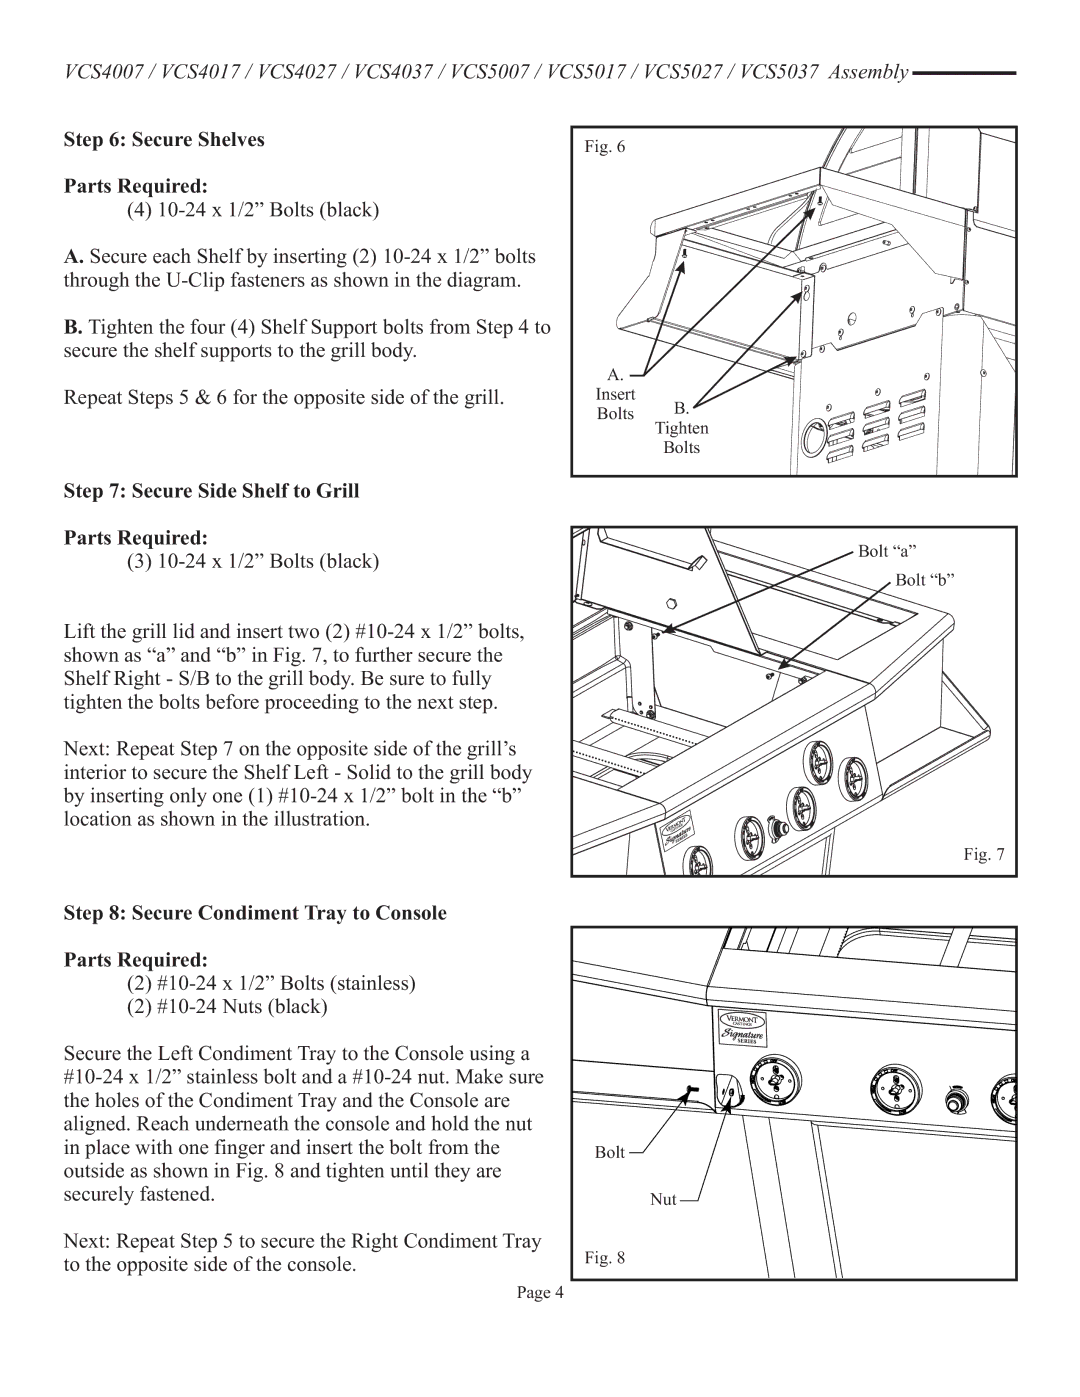
Step 6: Secure Shelves

Parts Required:

(4)10-24 x 1/2” Bolts (black)

A.Secure each Shelf by inserting (2) 10-24 x 1/2” bolts through the U-Clip fasteners as shown in the diagram.

B.Tighten the four (4) Shelf Support bolts from Step 4 to secure the shelf supports to the grill body.

Repeat Steps 5 & 6 for the opposite side of the grill.

Fig. 6


A.


Insert

B.

Bolts

Tighten


Bolts

Step 7: Secure Side Shelf to Grill

Parts Required:

(3) 10-24 x 1/2” Bolts (black)

Lift the grill lid and insert two (2) #10-24 x 1/2” bolts, shown as “a” and “b” in Fig. 7, to further secure the Shelf Right - S/B to the grill body. Be sure to fully tighten the bolts before proceeding to the next step.

Next: Repeat Step 7 on the opposite side of the grill’s interior to secure the Shelf Left - Solid to the grill body by inserting only one (1) #10-24 x 1/2” bolt in the “b” location as shown in the illustration.

Bolt “a”

Bolt “b”

Fig. 7

Step 8: Secure Condiment Tray to Console

Parts Required:

(2)#10-24 x 1/2” Bolts (stainless)

(2)#10-24 Nuts (black)

Secure the Left Condiment Tray to the Console using a #10-24 x 1/2” stainless bolt and a #10-24 nut. Make sure the holes of the Condiment Tray and the Console are aligned. Reach underneath the console and hold the nut in place with one finger and insert the bolt from the outside as shown in Fig. 8 and tighten until they are securely fastened.

Next: Repeat Step 5 to secure the Right Condiment Tray to the opposite side of the console.

Bolt

Nut

Fig. 8

Page 4

Page 22
Image 22
Vermont Casting VCS5017 user manual Secure Shelves Parts Required, Secure Side Shelf to Grill Parts Required