VCS4007 / VCS4017 / VCS4027 / VCS4037 / VCS5007 / VCS5017 / VCS5027 / VCS5037 Assembly
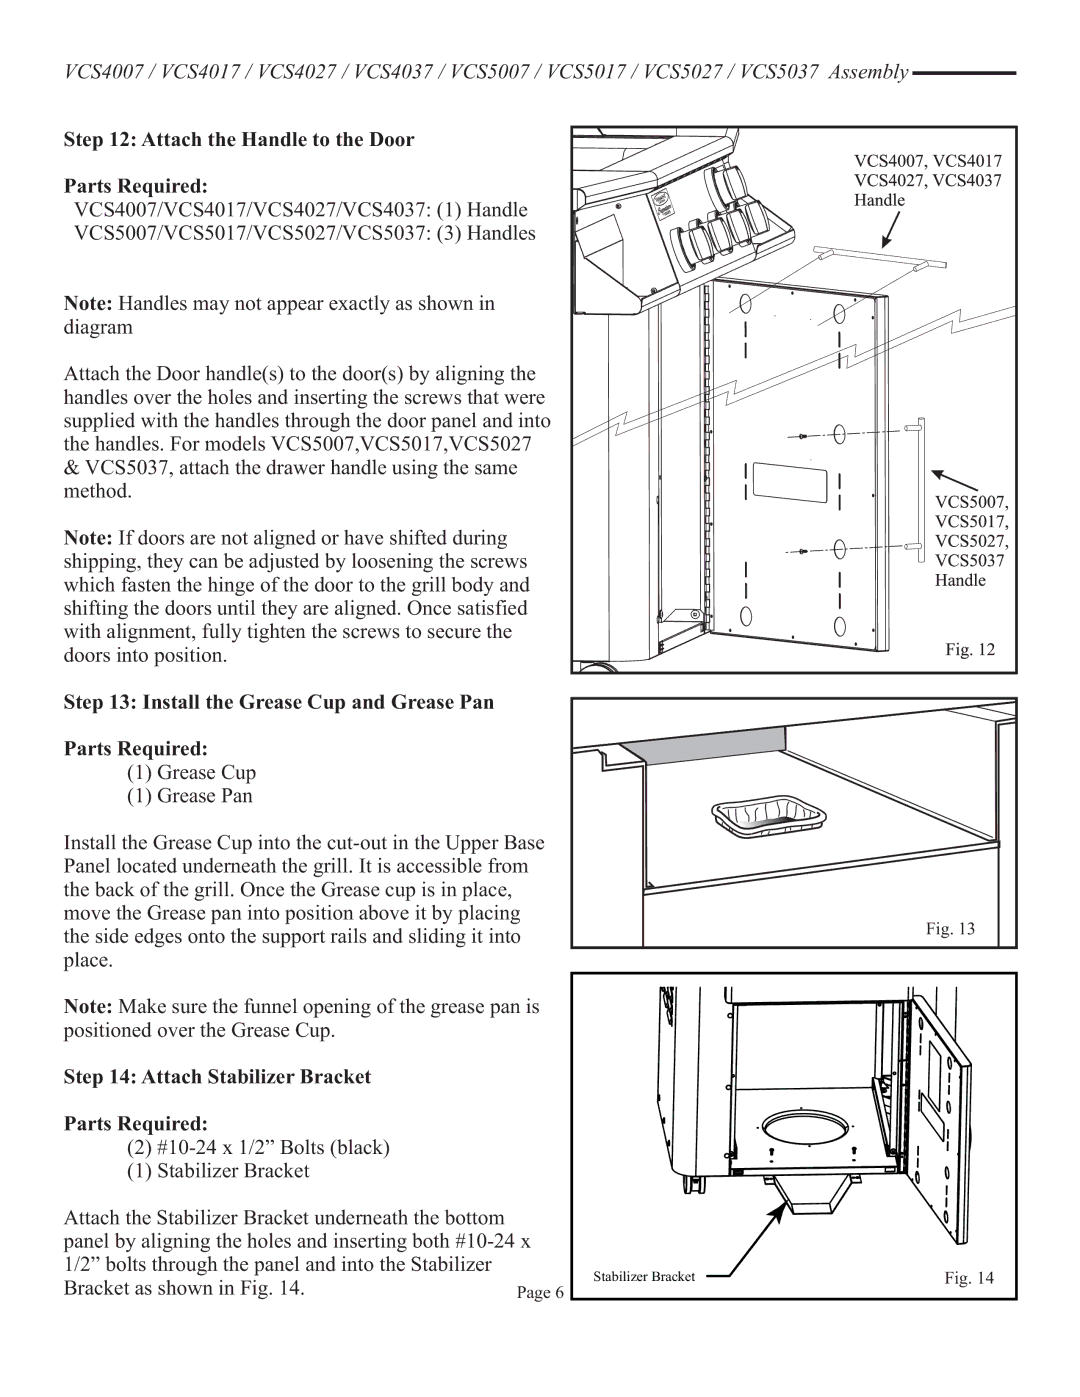
Step 12: Attach the Handle to the Door
Parts Required:
VCS4007/VCS4017/VCS4027/VCS4037: (1) Handle
VCS5007/VCS5017/VCS5027/VCS5037: (3) Handles
Note: Handles may not appear exactly as shown in diagram
Attach the Door handle(s) to the door(s) by aligning the handles over the holes and inserting the screws that were supplied with the handles through the door panel and into the handles. For models VCS5007,VCS5017,VCS5027
&VCS5037, attach the drawer handle using the same method.
Note: If doors are not aligned or have shifted during shipping, they can be adjusted by loosening the screws which fasten the hinge of the door to the grill body and shifting the doors until they are aligned. Once satisfied with alignment, fully tighten the screws to secure the doors into position.
Step 13: Install the Grease Cup and Grease Pan
Parts Required:
(1)Grease Cup
(1)Grease Pan
Install the Grease Cup into the
Fig. 13 |
Note: Make sure the funnel opening of the grease pan is positioned over the Grease Cup.
Step 14: Attach Stabilizer Bracket
Parts Required:
(2)
(1)Stabilizer Bracket
Attach the Stabilizer Bracket underneath the bottom panel by aligning the holes and inserting both
Stabilizer Bracket | Fig. 14 |
|
|