Setting up the PC
3. Connect the power adapter to a nearby power outlet.
Do not plug in or turn on the power to the computer until instructed to do so.
Connecting the wired keyboard and mouse
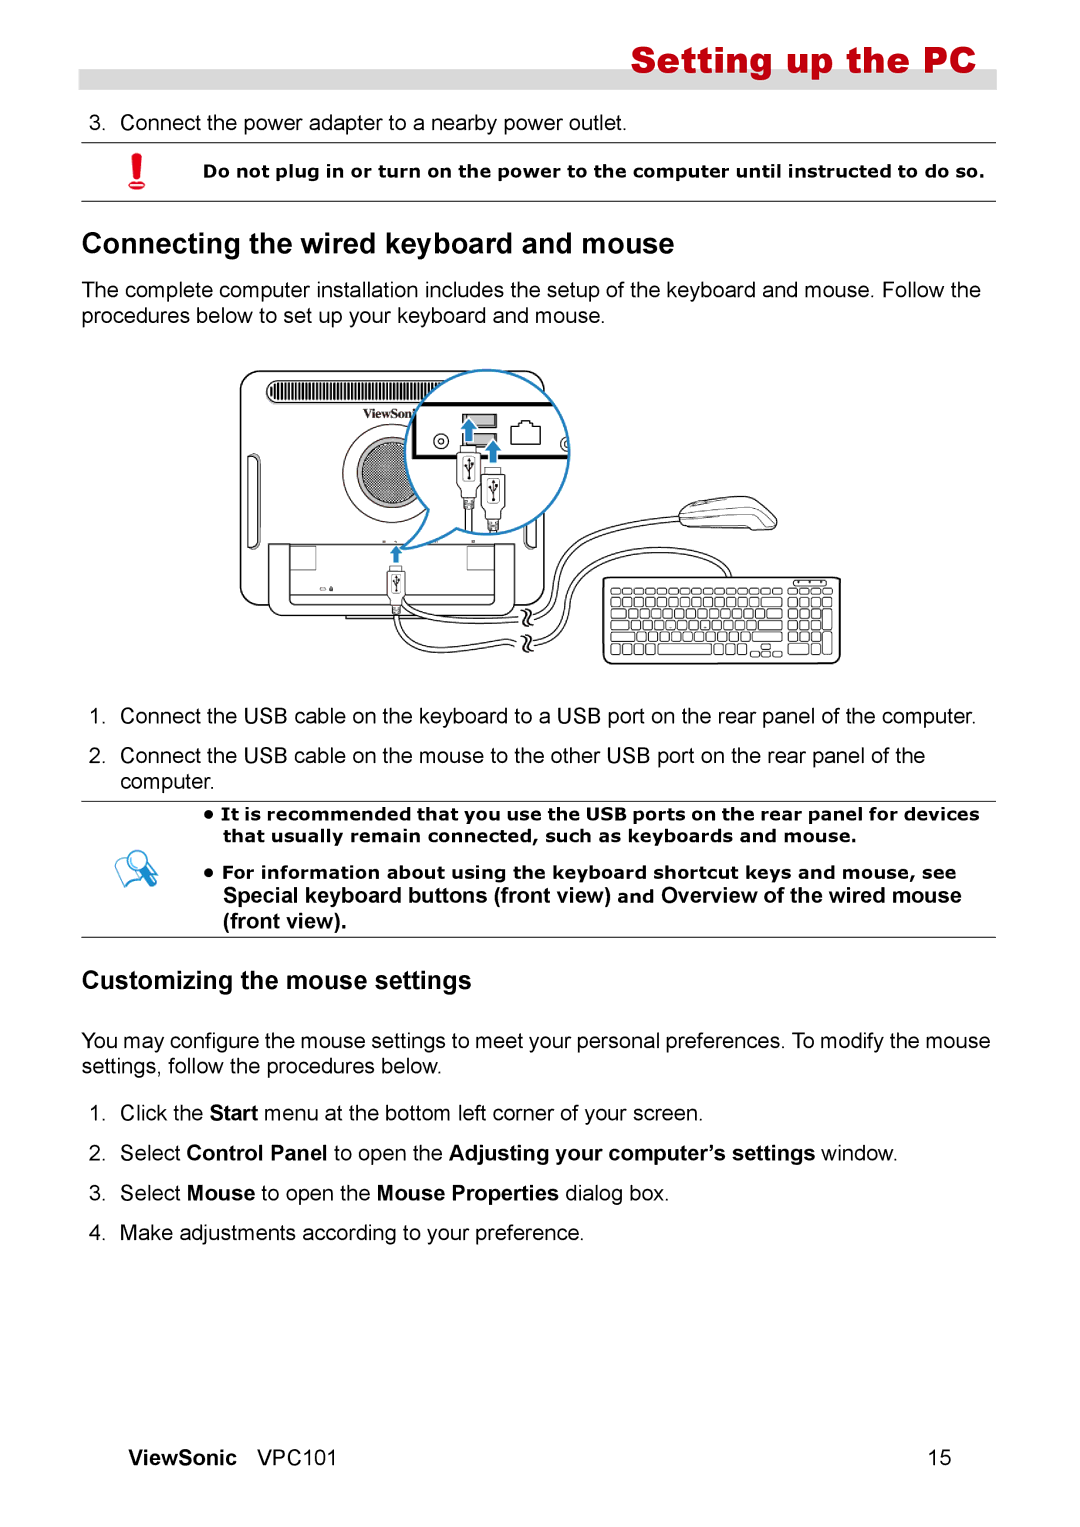
The complete computer installation includes the setup of the keyboard and mouse. Follow the procedures below to set up your keyboard and mouse.
1.Connect the USB cable on the keyboard to a USB port on the rear panel of the computer.
2.Connect the USB cable on the mouse to the other USB port on the rear panel of the computer.
•It is recommended that you use the USB ports on the rear panel for devices that usually remain connected, such as keyboards and mouse.
•For information about using the keyboard shortcut keys and mouse, see
Special keyboard buttons (front view) and Overview of the wired mouse (front view).
Customizing the mouse settings
You may configure the mouse settings to meet your personal preferences. To modify the mouse settings, follow the procedures below.
1.Click the Start menu at the bottom left corner of your screen.
2.Select Control Panel to open the Adjusting your computer’s settings window.
3.Select Mouse to open the Mouse Properties dialog box.
4.Make adjustments according to your preference.
ViewSonic VPC101 | 15 |
