VIVOTEK
Hardware Reset
The reset button is used to reset the system or restore the factory default settings� Sometimes resetting the system can return the camera to normal operation� If the system problems remain after reset, restore the factory settings and install again�
Reset: Press and release the recessed reset button with a paper clip or thin object� Wait for the Network Camera to reboot�
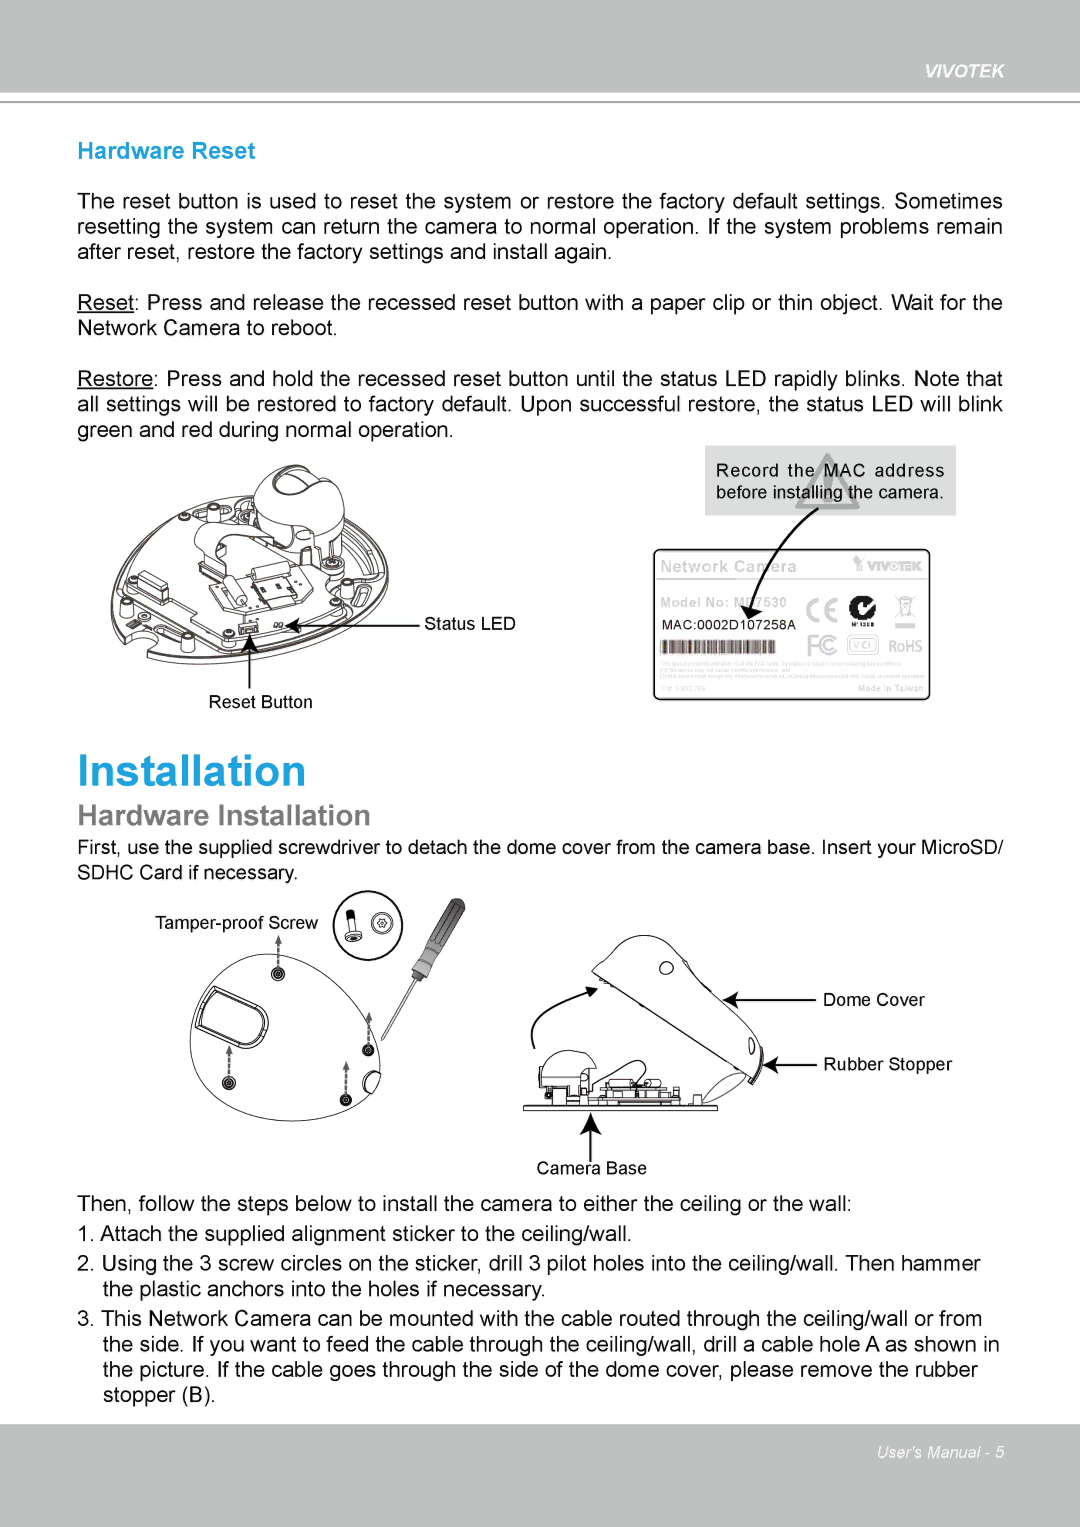
Restore: Press and hold the recessed reset button until the status LED rapidly blinks� Note that all settings will be restored to factory default� Upon successful restore, the status LED will blink green and red during normal operation�
Record the MAC address before installing the camera�
Network Camera
Status LED
Model No: MD7530
MAC:0002D107258A
V I RoHS
This device complies with part 15 of the FCC rules. Operation is subject to the following two conditions: (1)This device may not cause harmful interference, and
(2) this device must accept any interference received, including interference that may cause undesired operation.
Reset Button | Pat. 6,930,709 | Made in Taiwan |
|
|
Installation
Hardware Installation
First, use the supplied screwdriver to detach the dome cover from the camera base� Insert your MicroSD/ SDHC Card if necessary�
![]()
![]() Dome Cover
Dome Cover
![]()
![]()
![]() Rubber Stopper
Rubber Stopper
Camera Base
Then, follow the steps below to install the camera to either the ceiling or the wall: 1� Attach the supplied alignment sticker to the ceiling/wall�
2� Using the 3 screw circles on the sticker, drill 3 pilot holes into the ceiling/wall� Then hammer the plastic anchors into the holes if necessary�
3� This Network Camera can be mounted with the cable routed through the ceiling/wall or from the side� If you want to feed the cable through the ceiling/wall, drill a cable hole A as shown in the picture� If the cable goes through the side of the dome cover, please remove the rubber stopper (B)�
User's Manual - 5