1,
2,
3,
Frame Assembly
Before beginning assembly, make sure you understand the information in the box on page 5, See the PART iDENTiFiCATION CHART in the center of this manua ! f0r help
identifying small parts.
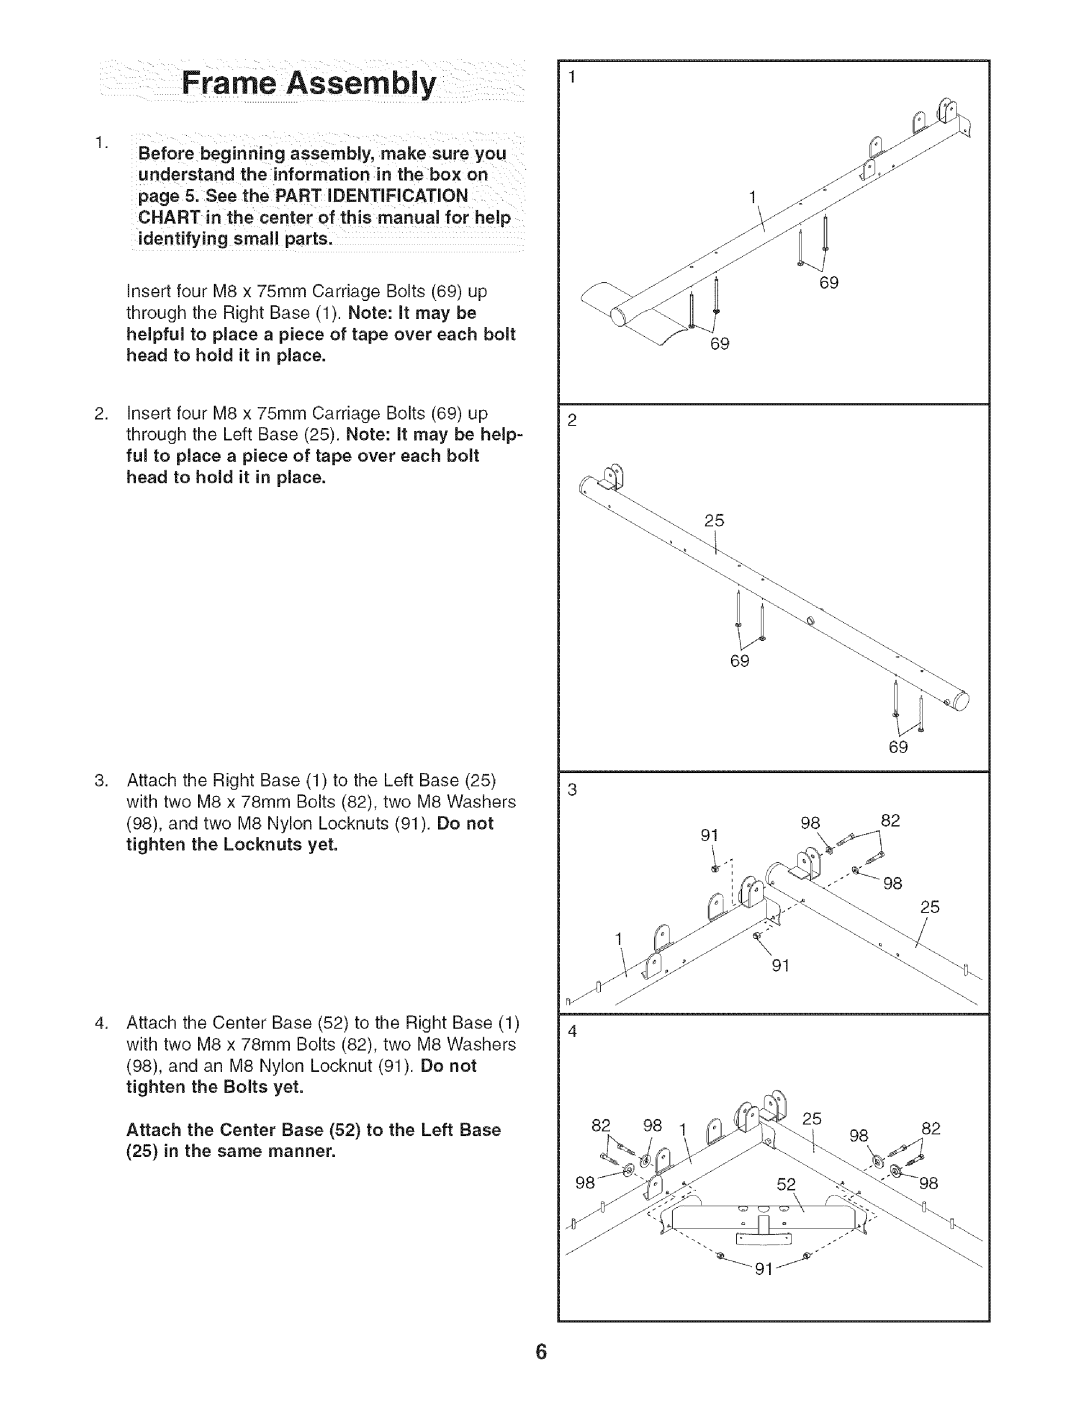
Insert four M8 x 75mm Carriage Bolts (69) up through the Right Base (1). Note: It may be helpful to place a piece of tape over each bolt head to hold it in place.
Insert four M8 x 75mm Carriage Bolts (69) up through the Left Base (25). Note: it may be help= ful to place a piece of tape over each bolt head to hold it in place.
Attach the Right Base (1) to the Left Base (25) with two M8 x 78mm Bolts (82), two M8 Washers (98), and two M8 Nylon Locknuts (91). Do not tighten the Locknuts yet.
69
69
25
69
69
98 82
91
25
91
4, | Attach the Center Base (52) to the Right Base (1) |
|
|
|
|
|
| |||
|
|
|
|
|
|
| ||||
| with two M8 x 78mm Bolts (82), two M8 Washers |
|
|
|
|
|
| |||
| (98), and an M8 Nylon Locknut (91). Do not |
|
|
|
|
|
| |||
| tighten | the | Bolts | yet. |
|
|
|
|
|
|
| Attach | the | Center | Base (52) to the Left Base | 82 | 98 | 1 | 25 |
| 82 |
|
| 98 | ||||||||
|
|
|
|
|
| |||||
(25) in the same manner.
52
6
