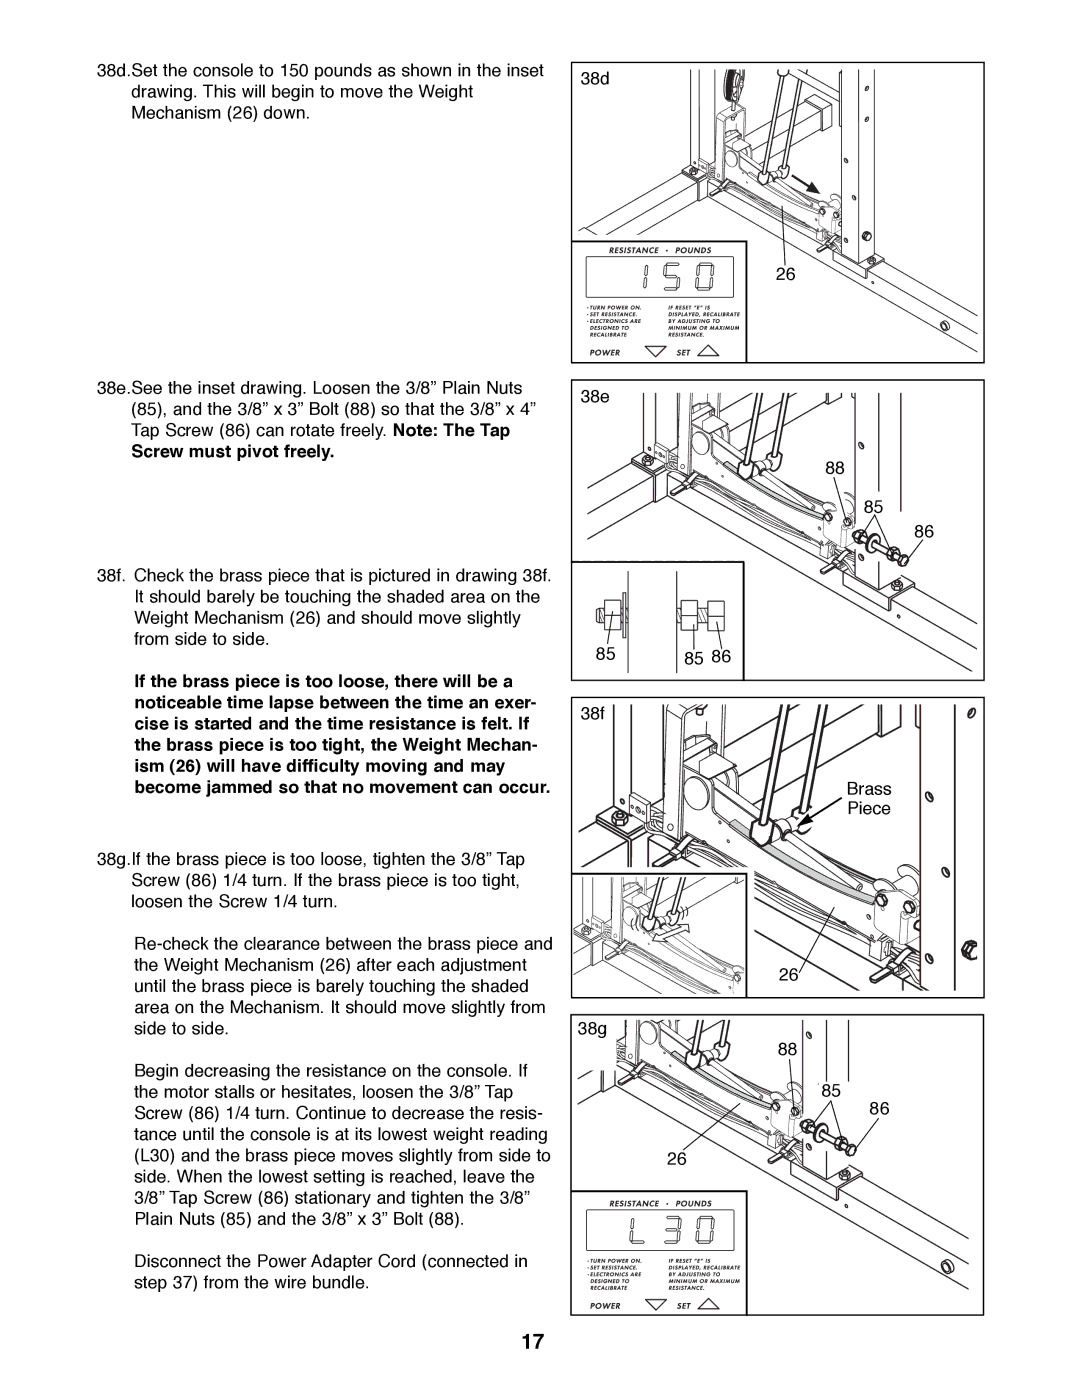
38d.Set the console to 150 pounds as shown in the inset drawing. This will begin to move the Weight Mechanism (26) down.
38e.See the inset drawing. Loosen the 3/8Ó Plain Nuts (85), and the 3/8Ó x 3Ó Bolt (88) so that the 3/8Ó x 4Ó Tap Screw (86) can rotate freely. Note: The Tap
Screw must pivot freely.
38f. Check the brass piece that is pictured in drawing 38f. It should barely be touching the shaded area on the Weight Mechanism (26) and should move slightly from side to side.
If the brass piece is too loose, there will be a noticeable time lapse between the time an exer- cise is started and the time resistance is felt. If the brass piece is too tight, the Weight Mechan- ism (26) will have difficulty moving and may become jammed so that no movement can occur.
38g.If the brass piece is too loose, tighten the 3/8Ó Tap Screw (86) 1/4 turn. If the brass piece is too tight, loosen the Screw 1/4 turn.
Begin decreasing the resistance on the console. If the motor stalls or hesitates, loosen the 3/8Ó Tap Screw (86) 1/4 turn. Continue to decrease the resis- tance until the console is at its lowest weight reading (L30) and the brass piece moves slightly from side to side. When the lowest setting is reached, leave the 3/8Ó Tap Screw (86) stationary and tighten the 3/8Ó Plain Nuts (85) and the 3/8Ó x 3Ó Bolt (88).
Disconnect the Power Adapter Cord (connected in step 37) from the wire bundle.
38d
| 26 |
38e |
|
| 88 |
| 85 |
| 86 |
85 | 85 86 |
38f |
|
Brass
![]() Piece
Piece
26 |
38g |
88 |
85 |
86 |
26 |
17