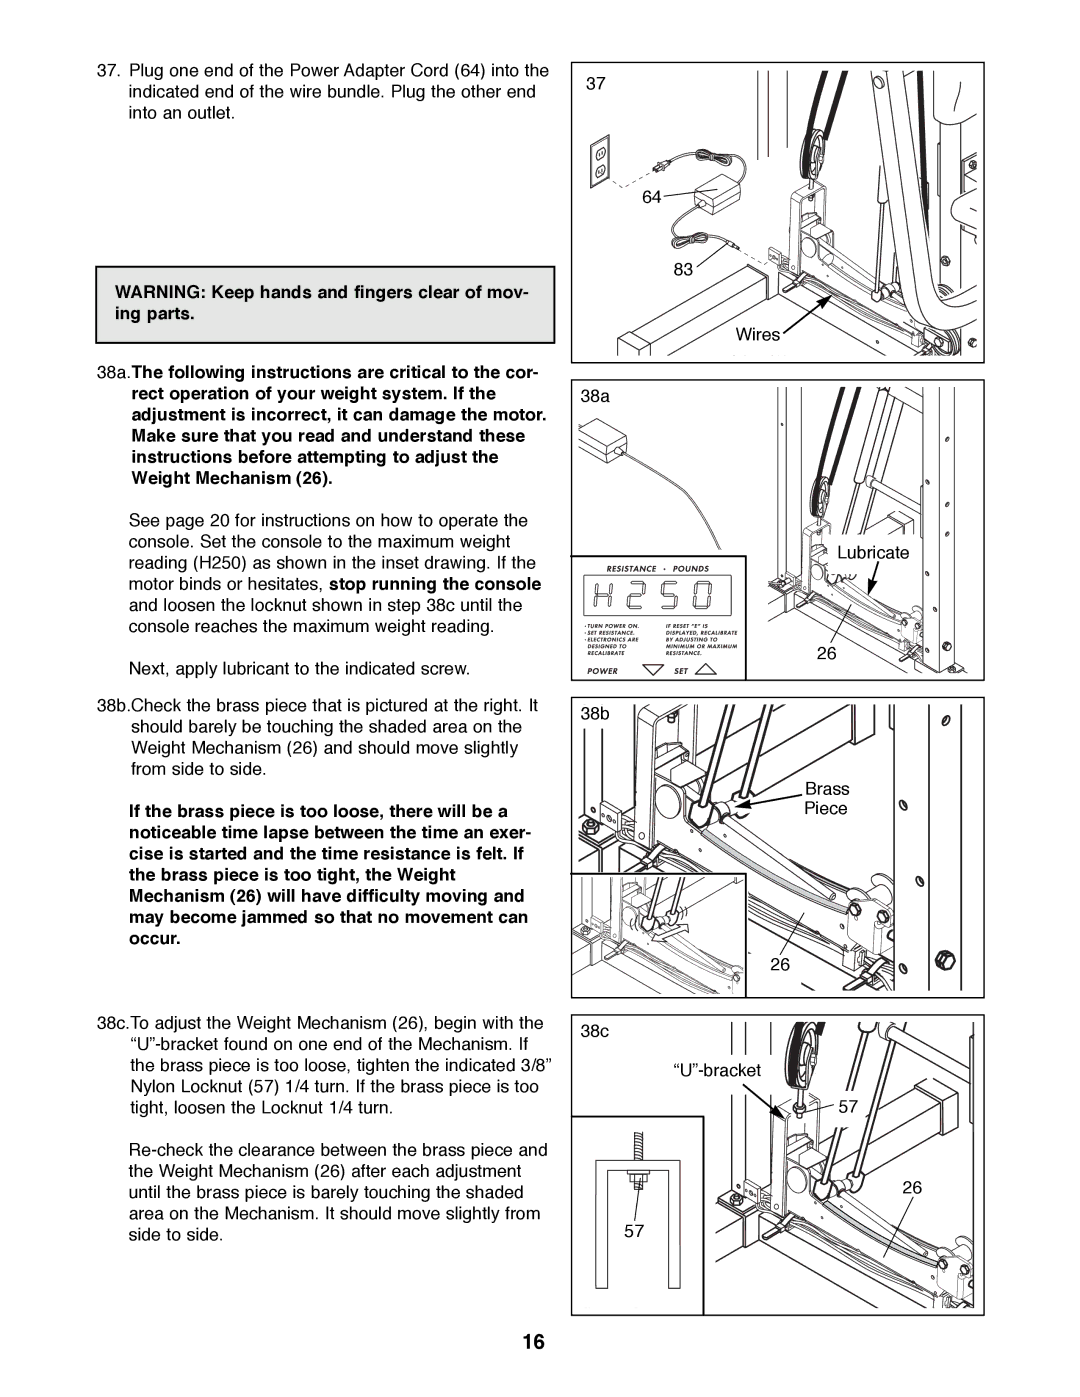
37.Plug one end of the Power Adapter Cord (64) into the indicated end of the wire bundle. Plug the other end into an outlet.
WARNING: Keep hands and fingers clear of mov- ing parts.
38a.The following instructions are critical to the cor- rect operation of your weight system. If the adjustment is incorrect, it can damage the motor. Make sure that you read and understand these instructions before attempting to adjust the Weight Mechanism (26).
See page 20 for instructions on how to operate the console. Set the console to the maximum weight reading (H250) as shown in the inset drawing. If the motor binds or hesitates, stop running the console and loosen the locknut shown in step 38c until the console reaches the maximum weight reading.
Next, apply lubricant to the indicated screw.
38b.Check the brass piece that is pictured at the right. It should barely be touching the shaded area on the Weight Mechanism (26) and should move slightly from side to side.
If the brass piece is too loose, there will be a noticeable time lapse between the time an exer- cise is started and the time resistance is felt. If the brass piece is too tight, the Weight Mechanism (26) will have difficulty moving and may become jammed so that no movement can occur.
38c.To adjust the Weight Mechanism (26), begin with the
37 |
64 |
83 |
Wires |
38a |
Lubricate |
26 |
38b |
Brass |
Piece |
26 |
38c |
57 |
26 |
57 |
16