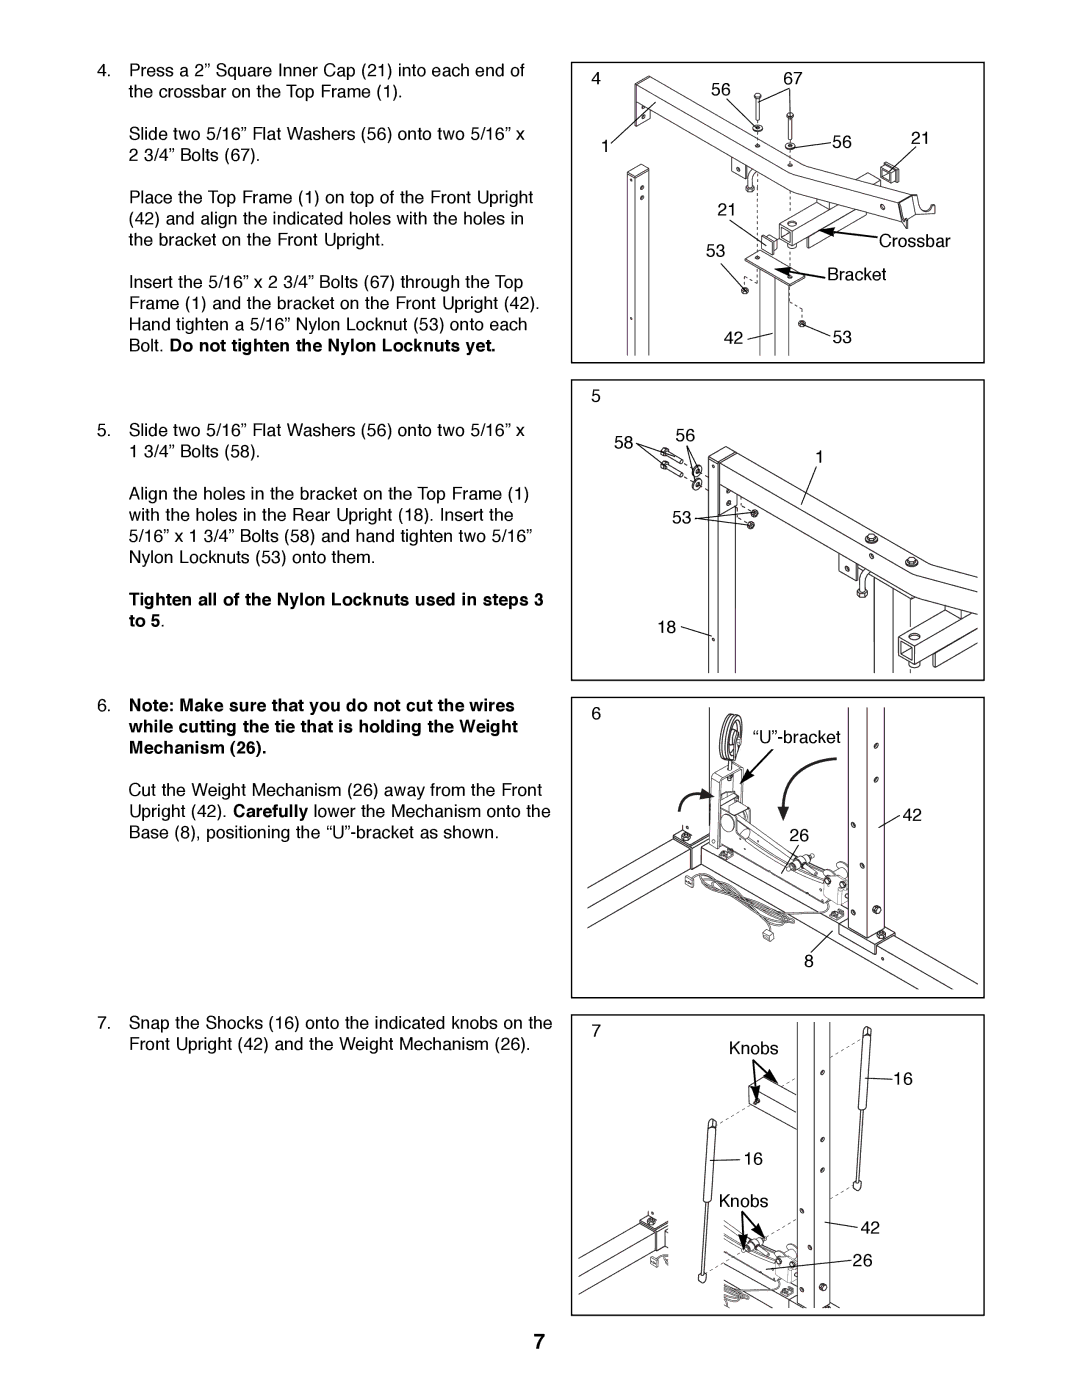
4.Press a 2Ó Square Inner Cap (21) into each end of the crossbar on the Top Frame (1).
Slide two 5/16Ó Flat Washers (56) onto two 5/16Ó x 2 3/4Ó Bolts (67).
Place the Top Frame (1) on top of the Front Upright
(42)and align the indicated holes with the holes in the bracket on the Front Upright.
Insert the 5/16Ó x 2 3/4Ó Bolts (67) through the Top Frame (1) and the bracket on the Front Upright (42). Hand tighten a 5/16Ó Nylon Locknut (53) onto each Bolt. Do not tighten the Nylon Locknuts yet.
5.Slide two 5/16Ó Flat Washers (56) onto two 5/16Ó x 1 3/4Ó Bolts (58).
Align the holes in the bracket on the Top Frame (1) with the holes in the Rear Upright (18). Insert the 5/16Ó x 1 3/4Ó Bolts (58) and hand tighten two 5/16Ó Nylon Locknuts (53) onto them.
Tighten all of the Nylon Locknuts used in steps 3 to 5.
6.Note: Make sure that you do not cut the wires while cutting the tie that is holding the Weight Mechanism (26).
Cut the Weight Mechanism (26) away from the Front Upright (42). Carefully lower the Mechanism onto the Base (8), positioning the
7.Snap the Shocks (16) onto the indicated knobs on the Front Upright (42) and the Weight Mechanism (26).
4 |
| 56 | 67 |
|
|
|
|
| |
1 |
|
| 56 | 21 |
|
| 21 |
|
|
|
| 53 |
| Crossbar |
|
|
|
| |
|
|
| Bracket | |
|
| 42 | 53 |
|
5 |
|
|
|
|
| 58 | 56 |
|
|
|
| 1 |
| |
|
|
|
| |
|
| 53 |
|
|
|
| 18 |
|
|
6 |
|
|
|
|
|
|
|
| |
|
|
| 26 | 42 |
|
|
|
| |
|
|
| 8 |
|
7 |
| Knobs |
| |
|
|
| ||
|
|
|
| 16 |
16
![]() Knobs
Knobs
![]() 42
42
26
7