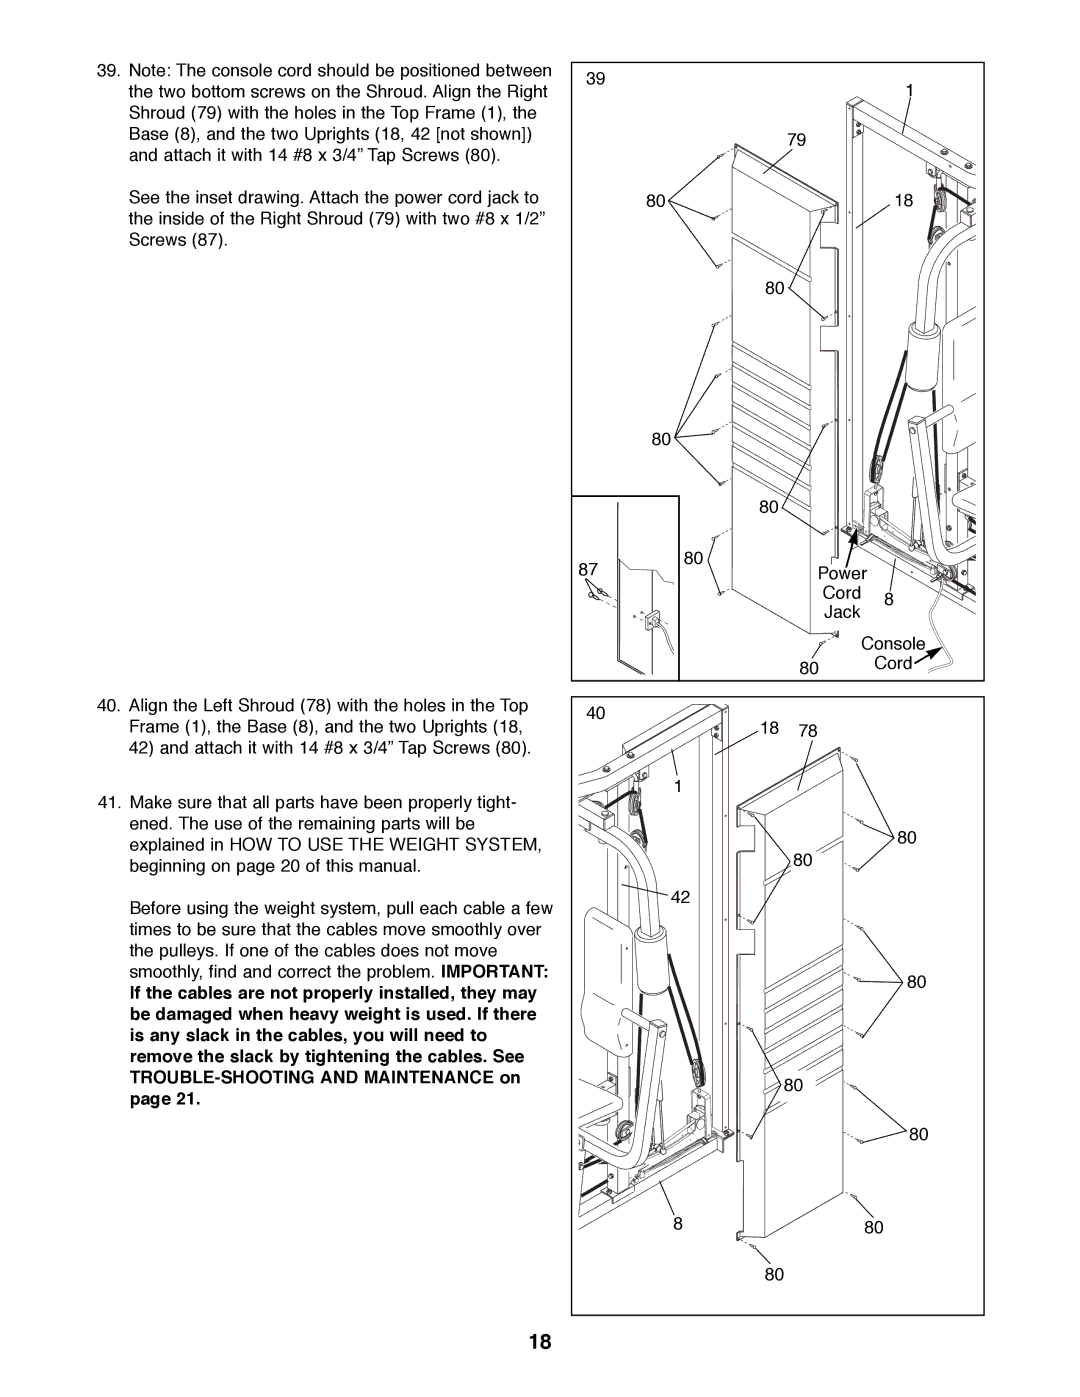
39.Note: The console cord should be positioned between the two bottom screws on the Shroud. Align the Right Shroud (79) with the holes in the Top Frame (1), the Base (8), and the two Uprights (18, 42 [not shown]) and attach it with 14 #8 x 3/4Ó Tap Screws (80).
See the inset drawing. Attach the power cord jack to the inside of the Right Shroud (79) with two #8 x 1/2Ó Screws (87).
40.Align the Left Shroud (78) with the holes in the Top Frame (1), the Base (8), and the two Uprights (18,
42) and attach it with 14 #8 x 3/4Ó Tap Screws (80).
41.Make sure that all parts have been properly tight- ened. The use of the remaining parts will be explained in HOW TO USE THE WEIGHT SYSTEM, beginning on page 20 of this manual.
Before using the weight system, pull each cable a few times to be sure that the cables move smoothly over the pulleys. If one of the cables does not move smoothly, find and correct the problem. IMPORTANT:
If the cables are not properly installed, they may be damaged when heavy weight is used. If there is any slack in the cables, you will need to remove the slack by tightening the cables. See
18
39 |
|
| 1 |
|
|
| |
| 79 |
|
|
80 |
|
| 18 |
| 80 |
|
|
80 |
|
|
|
| 80 |
|
|
87 | 80 |
|
|
Power | |||
|
| Cord | 8 |
|
| Jack | |
|
|
| |
|
|
| Console |
| 80 |
| Cord |
40 |
|
18 | 78 |
1 |
|
| 80 |
| 80 |
42 |
|
| 80 |
| 80 |
| 80 |
8 | 80 |
80 | |