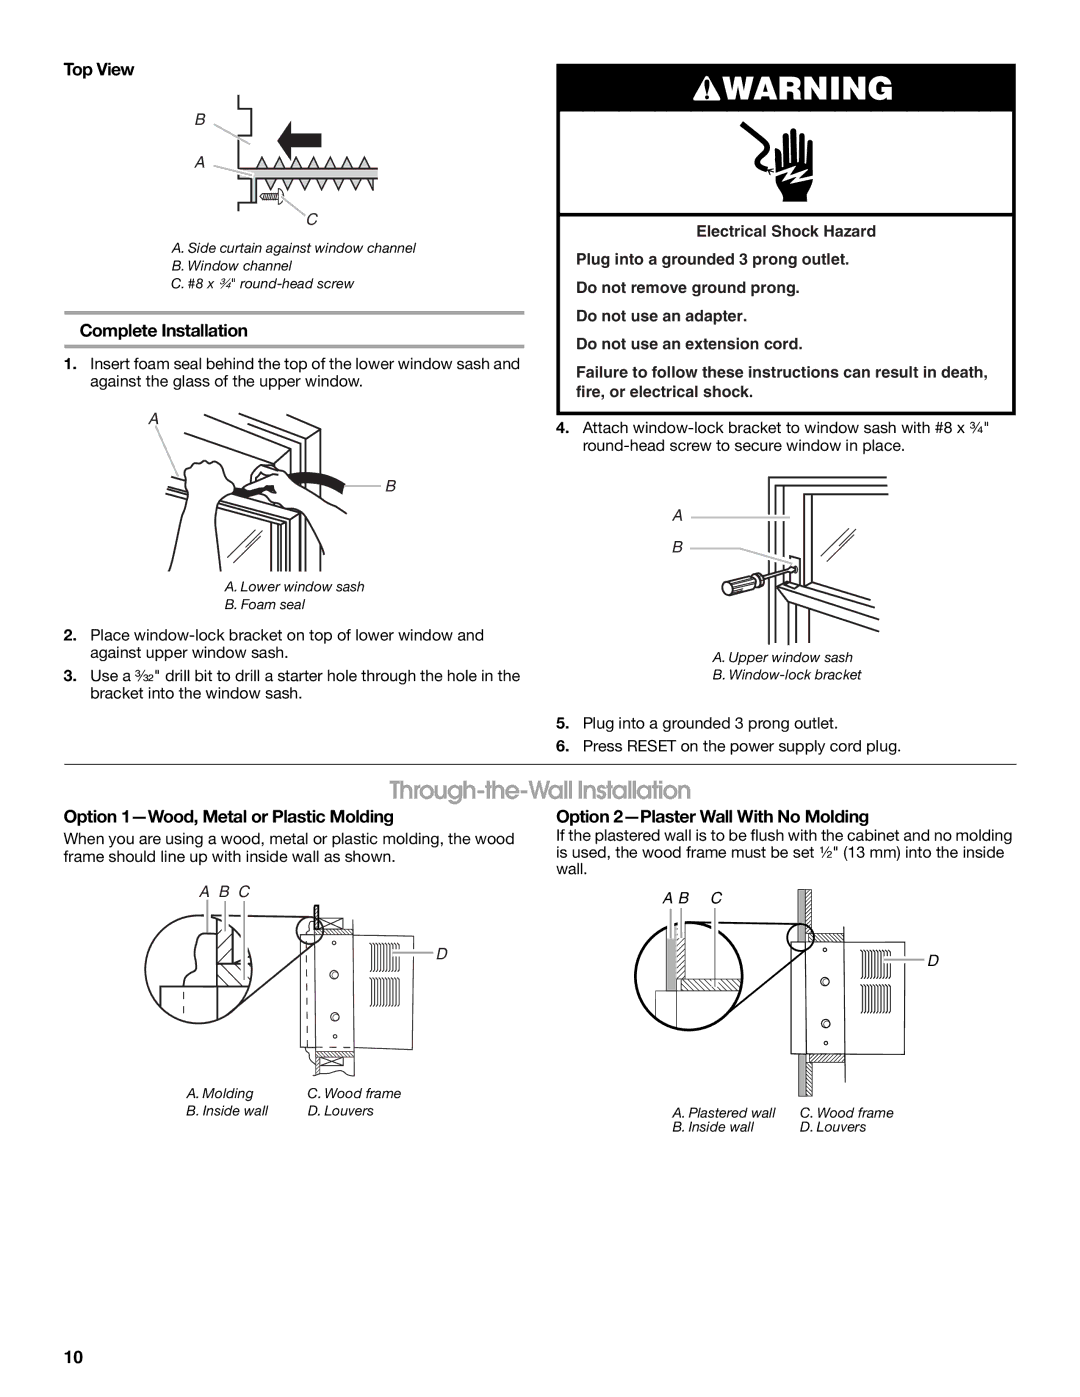
Top View
B
A
C
A. Side curtain against window channel
B. Window channel
C. #8 x ³⁄₄"
Complete Installation
1.Insert foam seal behind the top of the lower window sash and against the glass of the upper window.
A
B
A. Lower window sash
B. Foam seal
2.Place
3.Use a ³⁄₃₂" drill bit to drill a starter hole through the hole in the bracket into the window sash.
![]() WARNING
WARNING
Electrical Shock Hazard
Plug into a grounded 3 prong outlet.
Do not remove ground prong.
Do not use an adapter.
Do not use an extension cord.
Failure to follow these instructions can result in death, fire, or electrical shock.
4.Attach
A
B
A. Upper window sash
B.
5.Plug into a grounded 3 prong outlet.
6.Press RESET on the power supply cord plug.
Through-the-Wall Installation
Option 1—Wood, Metal or Plastic Molding
When you are using a wood, metal or plastic molding, the wood frame should line up with inside wall as shown.
A B C
Option 2—Plaster Wall With No Molding
If the plastered wall is to be flush with the cabinet and no molding is used, the wood frame must be set ¹⁄₂" (13 mm) into the inside wall.
A B C
![]() D
D
D
|
|
|
|
|
|
|
|
|
|
|
|
|
|
|
|
|
|
A. Molding | C. Wood frame |
|
|
|
|
| ||
|
|
|
|
| ||||
B. Inside wall | D. Louvers | A. Plastered wall | C. Wood frame | |||||
|
|
|
| B. Inside wall | D. Louvers | |||
10