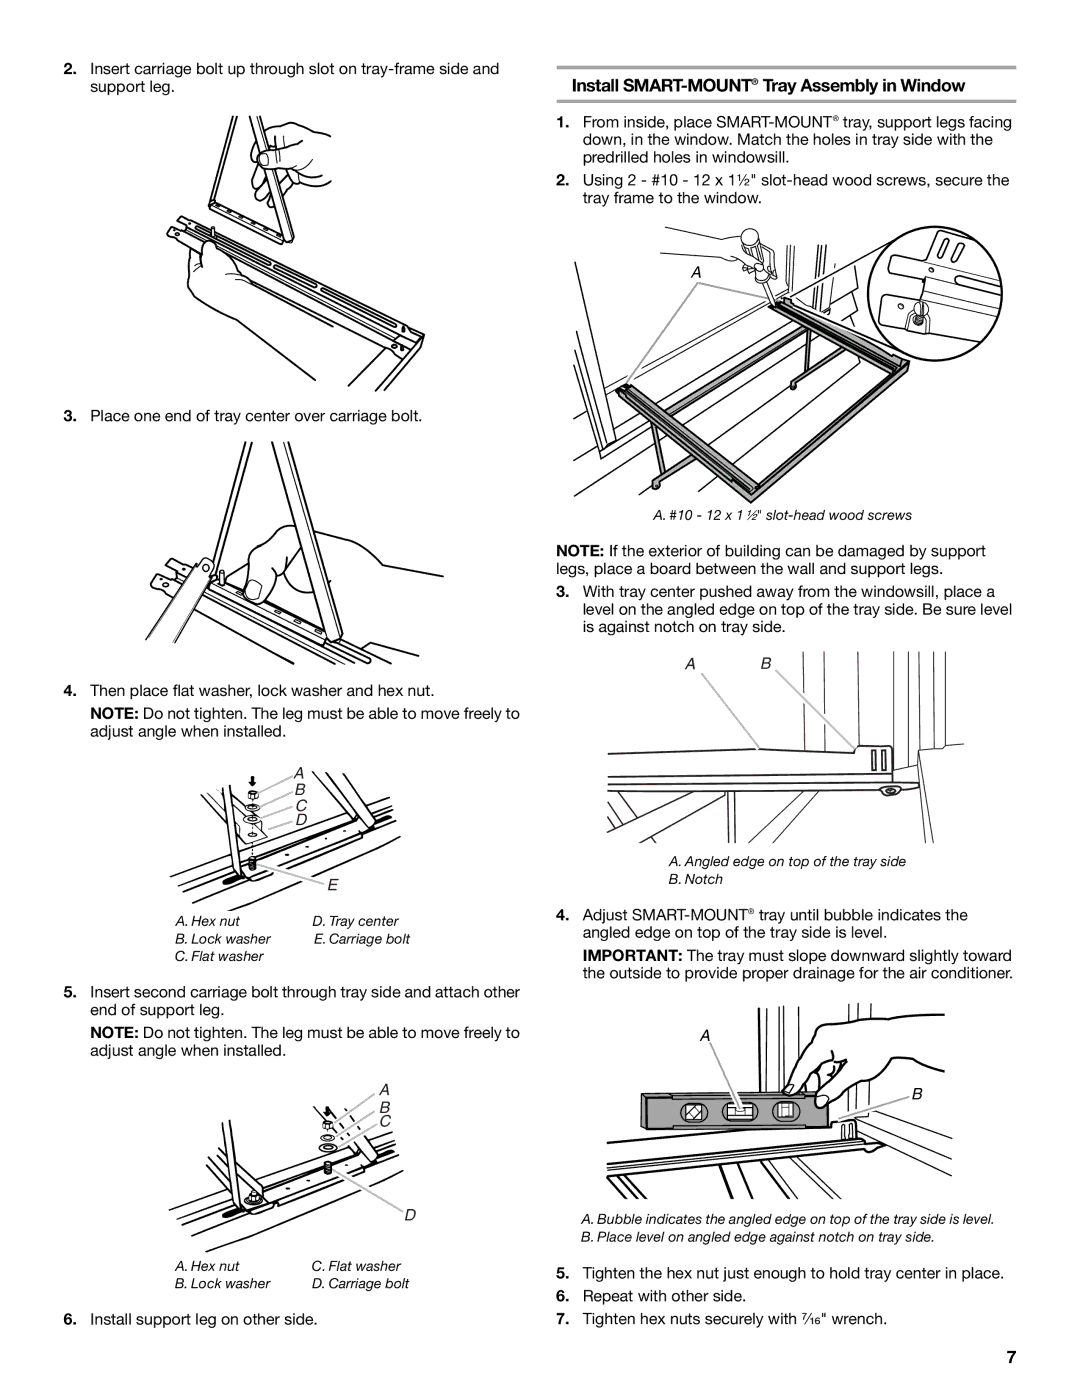
2.Insert carriage bolt up through slot on
3.Place one end of tray center over carriage bolt.
4.Then place flat washer, lock washer and hex nut.
NOTE: Do not tighten. The leg must be able to move freely to adjust angle when installed.
A
B
C
D
| E |
A. Hex nut | D. Tray center |
B. Lock washer | E. Carriage bolt |
C. Flat washer |
|
5.Insert second carriage bolt through tray side and attach other end of support leg.
NOTE: Do not tighten. The leg must be able to move freely to adjust angle when installed.
A
B
C
D
A. Hex nut | C. Flat washer |
B. Lock washer | D. Carriage bolt |
6.Install support leg on other side.
Install SMART-MOUNT® Tray Assembly in Window
1.From inside, place
2.Using 2 - #10 - 12 x 1¹⁄₂"
A
A. #10 - 12 x 1¹⁄₂"
NOTE: If the exterior of building can be damaged by support legs, place a board between the wall and support legs.
3.With tray center pushed away from the windowsill, place a level on the angled edge on top of the tray side. Be sure level is against notch on tray side.
A B
A. Angled edge on top of the tray side
B.Notch
4.Adjust
IMPORTANT: The tray must slope downward slightly toward the outside to provide proper drainage for the air conditioner.
A
![]()
![]() B
B
A. Bubble indicates the angled edge on top of the tray side is level. B. Place level on angled edge against notch on tray side.
5.Tighten the hex nut just enough to hold tray center in place.
6.Repeat with other side.
7.Tighten hex nuts securely with ⁷⁄₁₆" wrench.
7