Installing Headset
Select mounting method based on helmet type.
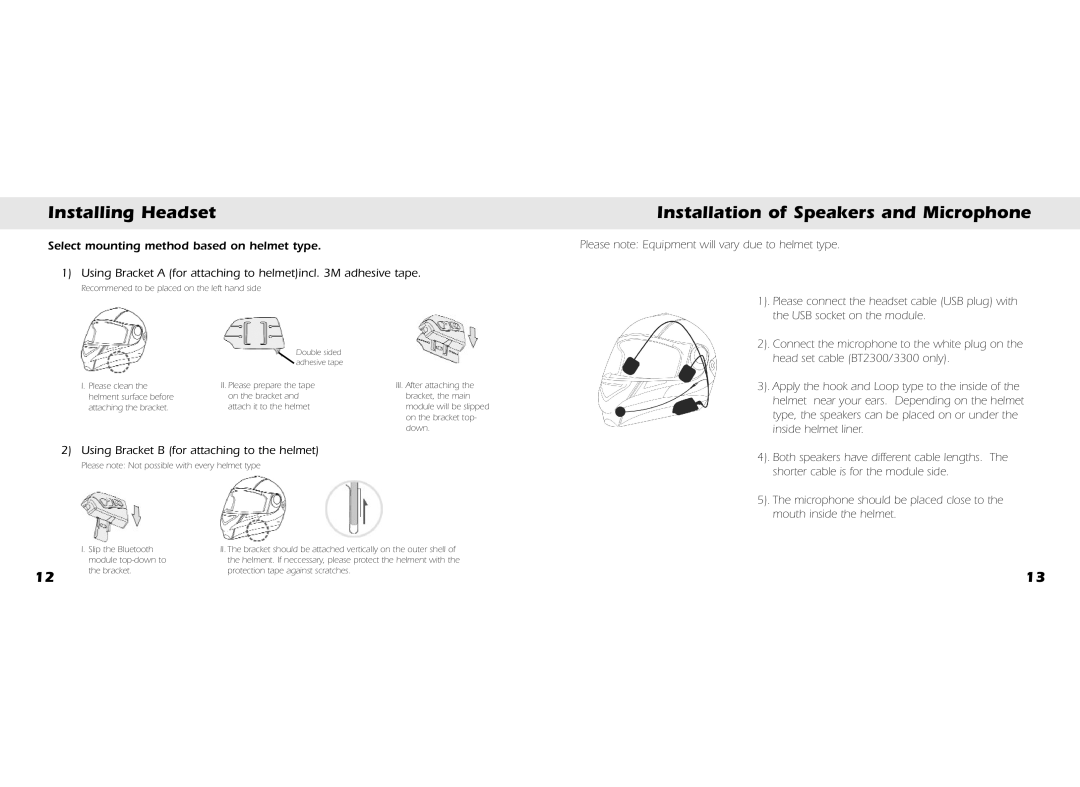
1) Using Bracket A (for attaching to helmet)incl. 3M adhesive tape.
Recommened to be placed on the left hand side
Double sided adhesive tape
Installation of Speakers and Microphone
Please note: Equipment will vary due to helmet type.
1). Please connect the headset cable (USB plug) with the USB socket on the module.
2). Connect the microphone to the white plug on the head set cable (BT2300/3300 only).
I. Please clean the helment surface before attaching the bracket.
II.Please prepare the tape on the bracket and attach it to the helmet
III.After attaching the bracket, the main module will be slipped on the bracket top- down.
3). Apply the hook and Loop type to the inside of the helmet near your ears. Depending on the helmet type, the speakers can be placed on or under the inside helmet liner.
2) Using Bracket B (for attaching to the helmet)
Please note: Not possible with every helmet type
| I. Slip the Bluetooth | II. The bracket should be attached vertically on the outer shell of |
| module | the helment. If neccessary, please protect the helment with the |
12 | the bracket. | protection tape against scratches. |
|
|
4). Both speakers have different cable lengths. The shorter cable is for the module side.
5). The microphone should be placed close to the mouth inside the helmet.
13