Section
5 Maintenance
Carefully read this Section on mower and engine maintenance and service. Performing the required maintenance ac- cording to schedule will ensure the proper performance and long life of your machine.
WARNING
Before inspecting, cleaning or servicing the machine, shut off engine, make sure that all moving parts have come to a complete stop, disconnect spark plug wire and move wire away from spark plug. Remove ignition key on electric start models.
Failure to follow these instructions can result in personal injury or property damage.
NOTE: All references to left, right, front and rear of the machine are determined by standing behind the handlebars and facing the direction of forward travel.
IMPORTANT: REFER TO MAINTENANCE CHART IN THIS SECTION FOR A LIST- ING OF REGULARLY SCHEDULED MAINTENANCE PROCEDURES.
ENGINE SERVICE
Routine engine service is described below. For more complete engine ser- vice information, refer to the engine manual provided with your machine. For complete engine service, contact an au- thorized engine dealer.
ENGINE OIL
OIL LEVEL: With mower on level ground, the engine oil level must be between the "ADD" and "FULL" marks on the dipstick at all times. Check before each use and every 5 operating hours.
OIL CHANGE: On a new engine, change oil after first 2 hours of use, then change oil regularly as specified on the Maintenance Chart. Refer to Engine Owner's Manual for oil capacity.
OIL TYPE: Use clean, high quality deter- gent oil having an A.P.I. service classifi- cation of SE, SF or SG. Use no special additives with oil. Refer to the Engine Owner’s Manual for recommended SAE viscosity grades that match the starting temperature anticipated before the next oil change.
Checking Oil Level:
1.Park machine on level ground.
2.Stop engine, wait for parts to stop moving, and disconnect spark plug wire.
3.Clean area around dipstick (Z, Figure
4.Remove dipstick. Oil level must be be- tween “ADD” and “FULL” marks. Do not exceed “FULL” mark on dipstick.
5.To add oil, pour slowly into dipstick opening. While adding, check oil level frequently by securely replacing dipstick and removing to read oil level. Wipe dip- stick clean each time oil level is checked.
6.After filling to “FULL” mark, securely replace dipstick.
Changing Oil:
Change oil while engine is still warm from recent operation. Warm oil flows more freely and carries away more im- purities.
1.Stop engine, wait for parts to stop moving, and disconnect spark plug wire.
2.Remove dipstick (Z, Figure
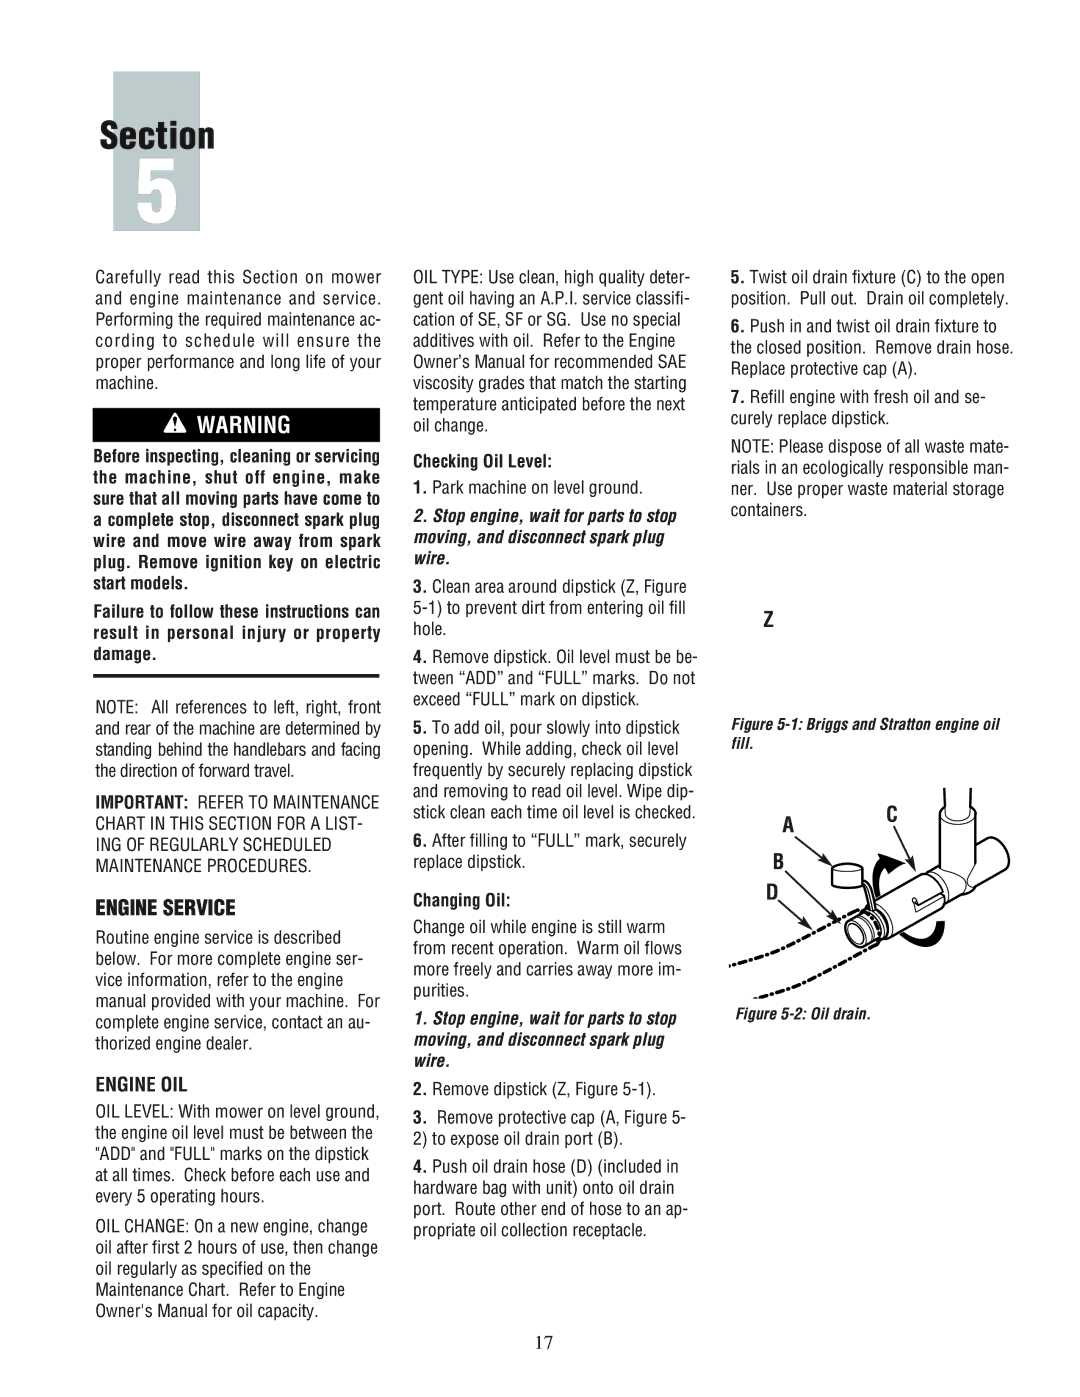
3.Remove protective cap (A, Figure 5- 2) to expose oil drain port (B).
4.Push oil drain hose (D) (included in hardware bag with unit) onto oil drain port. Route other end of hose to an ap- propriate oil collection receptacle.
5.Twist oil drain fixture (C) to the open position. Pull out. Drain oil completely.
6.Push in and twist oil drain fixture to the closed position. Remove drain hose. Replace protective cap (A).
7.Refill engine with fresh oil and se- curely replace dipstick.
NOTE: Please dispose of all waste mate- rials in an ecologically responsible man- ner. Use proper waste material storage containers.
Z
Figure 5-1: Briggs and Stratton engine oil fill.
AC
B
D ![]()
Figure 5-2: Oil drain.
17