Section 2: Assembly
Black | Lead) | V | |
Black(GroundLead) | |||
|
|
|
|
Red (Positive
(PositiveLead)Lead)
(+)U
Figure 2-3: Connect wire terminals to battery terminals.
W |
Figure 2-4: Attach wire harness with J- clips.
WARNING
Charge battery only with charger sup- plied with machine. Do not short circuit battery wires. Remove any jewelry be- fore working on or near the battery or electric start system.
Failure to follow these instructions could result in personal injury or prop- erty damage.
C. Charge the Battery
Charge a new battery for
CAUTION
If battery is removed, do not operate engine without insulating positive (+) battery cable terminal with electrical tape or sparking from battery cells can result.
1. To charge the battery, locate the plas- | STEP 4: Attach Control Rods |
| |||
tic connector (T, Figure |
|
|
|
| |
from the wire harness below the handle- |
| WARNING |
| ||
bar console. | Control rods are adjusted at the factory | ||||
2. Plug the connector on the battery | |||||
and should not require additional ad- | |||||
charger (Z, Figure | |||||
justment during assembly. After as- | |||||
tor on the wire harness (T). | |||||
sembling | unit, | control | rod | ||
| |||||
3. Plug the battery charger into a 120V | adjustment should be checked (and | ||||
grounded wall outlet. NOTE: The battery | |||||
charger is designed for use indoors and | information in Maintenance Section. | ||||
should not be exposed to rain or snow. | Failure to follow this instruction could | ||||
| |||||
4. Charge battery for | result in severe personal injury or | ||||
5. After charging, unplug battery | property damage. |
|
| ||
|
|
|
| ||
charger from wall outlet, then unplug |
|
|
|
| |
charger from wire harness. | A. Attach Wheel Drive Control Rod |
| |||
|
| ||||
| 1. Locate the wheel drive control rod (F, | ||||
| Figures |
| |||
| from the left handlebar in Step 2. This | ||||
| rod has a swivel block (H, Figure | ||||
| one end. |
|
|
| |
T | 2. At left side of engine deck, insert |
| |||
swivel block (H, Figures | |||||
| wheel drive control rod into wheel drive | ||||
Z | control arm (U, Figure |
| |||
| 3. Add a 5/16" washer (A, Figure | ||||
To grounded | and attach with a cotter pin (B). Bend | ||||
legs of cotter pin over rod to secure. |
| ||||
wall outlet |
| ||||
|
|
|
| ||
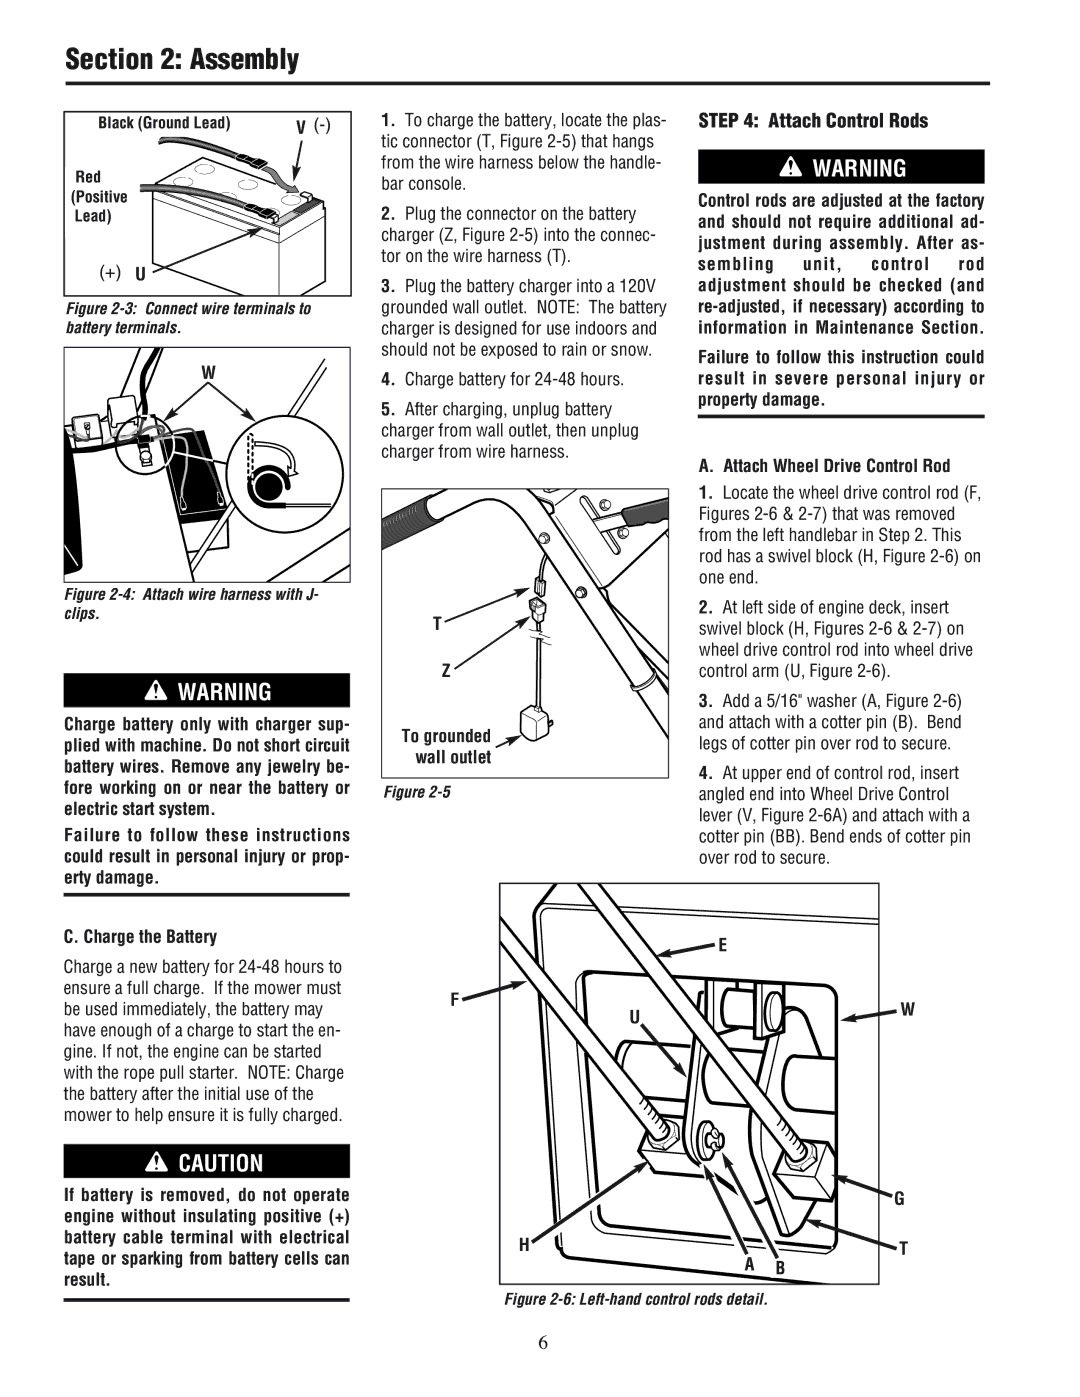
4. At upper end of control rod, insert
Figure 2-5 angled end into Wheel Drive Control lever (V, Figure 2-6A) and attach with a cotter pin (BB). Bend ends of cotter pin over rod to secure.
|
| E |
F | U | W |
| ||
|
|
![]() G
G
H![]() T
T
A B
Figure 2-6: Left-hand control rods detail.
6