Section 2: Assembly
BB
![]() V
V
F
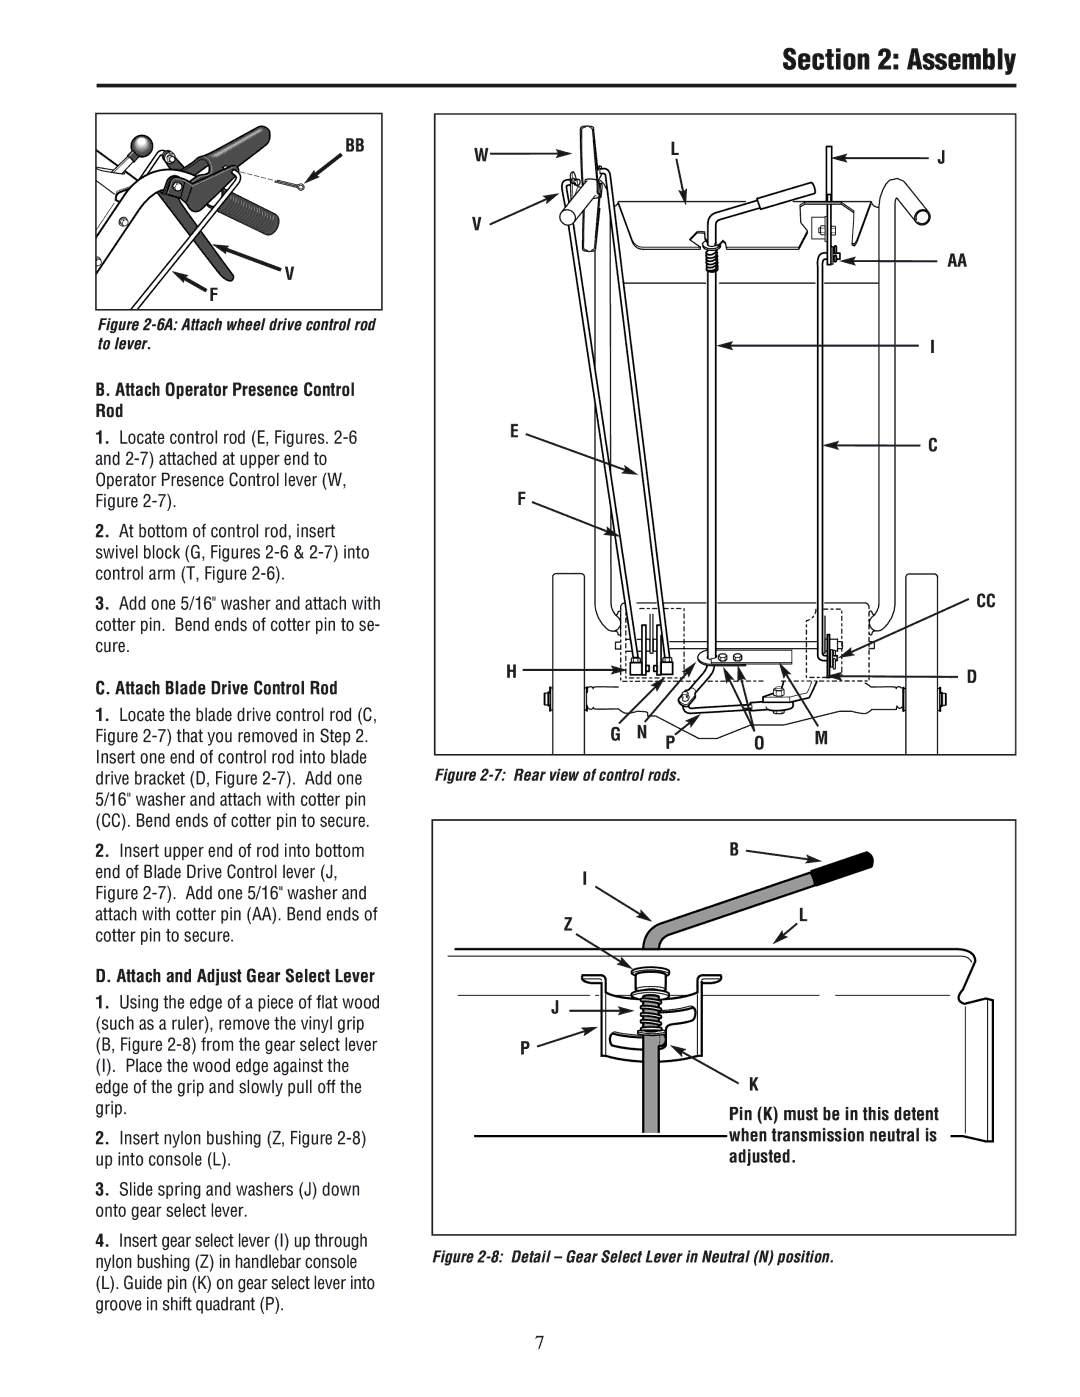
Figure 2-6A: Attach wheel drive control rod to lever.
B. Attach Operator Presence Control Rod
1.Locate control rod (E, Figures.
2.At bottom of control rod, insert swivel block (G, Figures
3.Add one 5/16" washer and attach with cotter pin. Bend ends of cotter pin to se- cure.
C. Attach Blade Drive Control Rod
1.Locate the blade drive control rod (C, Figure
2.Insert upper end of rod into bottom end of Blade Drive Control lever (J, Figure
D. Attach and Adjust Gear Select Lever
1.Using the edge of a piece of flat wood (such as a ruler), remove the vinyl grip (B, Figure
(I). Place the wood edge against the edge of the grip and slowly pull off the grip.
2.Insert nylon bushing (Z, Figure
3.Slide spring and washers (J) down onto gear select lever.
4.Insert gear select lever (I) up through nylon bushing (Z) in handlebar console
(L). Guide pin (K) on gear select lever into groove in shift quadrant (P).
W |
| L |
| J |
|
|
| ||
V |
|
|
|
|
|
|
|
| AA |
|
|
|
| I |
E |
|
|
| C |
|
|
|
| |
F |
|
|
|
|
|
|
|
| CC |
H |
|
|
| D |
G | N | P | O | M |
|
Figure 2-7: Rear view of control rods.
| B |
| I |
Z | L |
|
J
P ![]()
K
Pin (K) must be in this detent when transmission neutral is adjusted.
Figure 2-8: Detail – Gear Select Lever in Neutral (N) position.
7
