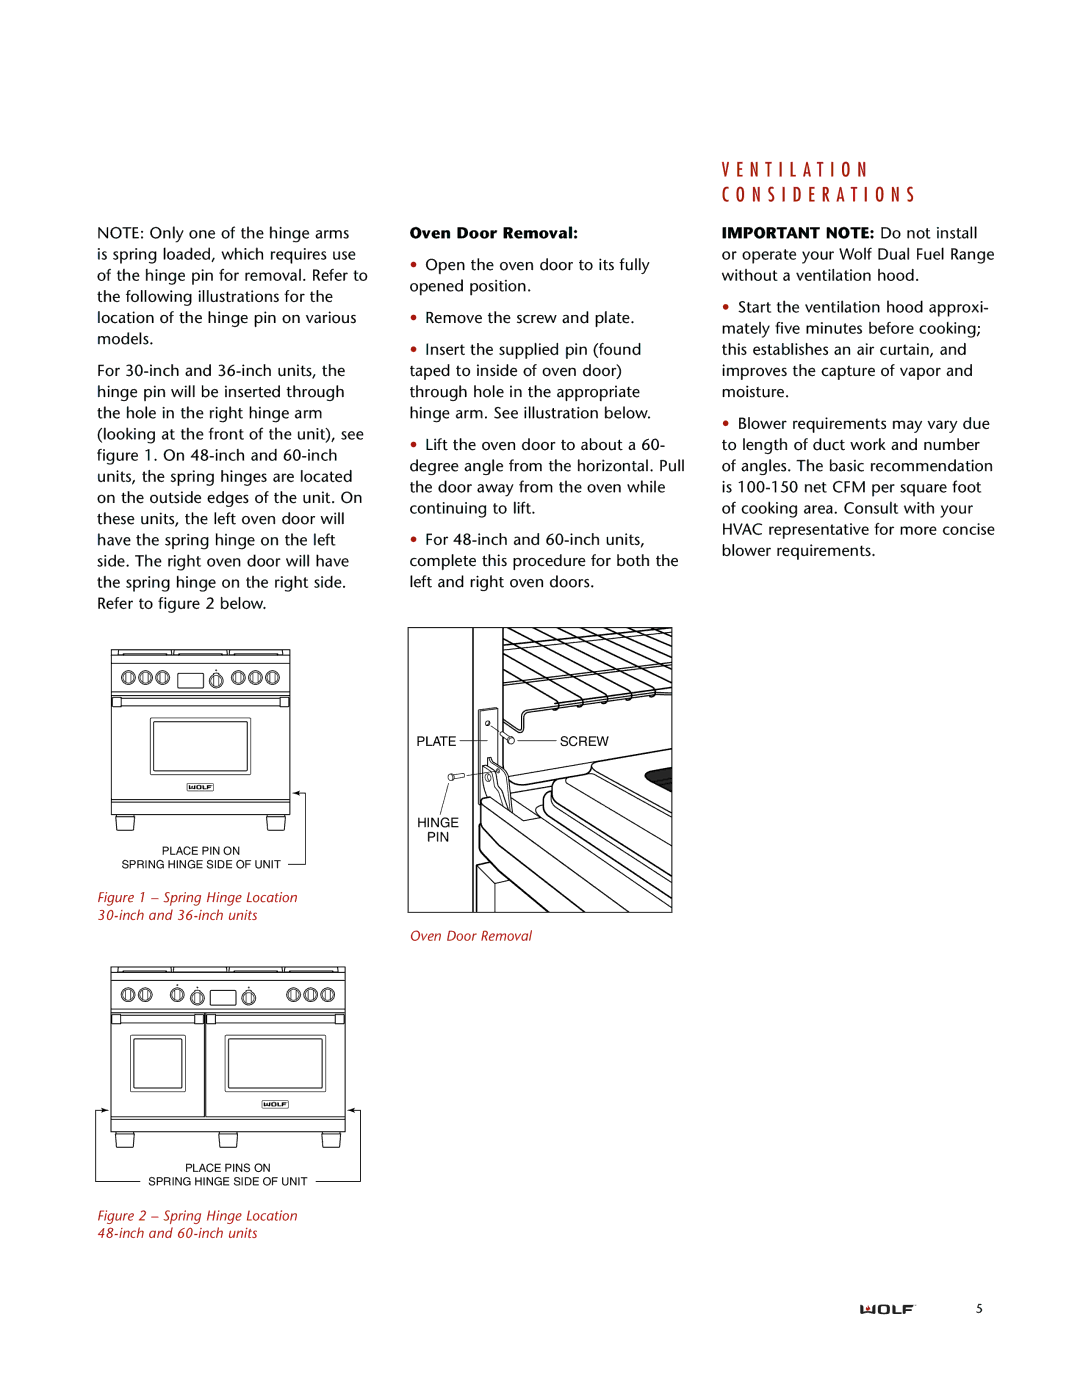
NOTE: Only one of the hinge arms is spring loaded, which requires use of the hinge pin for removal. Refer to the following illustrations for the location of the hinge pin on various models.
For
PLACE PIN ON
SPRING HINGE SIDE OF UNIT
Figure 1 – Spring Hinge Location 30-inch and 36-inch units
Oven Door Removal:
•Open the oven door to its fully opened position.
•Remove the screw and plate.
•Insert the supplied pin (found taped to inside of oven door) through hole in the appropriate hinge arm. See illustration below.
•Lift the oven door to about a 60- degree angle from the horizontal. Pull the door away from the oven while continuing to lift.
•For
PLATE | SCREW |
HINGE |
|
PIN |
|
Oven Door Removal
V E N T I L A T I O N
C O N S I D E R A T I O N S
IMPORTANT NOTE: Do not install or operate your Wolf Dual Fuel Range without a ventilation hood.
•Start the ventilation hood approxi- mately five minutes before cooking; this establishes an air curtain, and improves the capture of vapor and moisture.
•Blower requirements may vary due to length of duct work and number of angles. The basic recommendation is
PLACE PINS ON
SPRING HINGE SIDE OF UNIT
Figure 2 – Spring Hinge Location 48-inch and 60-inch units
5
