A S S E M B L Y
Attach Chute Extension Tray
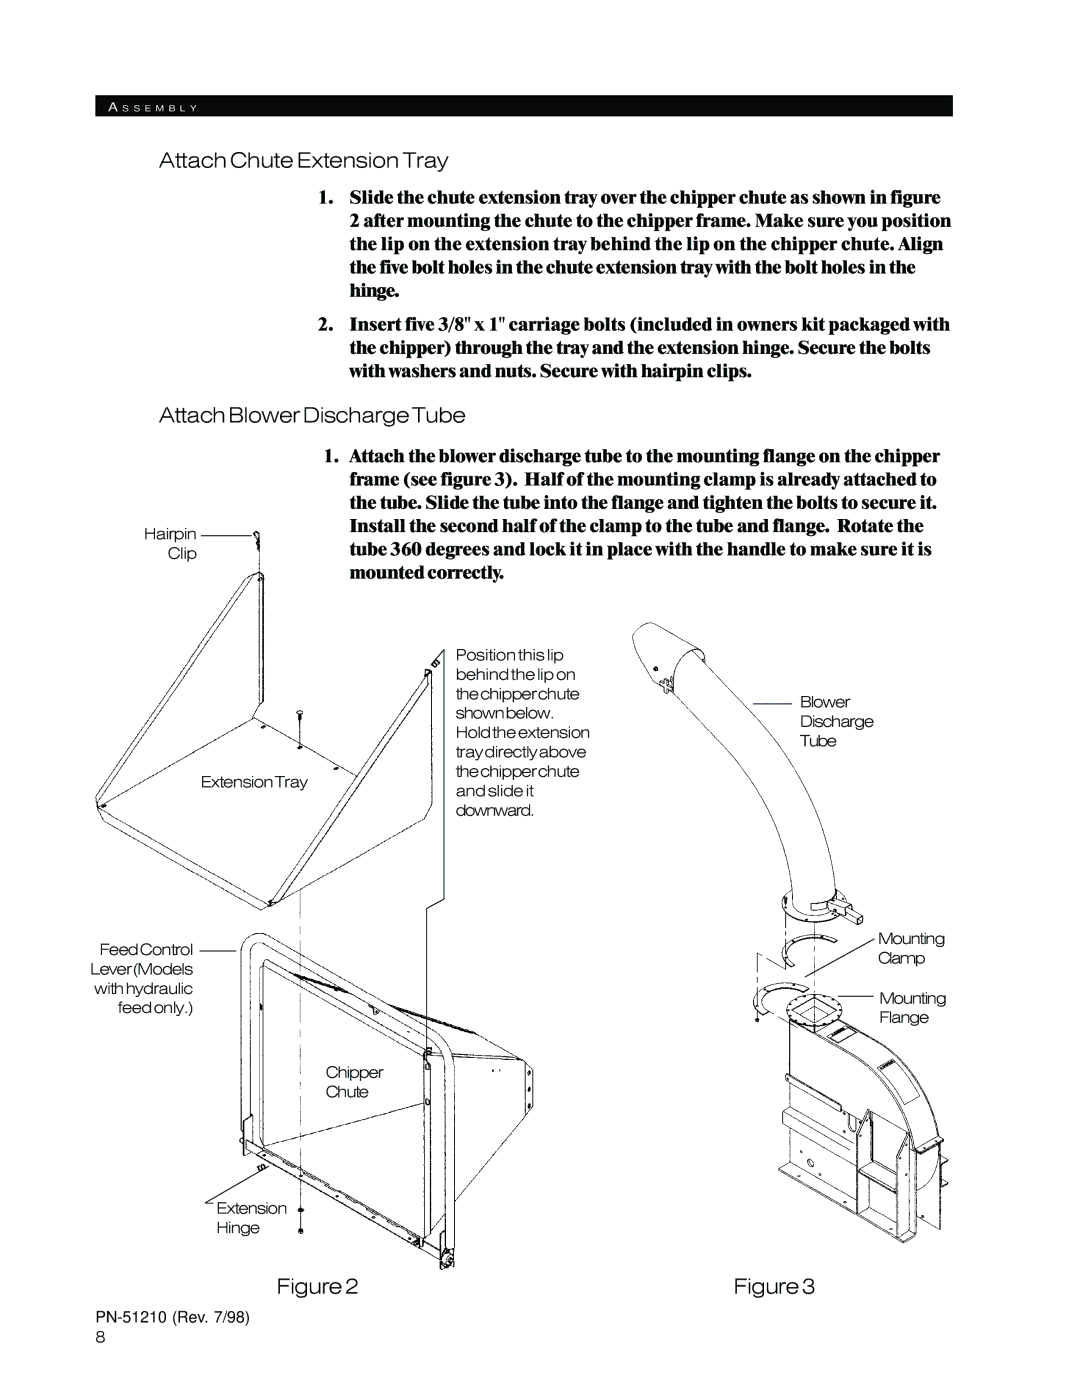
1.Slide the chute extension tray over the chipper chute as shown in figure 2 after mounting the chute to the chipper frame. Make sure you position the lip on the extension tray behind the lip on the chipper chute. Align the five bolt holes in the chute extension tray with the bolt holes in the hinge.
2.Insert five 3/8" x 1" carriage bolts (included in owners kit packaged with the chipper) through the tray and the extension hinge. Secure the bolts with washers and nuts. Secure with hairpin clips.
Attach Blower Discharge Tube
Hairpin Clip
1.Attach the blower discharge tube to the mounting flange on the chipper frame (see figure 3). Half of the mounting clamp is already attached to the tube. Slide the tube into the flange and tighten the bolts to secure it. Install the second half of the clamp to the tube and flange. Rotate the tube 360 degrees and lock it in place with the handle to make sure it is mounted correctly.
s
ExtensionTray
FeedControl
Lever(Models
withhydraulic
feedonly.)
s
Chipper
Chute
s
Extension
Hinge
Position this lip |
|
|
behindthelipon |
|
|
thechipperchute |
| Blower |
shownbelow. |
| |
| Discharge | |
Holdtheextension |
| |
| Tube | |
traydirectlyabove |
| |
|
| |
thechipperchute |
|
|
andslideit |
|
|
downward. |
|
|
Mounting
Clamp
Mounting
Flange
Figure2Figure3
8