A S S E M B L Y
Assembly
For instructions on assembling the hydraulic feed kit, see page 20.
Attach Chipper Chute
TorqueChart
Standardminimum tighteningtorquefor normalassembly applications.
Bolts (SAE GR5)
Size Ft.Lbs.
5/16" 20
3/8" 35
1/2" 75
Screws
Size Ft.Lbs.
5/16"Set 15
Do not operate this unit without the chipper chute correctly installed. Rotating cutting blades can cause serious personal injury.
1.Remove chipper from shipping crate. Place unit on a level surface before attempting to assemble. See torque chart for minimum tightening torque.
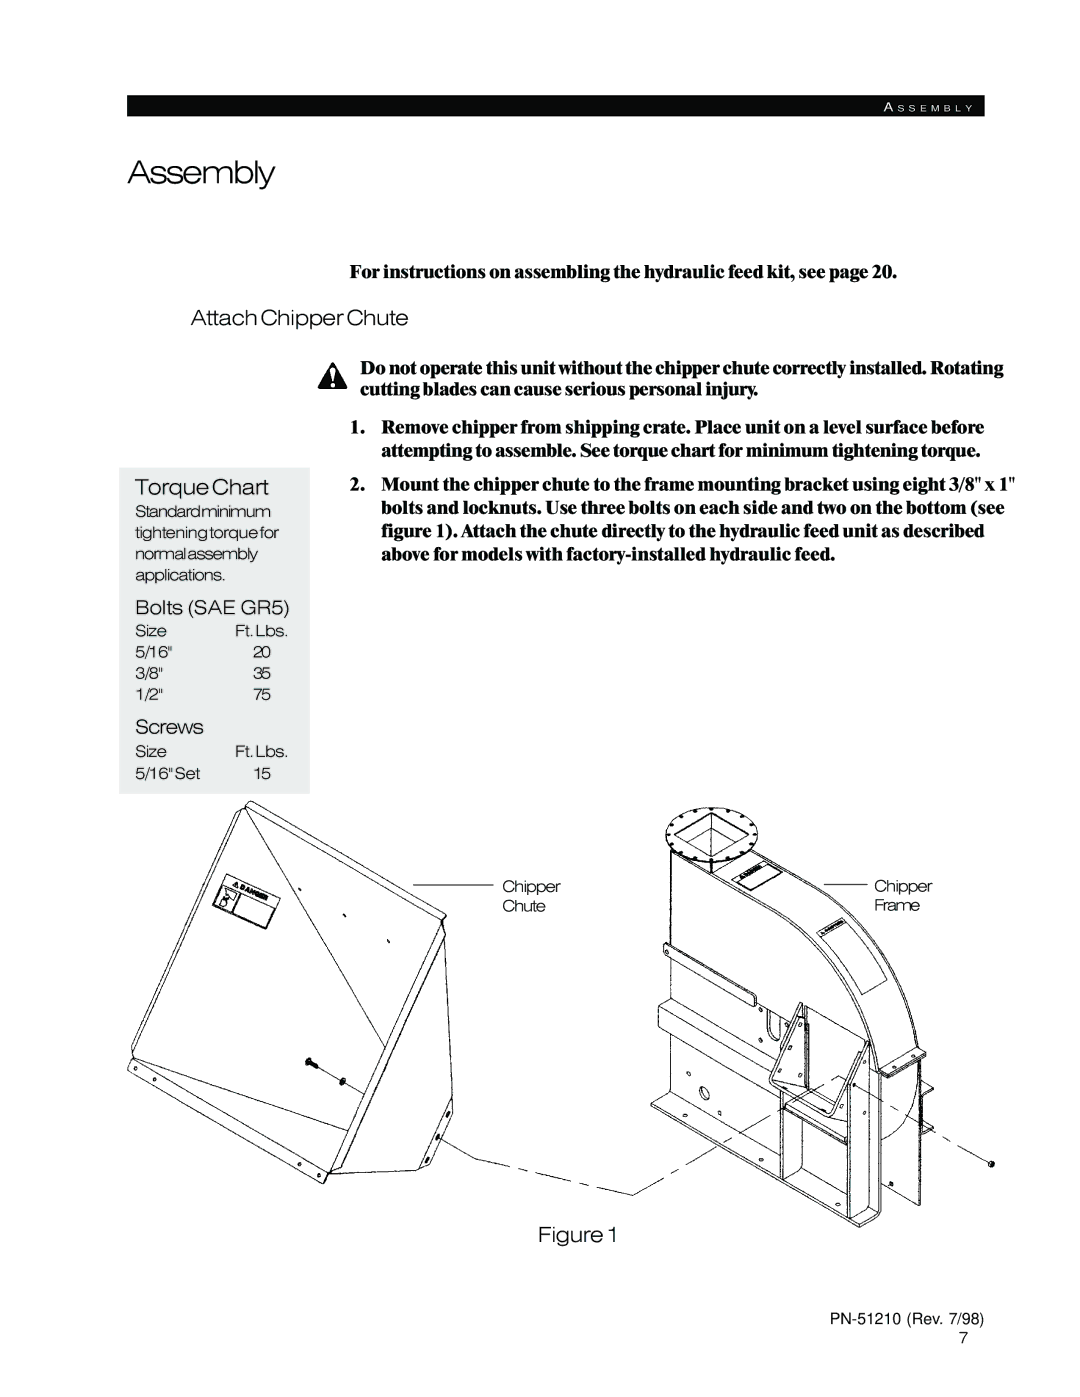
2.Mount the chipper chute to the frame mounting bracket using eight 3/8" x 1" bolts and locknuts. Use three bolts on each side and two on the bottom (see figure 1). Attach the chute directly to the hydraulic feed unit as described above for models with
Chipper |
| Chipper |
| ||
Chute |
| Frame |
Figure1
7